Sauerkraut and Lit’l Smokies Recipe

This shop is part of a social shopper marketing insight campaign with Pollinate Media Group™ and Hillshire Farm but all my opinions are my own. #pmedia #buy3save3  http://cmp.ly/3/8vNxcO

 
My life has changed a lot since having my baby girl in July. It seems like I have more to get done in a single day now than I ever had to do in a week before… I’m assuming most busy moms feel like that. Especially moms who work either from or away from the home. There’s the little ones to care for, the home to tend, a job… And that’s all before lunchtime even rolls around. Mommas out there?? Am I right??

One of the ways I cut down on the busyness is by making quick and easy recipes for lunch or dinnertime. One of my go to, all time favorite easy recipes is Sauerkraut and Lit’l Smokies. Seriously, there is nothing easier than this!!!

Sauerkraut and Lit'l Smokies Recipe

It requires only two ingredients plus a dash of salt and pepper; a jar of sauerkraut and a package of Lit’l Smokies. The Chedder Lit’l Smokies from Hillshire Farm are my favorite!!

quick and easy lunch recipe

Literally all you have to do is drain some of the juice off the jar of sauerkraut, then pour it and the package of Lit’l Smokies into a skillet.

Hillshire Farm Recipe

Sprinkle the entire thing with a little salt and pepper. Let the skillet heat on medium-high until the smokies are warmed all the way through… About 5-8 minutes or so.

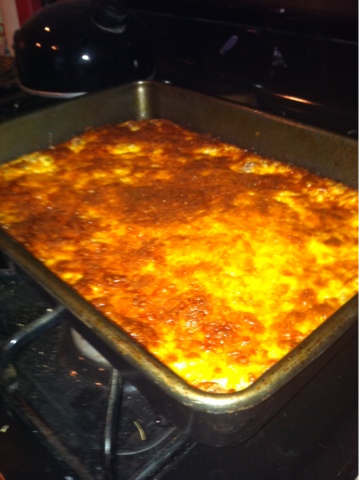
Then serve! I like to eat mine in a bowl for lunch by itself or served with bread and butter for dinner.

Hillshire Farm Lit'l Smokes and Sauerkraut

I purchased the ingredients for this quick and easy recipe at Safeway. This week, if you’re signed up for their “Just for U” program you will save $3 when you buy 3 Hillshire Farm products. That includes those yummy Hillshire Farm Cheddar Lit’l Smokies!!

If you’re not a sauerkraut fan… Cause let’s be honest, people tend to either love it or hate it, it seems… 😉 You can find all kinds of other yummy recipes at the Hillshire Farm website here. OR you can follow Hillshire Farm on Facebook and Twitter.

Your turn: What’s your favorite quick and easy recipe?? AND/OR are you/aren’t you a sauerkraut fan??

Maternity Leave – French Vanilla Mousse Recipe

Hey there friends! While I’m away loving on my brand new baby girl and all the stuff that comes with it I have asked a few friends to BABY sit Truly Lovely! They each have a fun post to share with you to give you a little something to hold you over until I can come back and share cute baby pics and the like… 😉 So please share a little love with each guest poster here and be sure to click over and check out their blogs!

Today’s guest is Jerri of Simply Sweet Home! She has a delicious French Vanilla Mousse recipe for you to try!!!

Take it away Jerri….

___________________________________

Hi Lovelies! I am so excited to be guest posting here today! My name is Jerri and I’m from the blog Simply Sweet Home. It is a lifestyle blog covering everything from home & garden topics to recipes, product reviews, and even a little beauty and fashion! We also have a weekly linky party called Friday Favorites. Oh! And I have a little jewelry shop on Etsy called !

In the summer time I have always loved eating cool sweet treats. This French Vanilla Mousse is great for parties, picnics, or just a quick snack on the back porch! And it’s very versatile. You can serve it up in parfait dishes or use it in a trifle (perhaps layered with angel food cake or pound cake and fruit!). And I’ve also just poured it up into a graham cracker pie shell! And it’s also super quick and easy! Check it out!

Recipe for French Vanilla Mousse
Ingredients:
1 (14 oz.) can Sweetened Condensed Milk
1 cup cold water
1 (4-serving size) package French vanilla instant pudding mix
1 (8 oz.) container frozen light whipped topping, thawed
Nila Wafers (or other cookies to garnish with)
Directions: Whisk sweetened condensed milk and water in large bowl. Add pudding mix. Whisk 2 minutes or until well blended. Chill 5 minutes. Fold in whipped topping. Spoon into serving dishes. Chill. Garnish as desired. (I layered with Nila wafers.)

Thanks so much to Kassi for having me here today!
Please come by and see me over at my blog and .
Also, follow on , , , and .
___________________________________


Yep, I’m all about cool, sweet treats! So yummy! Thanks for sharing Jerri! Please leave her a little bloggie love friends! Thanks!

Bethani’s Breakfast Casserole Recipe

Hey there lovelies! Happy Monday! Hope you had a great weekend! We have a sweet lady for you to meet today, Bethani of Cheers, Bethani! She’s got the prime position on our sidebar this month!

<—– Over there on the left, under sponsors. Yep, that’s her. And we just adore her. She’s a new mommy, a wife to her fun hubby (shown below) and a sweet Texas gal! 😉 She has a yummy breakfast recipe to share with you today! First, take notes on the deliciousness, then please take a second and tell her hello over at her place. While you’re there meet her sweet baby boy, the cuteness kills me! Thanks dolls!

Here’s Bethani….

______________


hey gals (and guys)! my name is bethani and i blog over at cheers, bethani where i talk about just about everything. seriously. what i’m loving, hating, family adventures and of course food!

i recently become a mommy to the sweetest, most handsome little boy ever & will be married to my love two years in april! life has definitely changed over the last few months, but this chapter of my life has been the best so far, especially since i get to be a stay at home mom with him, while just working a few hours in the evenings and on weekends.

one thing though that hasn’t changed is my love for food. and one of my favorite foods ever is breakfast! anytime of the day too. so today i’m gonna share one of my favorite breakfast casserole recipes that i live for. its so simple & can feed a crowd. even if you don’t have a crowd to feed, this recipe makes great for leftovers the next morning.

ingredients:

6 large eggs

1 can crescent rolls (the pillsbury i have found work the best)

1 can cream of mushroom soup

1 can (the small can) green chiles

1 lb breakfast sausage, browned

1 regular size bag shredded cheese

salsa (optional)

the hows:

the night before you want to eat this yumminess:  mix together in a glass bowl the eggs, mushroom soup & green chiles. cover and refrigerate overnight. this gives everything to time merge flavors.

when ready to cook: preheat oven to 350 degrees.

brown sausage in skillet and drain of grease.

set aside.

grease 9×13″ baking pan with your preferred cooking spray (PAM).

roll out & press crescent rolls into bottom of pan, sealing any gaps to create a solid layer on the bottom.

sprinkle browned sausage on the layer of crescent roll evenly.

dump egg, soup, chile mixture on top of sausage and crescent rolls.

spread bag of shredded cheese on top evenly. (my dad cant have cheese so we always leave a corner without when he dines with us)

bake at 350 for 45 minutes to 1 hour. (i check to see if its cooked by gently pressing on the top and if it bounces back or not and/or jiggles.)

enjoy with salsa!

i hope you enjoy this recipe as much as our family and friends do.

thanks again to kassi & kayli for letting me take over their blog today & for residing on their sidebar during april. be sure to stop by my blog & subscribe for more recipes, tips, & more on my life.

blog                  

Woolite Clothing & Accessories Exchange

Hey friends! How’s your week so far?? Today I’m sharing my recent Woolite In Home Clothing & Accessories Exchange Boutique! What a mouth full, right!?! But we had the BEST time! {Please pardon the photo overload!}

Woolite In Home Boutique

First things first, this was a sponsored party via Woolite and Crowdtap. I’ve said it before, but I’ll say it again, if you haven’t joined Crowdtap yet, you really should get on that! You’ll have the opportunity to host fun parties, try free products and share your opinion! I received several samples of Woolite’s Everyday Laundry Detergent to share and discuss with my guests. Then I got to plan a fun party around doing so!!!

WooliteSamplesWooliteEveryday

I decided to purchase my own bottle of Woolite Everyday before the party so that I could test the product and then be able to share my own opinion at the party. The verdict? I loved the scent! My clothes came out of the washer smelling fresh and clean, but not overwhelming. I really do think that with continued use my clothes will look better over all.

The party planning started with inviting several friends and family over to my house for a clothing and accessories exchange. I asked everyone to bring 3-5 items to trade and even sent out a few ideas via my Facebook page and through Instagram pics. You can check out the live tweets from before and during . Just look for the hashtags #wooliteers and #woolitewashed.

I went with a sort of bright colors and Spring theme for the party since it was held right before Easter weekend. Treats were centered around bright colors and Easter candy! {Please excuse the bad lighting, it was late evening during the party!}

Spring party

The pink punch was served in mason jars with striped paper straws. To make your own Sparkling Spring Pink Punch combine two, two liter bottles of Strawberry Lemonade and one 20 oz. bottle of club soda. Serve on ice!

Sparkling Spring Punch Recipe

Sweets included chocolate dipped Peeps on skewers, Jolly Rancher Jelly Beans {my favorite!!!} and chocolate dipped pretzels with pink sugar sprinkles!

Easter Party Treats

To offset so many sweets I also served a fruit tray and this easy two ingredient fruit dip. {It’s a party staple in my house!} And I made up my own version of the tortilla pin wheels! To make your own you’ll need:

  • 5 or so large flour tortillas
  • 2 8 oz. packages of cream cheese (room temperature for easier mixing!!)
  • A small can of chopped black olives
  • A small can of chopped green chiles (or use fresh like I did and just peel and chop about two large chiles)
  • 1 package of ranch dressing mix

Mix all the ingredients together in a large mixing bowl or electric mixer, then spread on your tortillas. Roll tortillas up, wrap in plastic wrap and store in the freezer for at least 30 minutes. Cut into thin slices and serve!

party treat ideas

Once my guests arrived we enjoyed some treats, visited and talked about the Woolite Everyday Laundry Detergent samples.

Woolite Washed Party

Woolite Washed Party

I decorated the boutique area with a bright striped table cloth and bright colored bags for guests to take home their goodies. I stuck a ‘Thanks for Swapping‘ message on each bag.

clothing exchange shopping bags

After treats it was time to swap!!! The table was covered with cute tops, jewelry, scarves, dresses, shoes and more! I made paper numbers and had each guest draw a number. Number one got to choose one item of clothing, then number two took her turn and so on.

wooliteinhomeboutique

Oh, and just in case you were starting to wonder if I was even there… haha. I took a turn shopping as well! I even found a few really cute items to wear with my preggo belly for the next couple of months!!!

By the time all of the items were gone from the table everyone had several new to them items to take home!

Thanks to Woolite and Crowdtap for sponsoring this fun party! As always opinions expressed on Truly Lovely are 100% my own thoughts!!!

Quick Snack – Husband Style

I have googled, I have pinterested, I have looked everywhere for a quick and easy snack for the hubs.
He comes in every evening from work famished and then quickly escalates to grouchy if there’s not a quick snack on hand to hold him over until dinner. Sure there are some fun snack ideas for kids, for healthy eaters, but let’s be realistic… My husband is neither of those. 😉

So I am super excited to share with you my latest husband snack solution!

husband snack idea

That’s right peeps. Summer sausage and cheese. No, it’s not the healthiest of snacks, but it’s a yummy combination that’s easy to fix up and the husband (and me, if I’m being honest) loves it!

All you need is a stick of summer sausage (they’re popular at most grocery stores this time of year so they shouldn’t be hard to find, but they are normally by the pepperoni in the lunch meat section FYI), a chunk of your preferred cheese (we like sharp cheddar) and some sandwich baggies.

making a snack for husband

Now, the most difficult step… slice up the cheese and summer sausage. 😉
Your husband will thank you for this… it equals snack in hand when he walks in the door which then equals happy hubs.
Fill a baggy with three or four slices of cheese and sausage, then refrigerate.

See? All ready to go and next to my snacks in the fridge, no worries that the hubs will get my yogurt confused with his meat and cheese snack… haha.

What’s your favorite quick and easy snack??

Linking this here and here and .

P.S. Hope you enjoyed this post! If so, we’d love if !

Tips for a Better Layer Cake

Hi there lovelies! The holidays are a time for baking around here.
So far this season I’ve attempted my first pumpkin roll, made a few pies and plan on making some homemade candy this evening!

Today, in the spirit of the major baking season, I have a few tips for you on how to make a better layer cake.

make a better layer cake

First of all, I love layered cakes. You can most definitely still use just a cake mix, so they’re as easy to make as a normal pan cake, but they look much more impressive. They require only a little extra time, but give off the impression of much more time spent then a normal pan cake.

grease and flour cake pans

One of the most important things for make a good layer cake is preparing your pans. By all means go the extra mile and grease and flour those suckers. Sure non-stick spray works alright, but if you want the cake to really come out clean, the grease and flour method works the best. Using parchment paper in the bottom of your pan is an extra step against having your cake stick, but I’ve found for the most part grease and flour does the trick.

making a pretty layer cake

I do recommend parchment paper as a way to turn out each cake to cool before stacking though. Lay a plate down, then cover it with parchment. Turn your cake over onto the parchment paper and allow to cool completely before stacking. Otherwise, as the cake cools it might stick to your plate.

Another tip at this point is to cut off the rounded top of your bottom layer cake. This gives the top layer a nice, mostly flat surface to rest on to make your cake more even. I use a butter knife to just sort of shave off the rounded top and even it out.

icing a layer cake

I usually use store bought icing. After all the point is to make an easy cake but with a funner look right?!

You’ll want to cover the top of your bottom layer, then stack your top layer before icing completely. This way you don’t work on getting a nice bottom layer only to mess it up trying to blend it in with the top layer. Once it’s stacked you can ice the entire cake.

making a better layered cake

Now because store bought icing is often much thinner than homemade icing it’s a good idea to stick your cake in the fridge for an hour or two before serving. This gives the icing time to set and keeps it from just melting off. Take note, because it is so much thinner than homemade it will melt even with a completely cooled cake in a semi cool room. That’s just the nature of store bought icing on a stacked cake versus a flat cake.

So there you go! A few tips to make your next layer cake a little bit easier and a little bit prettier!

Tell me lovelies, what’s your favorite thing to bake during the holiday season?

Linking this here and here and .

P.S. Hope you enjoyed this post! If so, we’d love if !

Renesmee Brownies

So unless you’ve been living under a rock you’ve probably realized that the final ‘chapter’ of the Twilight movies will be out in theaters this month… November 16th to be exact. With the premier of Breaking Dawn 2, our friend Marissa of Raegun Ramblings asked us to create a Renesmee/Twilight post to celebrate!

 Breaking Dawn Party Peeps

Housewife EclecticLizy BSew DeliciousRae Gun Ramblings

Kayli and I both really enjoyed the books and have made it a point to see all of the movies together. We even stood in line for Breaking Dawn Part 1, only to be the cut off for the next showing. That’s right… they let everyone before us in the theater… and we had to wait there for a whole showing before getting in…. haha. Guess the bright side was we were first in line for the next showing and got to choose the best seats… 😉

For my contribution to Marissa’s ‘party’, I created a recipe that would be fun to share with friends before heading out to see the movie!

Twilight Brownie Recipe

In the Breaking Dawn book, when Renesmee is first introduced she is described as having “chocolate brown eyes” and cheeks the color of rose petals. I don’t know about you, but when I hear chocolate brown, I think of… BROWNIES!
Brownies drizzled with a ‘rose’ colored sugar glaze; A treat with Renesmee written all over it!

ingredients for twilight brownies

The ingredients needed to make your own Renesmee Brownies are:

Brownies –

  • Fudge Brownie Mix
  • 1 cup of chopped walnuts

Pink Glaze –

  • 1 tbs milk
  • 1/2 cup of powdered sugar
  • 1tbs melted butter
  • Red and yellow food coloring

Step 1: Make the brownie mix according to the instructions on the box. I substitute apple sauce for the oil called for on the box. It makes for a few less calories (which at this point, doesn’t really matter… haha) and more cake like brownies.

using a Ninja to chop walnuts

Step 2: Chop your walnuts and fold into the brownie mix.
(I think the walnuts add a fun twist to a normal brownie mix… Almost like the fun twist Renesmee adds to the story when she can share her thoughts with others.) Bake the brownies according to the box instructions.

Step 3: While your brownies are baking mix up your pink sugar glaze by combining all the ingredients mentioned above. I used two drops of red and one drop of yellow food coloring to get the sort of ‘rose petal’ pink color I wanted.  More powdered sugar will give you a thicker consistency, more milk will make it thinner.

pink sugar icing

Step 4: Once the brownies are done, let them cool completely then cut into squares. I piled mine on a cake plate and drizzled the pink glaze over each layer as I went. You could use a fork or something similar to drizzle the glaze, but I think it’s easiest to use a sandwich baggy with the tip cut off… Makes it easier to control, which then looks prettier… 😉

easy way to ice brownies

Step 5: Enjoy a Renesmee brownie with friends/family, then head out to watch Breaking Dawn Part 2!

Renesmee Dessert Idea

Thanks so much to Marissa for inviting me to be a part of her Breaking Dawn Party!
Hope you’ll check out the other fun posts linked above!!! 😉

Linking this here and here and .

P.S. Hope you enjoyed this post! If so, we’d love if !

Roasted Pumpkin Seeds

Actually this should be called The Roasted Pumpkin Seeds that Weren’t…
But we’ll get to that…
So, one of the things I love most about carving pumpkins is getting to roast and enjoy the pumpkin seeds.
After years of attempting to get it right, I think I’ve almost got it…

how to roast pumpkin seeds

It’s simple enough in theory… Cut your pumpkin open. Clean the pumpkin guts and seeds out separating the seeds as you go.

Once your seeds are separated, soak them in a bowl of water for a few hours.

Swish them around a little to get the rest of the pumpkin guts off.

Then lay them out to dry at LEAST overnight.

FYI – They roast 100% better if they’re dried out!

Then to season your pumpkin seeds, use about a tablespoon of melted butter, and your seasoning of choice. I prefer garlic salt…
Mix the seeds, seasoning and butter in a bowl until they’re fully coated.

Lay them out on a baking sheet. And bake for about 25 minutes at 325 degrees.


Here’s the key though…. stay in the KITCHEN. Keep an eye on those suckers….

Because apparently… it’s really easy to burn them if you don’t pay close attention and stir them once in awhile…

Just keepin’ it real! 😉
Like I said… I’ve ALMOST got it right….

What’s your favorite pumpkin seed seasoning???

Welcome to Kassi’s Surprise Birthday Party! Ami of AliLily: Pumpkin Round Up

We’re celebrating Kassi’s birthday by partying it up ALL MONTH LONG! Our first very special party guest (AND CO-PLANNER! This lady is THE best and has been SO much help to me!) is Miss Ami of AliLily! Here she is! 🙂


Hey y’all! It’s Ami from ! I’m here today to SURPRISE our sweet Kassi for her birthday!!! Happy birthday, Kassi! You are such an inspiring blogger, a supportive and wonderful friend. I am so glad I have you in my life. I can’t wait till we meet in the “really REAL” world.

For your birthday Kassi, I made you some Pumpkin & Chocolate Cheesecake Bars! Now, I know you aren’t here to try it but girl, let me tell you….they are DELICIOUS!

Of course, I had to go with pumpkin, since it’s Kassi’s favorite!

So Kassi, what do you think? It is SO GOOD!

Here is the recipe! Now, you just gotta get Nate to make it for you! 😉

This is an easy recipe I found at Better Homes and Gardens

1 1/4 cups graham cracker crumbs
1/4 cup sugar or sweetener
1/3 cup butter, melted
2 8 ounce packages cream cheese, softened
1 3/4 cups sugar or sweetener
3 eggs
1 cup canned pumpkin
1/2 teaspoon pumpkin pie spice
1/2 teaspoon vanilla
1/4 teaspoon salt
6 ounces semisweet chocolate chips (I used mini’s)
2 tablespoons butter
1 1/4 cups sour cream
1/4 cup sugar or sweetener
Grated fresh nutmeg and extra chips for decor

Preheat oven to 325 degrees F. Spray a 13x9x2-inch baking pan with non stick spray. In a medium bowl, combine graham cracker crumbs and 1/4 cup sugar. Stir in the 1/3 cup melted butter. Press mixture evenly into bottom of the prepared baking pan.

In a large bowl, combine cream cheese and the 1-3/4 cups sugar. Beat with an electric mixer on medium speed until smooth. Add eggs, one at a time, beating on low speed after each addition just until combined. Beat in pumpkin, pumpkin pie spice, vanilla, and salt on low speed just until combined. Remove 1-1/4 cups of the mixture.

In a small heavy saucepan, combine the 6 ounces chocolate and the 2 tablespoons butter. Cook and stir over low heat until melted. Whisk chocolate mixture into the 1-1/4 cups pumpkin mixture. Pour over crust, spreading evenly. Bake for 15 minutes.

Carefully pour the remaining pumpkin mixture over baked chocolate layer, spreading evenly. Bake for 40 to 45 minutes more or until filling is puffed and center is set. Cool on a wire rack for 30 minutes.

In a small bowl, combine sour cream and 1/4 cup sugar. Gently spread over bars. Cool completely. Cover and chill for at least 3 hours. Sprinkle with nutmeg and mini chocolate chips. Cut into bars.

Check out who helped me make Kassi’s Pumpkin and Chocolate Cheesecake Bars!!

I hope you had an amazing birthday yesterday. I hope you have an amazing birthday this month! You should call up your sister and ask her this “So Kayli, how did I FOIL your plans” LOL!!

I thought to create a Pumpkin yumminess round up for you, too. I hope you love the recipes I chose and I hope your readers love them too!

Truly Lovely readers, pin this list!! Pin it everywhere and all over. Spread the pumpkin yumminess!

ENJOY!!

1. Pumpkin Muffins with Chocolate Ganache from Truly Lovely 2. 3D Pumpkin Cookies from Glorious Treats 3. Rum Raisin Pumpkin Bread Pudding from Sweet Pea’s Kitchen 4. Pumpkin Mouse Shooters from Eat Yourself Skinny 5. Pumpkin better than…Cake from Something Swanky 6. Pumpkin Spice Woopie Pies from Katydid and Kid 7.Pumpkin Spice Mini Donuts from Dairy of Daves Wife 8. Pumpkin Dump Cake from Truly Lovely 9. Pumpkin Layer Cake from Homey Home Design 10. Pumpkin filled Cream Puffs from Life is a Party 11. Pumpkin and Chocolate Cheesecake Bars from AliLily

You may Pin this list in it’s entirety using the pin it button at the top. To Pin individual ideas included in this list please pin from the original source.

~Ami Allison


Isn’t she the best!?! I can’t thank her enough for all of her hard work, help, and support. So blessed to know such a sweet friend! And yes, pin pin pin!!! Happy Birthmonth Kassi!! The party rolls on! (;

P.S. DON’T FORGET TO LINK UP TO FANCY THIS FRIDAYS BELOW! (:

Pumpkin Muffins with Chocolate Ganache

Happy Pumpkin Week dears!! It’s Kayli. (:

Truly Lovely

Let me tell you a little story.

Once upon a time there was a girl who  was quite excited to try a couple pumpkin recipes, so she went out and bought pumpkin puree and set off on a fantastic pumpkin adventure. It all started great but alas, there was a disappointing turn of events. One recipe was a total bust. In my defense it was actually a microwave recipe and the oven is my domain. I was disappointed but the next recipe, pumpkin muffins, gave me much less trouble. The recipe was actually for baked donuts but I didn’t have a pan and the author of the original recipe said you could make muffins instead. She DID say that they were much better as doughnuts because of the crispy outside, cakey inside ratio but that it was do-able. I have to admit that when I pulled the muffins out and took a test bite, I felt like something was missing. I needed another element- the first thing that came to mind was cream cheese drizzle. (Which you should totally try by the way, because I’m sure it would be DELICIOUS. I think I’ll try it myself next time.)  I didn’t have cream cheese this time around but I DID have chocolate chips! (:  In the madness a wonderful creation was born, pumpkin muffins with chocolate ganache. For the original doughnut/muffin recipe you can go here. Keep in mind you want pumpkin puree NOT pumpkin pie filling.


For the muffins:

Mix together in a bowl

  • 1/2 cup vegetable oil
  • 3 eggs
  • 1 1/2 cups sugar
  • 1 1/2 cups pumpkin puree (Just pumpkin NOT pumpkin pie filling)
  • 1 1/2 tsp. pumpkin pie spice
  • 1 1/2 tsp. salt
  • 1 1/2 tsp. baking powder

Once smooth, gradually add in

  • 1 3/4 cups PLUS 2 tbs. of all purpose flour

Bake at 350* for roughly 25 minutes

I originally rolled mine in cinnamon sugar which did add in a different texture, if you want to do that make sure to do it while the muffins are still warm so it sticks on there. (:

For the ganache:

  • Chocolate chips (I used a mixture of semi-sweet and milk)
  • Milk (or sweetened condensed)

The fact of the matter is, there are a lot of ways to make ganache. You can do a double boiler method and melt your chips using a pie pan over a pan of boiling water, you can microwave the chips and do it that way. You can use regular milk, you can use sweetened condensed, you can make it thicker by using less milk or thinner by adding more, if it doesn’t have the right consistency go ahead and add more chips or milk and get it where you want it. I trust you’ll figure it out. (: I ended up doing mine in the microwave in the interest of saving some time, I put the chips and milk in a small bowl and microwaved them for 30 seconds then stirred until smooth. If they don’t melt quickly when stirred put them back in for another 10 seconds until they do.

Then I drizzled the chocolate on top of the muffins using a spoon and prayed they would be as delicious as they looked.

Sweet success! Turns out I LOVE pumpkin and chocolate.

So there it is friends. Happy Pumpkin Week and let me know if you try them! (:

P.S. Don’t forget to get YOUR pumpkin recipes ready to link up with us on Friday! Any pumpkin post will be welcome! Crafts, recipes, etc!