Easy Fleece Blanket Tutorial

Hey pretty friends! 
You might have seen this tutorial floating around blog land awhile back…. I hadn’t posted it here yet because it was a SECRET!!! Why a secret you ask?? Because I made these for my bridesmaid gifts for our wedding!!!
So today I’d like to share the tutorial for an easy fleece blanket that makes a great gift! Especially for a bridesmaid or two!
The materials needed are:
2 yards of fleece fabric
1 package of coordinating satin blanket binding
Coordinating yarn
Coordinating sewing thread
Pins
Yarn Needle
Scissors
Sewing Machine
In this case I went with zebra fabric and all red coordinating materials.
First trim your fleece fabric of any uneven edges or those funky white labeled edges… You know what I’m talking about… :)
Then, using the Yarn Needle, stitch your thread down the two length sides of your fabric like so… I spaced each stitch about a half an inch apart…

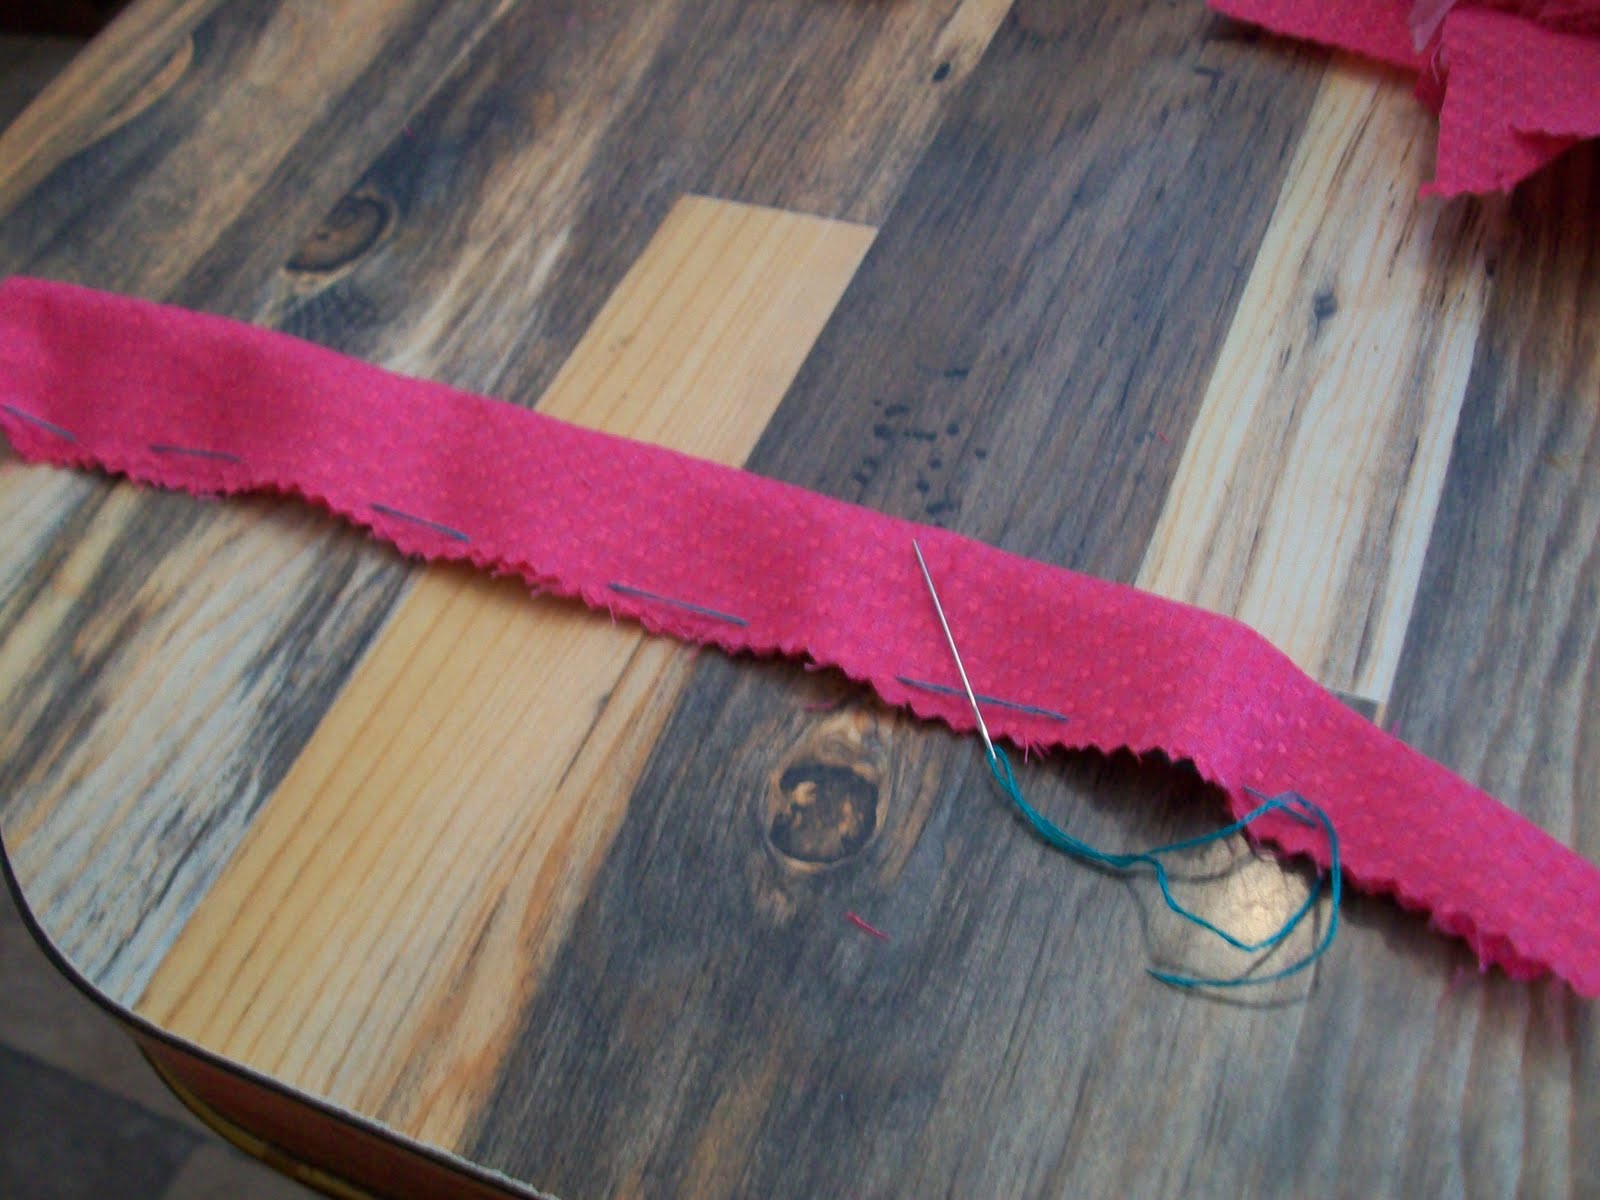
Next you’ll pin and trim your satin binding to the two width sides (the two shorter sides)… The binding will have a fold down the middle, simply line that fold up with the edge of your fabric, making sure it’s centered so there’s an even amount of binding on both sides…

binding a blanket

Fold over the edges of the binding to make your four corners and pin those as well. You can either trim or fold the extra binding inside to make your corner.

pinning binding on a blanket

Once you have the binding pinned onto both sides, get out the sewing machine. I used red thread to match the binding…

If you sew really well, you can use a varying color of thread for added pop!!!
I don’t so much… SO matching thread hides my inexperienced sewing skills. :)
(I’m a little addicted to zebra print… can you tell?!?)

sewing binding

Simply sew the binding to the fleece pulling pins as you go.

And TaDA!!!! A SUPER EASY fleece blanket made by you!
They make great baby gifts, or gifts for friends or family!! :)
And most especially, GREAT Bridesmaid gifts!!!

zebra print blanket

You can see… I made six of these blankets, then each blanket was rolled up and tucked inside a personalized tote bag for each of my lovely bridesmaids for my wedding a few weeks ago!

personalized tote bags

For the personalized tote tutorial, you can . :)

Have a lovely rest of the week!

Happy Sewing!!!!

Little Sister Lives! :) AND she has a pretty cute purse… if she does say so herself! :)

Well Hello Lovelies! It’s Kayli! :) Shock right?? Can I just give a major high five to Kas for being so awesome and posting faithfully? She deserves it.
So what’s MY excuse? SCHOOL! :) Senior year of high school is going awesome so far, we’re past a lot of the MAJOR stuff, college applications and acceptance letters (I got two by the way and am going crazy trying to decide) and homecoming and football season. Now we’re in full basketball swing. I don’t play but I DO keep stats and there are games almost every weekend. I seriously DREAM about turnovers and assists these days. BUT the good news is, we have a break this weekend because Winter Ball is next Saturday and yes, even the humble statistician herself is marching for the coronation. So I’ve been busy, but even if I wasn’t posting I have been reading everyday and keeping up with the happenings on here. So I’m sorry. I’ll promise to post more if that’ll make it better.. (which it might not, let’s face it, Kassi is awesome.) :)

ANYWHO! That’s all beside the point, on to a tutorial! haha So I have this purse… and it’s cute, don’t get me wrong- but it was kind of getting on my nerves. To put it lightly, it was…. absolutely, DREADFULLY boring. And if there’s one thing I can’t stand, it’s a boring purse! So my first thought of course is “I’ll look around and buy a new one!” my second thought was “I’m a broke high school student!” So instead I thought I might do a little fancying up of my own on a purse (that awfully dreadfully boring one) that I already had! My Inspiration came from Miss Nichelle at Vintage Wanna Bee because SHE IS FANTASTIC :) Go check it out yes? YES! So a pretty flower purse became the goal and THIS is how I got there.

Step One: Gather your materials! {Scrap material, a fairly boring bag, some thread, a needle and beads} Yours might be different from mine, you’ll probably need a lot less help from the patience fairy for example.. and you probably won’t need a phone to call Kassi and tell her about how awesome or awful the project’s going.. BUT those were necessities in my case :) (I steamed the purse with my shower to get those wrinkles out)

Step Two: Cut out a strip of fabric, how big you make it depends on how big you want your flower to be, I’m more of a lazy crafter- I won’t lie. So I just guessed, I wanted a smaller flower in this case. Then I folded it over and just simple stitched through it. WITHOUT cutting the thread right away.. you’re gonna use that to make it look like a flower. :)

Take your needle (still attached to string:) and pull until it ruffles into a circle, cut off the excess if you need to and sew it in place.


I just made a bunch of these and put some together.. then I attached them to the bag. I would go into stitches and pictures on all of that, but for as awful as I am at sewing, you’re probably better off on your own! Trust me! So I haphazardly attached sewed on my flowers so it looked like this!

Okay so now I have a confession to make, the lazy crafter in me hates sewing on beads but LOVES the idea of a good hot glue gun. So yes, I AM slightly ashamed of this next step. BUT it works for me! I’ve already carried it around and all of my beads are VERY secure. So I’m keeping my chin up! haha

And just like that my boring bag is suddenly something I’m excited to carry around!!! And with all my shortcuts it didn’t take all day to make!

Whew, THAT was a mouthful of blog. BUT I had to make up for lost time. :)What do you think? Have you done anything super crafty or fun lately? Link up to Fancy This Fridays and show it off :) And leave me some comment love yeah?

P.S. We’re linking this lovely accessory to the CSI Challenge this week!! (Feb. 16th) Accessories!! Come link up your lovelies too!!!

Visit thecsiproject.com

Cross Stitch Pillow Cases

I haven’t posted anything crafty lately because most of my crafting energy has been focused on one lengthy project…
Cross Stitch Pillow Cases

I have been embroidering since I was 4 years old.
You know when you hear people say that you’re thinking, “Yeah right…”
Well, really I was. I have proof!
Our Granny taught me to embroider when I was just a little tike.
I have some pot holders that I made for her when I was 4.
She gave them back to me a few years ago… They’re rough. :)
About what you’d expect from a 4 year old girl. But I’m still kinda proud of them, so I saved them of course.
Anyway, this last Christmas my Nana (the other grandma) gave me a set of pillow cases with a cross stitch pattern on them and some thread.
Embroidery is one of those things that I tackle with a huge project, take a long break and then do another huge project awhile later. So I finally got around to those pillow cases! And their done!
Anyone can do a cross stitch. It’s so easy. Let me show you!!
Simply start with a set of embroidery hoops. You can get them for a couple bucks at any craft store. A pair of decent scissors. An embroidery needle.
An embroidery pattern. In this case, the pillow cases… And some thread.

First cut a long length of thread. Pull two strands from your thread (more than that is too thick usually, save the rest you’ll need it later if it’s a very big project.) Then thread your needle.
Now tie a knot in one end of the thread.
Place your pillow cases in the embroidery hoops at the point where you want to start stitching. You can’t see it here, but the side of the pillow case with the pattern is sandwiched between two hoops to hold it taut.

Start your stitching from the underside of your hoops. Then stitch a little cross or X following the pattern. They KEY is to follow the pattern as neatly as possible.

When you reach the end of your thread tie it off, again on the underside. Keep all knots on the inside of the pillow case where no one will be the wiser! 😉 When you’re ready to switch colors, again just tie it off on the inside.

This tutorial may have been unnecessary because it’s so easy and there’s
instructions on the package if you buy the pillow case sets…
But it’s what I’ve been working on, so I thought I’d share!

So what do you think??

I know they’re not the most popular style… But I have some that my Granny made me that I will always cherish. And I think they’re pretty! 😉

Plus they take forever to finish… So as a gift, they are a lot of work!
My mom crochets an edge on all of hers… Adds a little something I think. Except I don’t really know how to crochet…
Any other ideas to spruce up the opening?
Or do you think they’re lovely as is??

Make It Your Own Christmas Gift Idea

I am a HUGE advocate of making things your own… adding little touches that make your items unique to you and different from everyone else! That being said, I like to treat the gifts I give at Christmas, and any other time, the same way. It seems so much more personal to add a little something specific to that gift receiver so that she, or he, feels it was made, or at least chosen especially for them.
I recently completed a Make it Your Own project for a friend’s Christmas gift. I started by purchasing a zebra print train case (I have one and just LOVE it!!) and then purchased a skull and crossbones iron on blingy from Wal-Mart. The iron on cost less than $3.

It turns out the iron on, because it has little rhinestones, is supposed to be ironed on by turning the fabric inside out. You CAN’T turn a train case inside out, so my solution was to use a small rectangular piece of black fabric from our fabric stash.
I did the ol’ snip with scissors than rip method to get the “rough” looking frayed edges on the material. I compared the fabric size to the iron on to make sure it would fit nicely. I then followed the directions on the iron on to secure the fun little blingies to the black fabric.
 To attach my little rectangle embellishment, I hand sewed a little X on each of the four corners attaching the skull fabric to the train case fabric. I used black thread, but looking back it might’ve been fun to use purple to match the train case trim.
And viola! I made it my own! Well, in this case, my friend’s own for her Christmas gift!!!
The embellishing only cost me a few dollars for the iron on! 
So what do you think??? I love it so much, I might embellish my own train case!!

P.S. Check out our new Linky Parties page to see the fun places this project was linked up! And take a few minutes to link your own projects! It’s a good time! 😉