Archives for August 2011

Lovely Little Gift Boxes

How about a tutorial on making lovely little gift boxes today?
I’ve BEEN so anxious to get this post together for you guys!!
So, finally… here you go! 😉

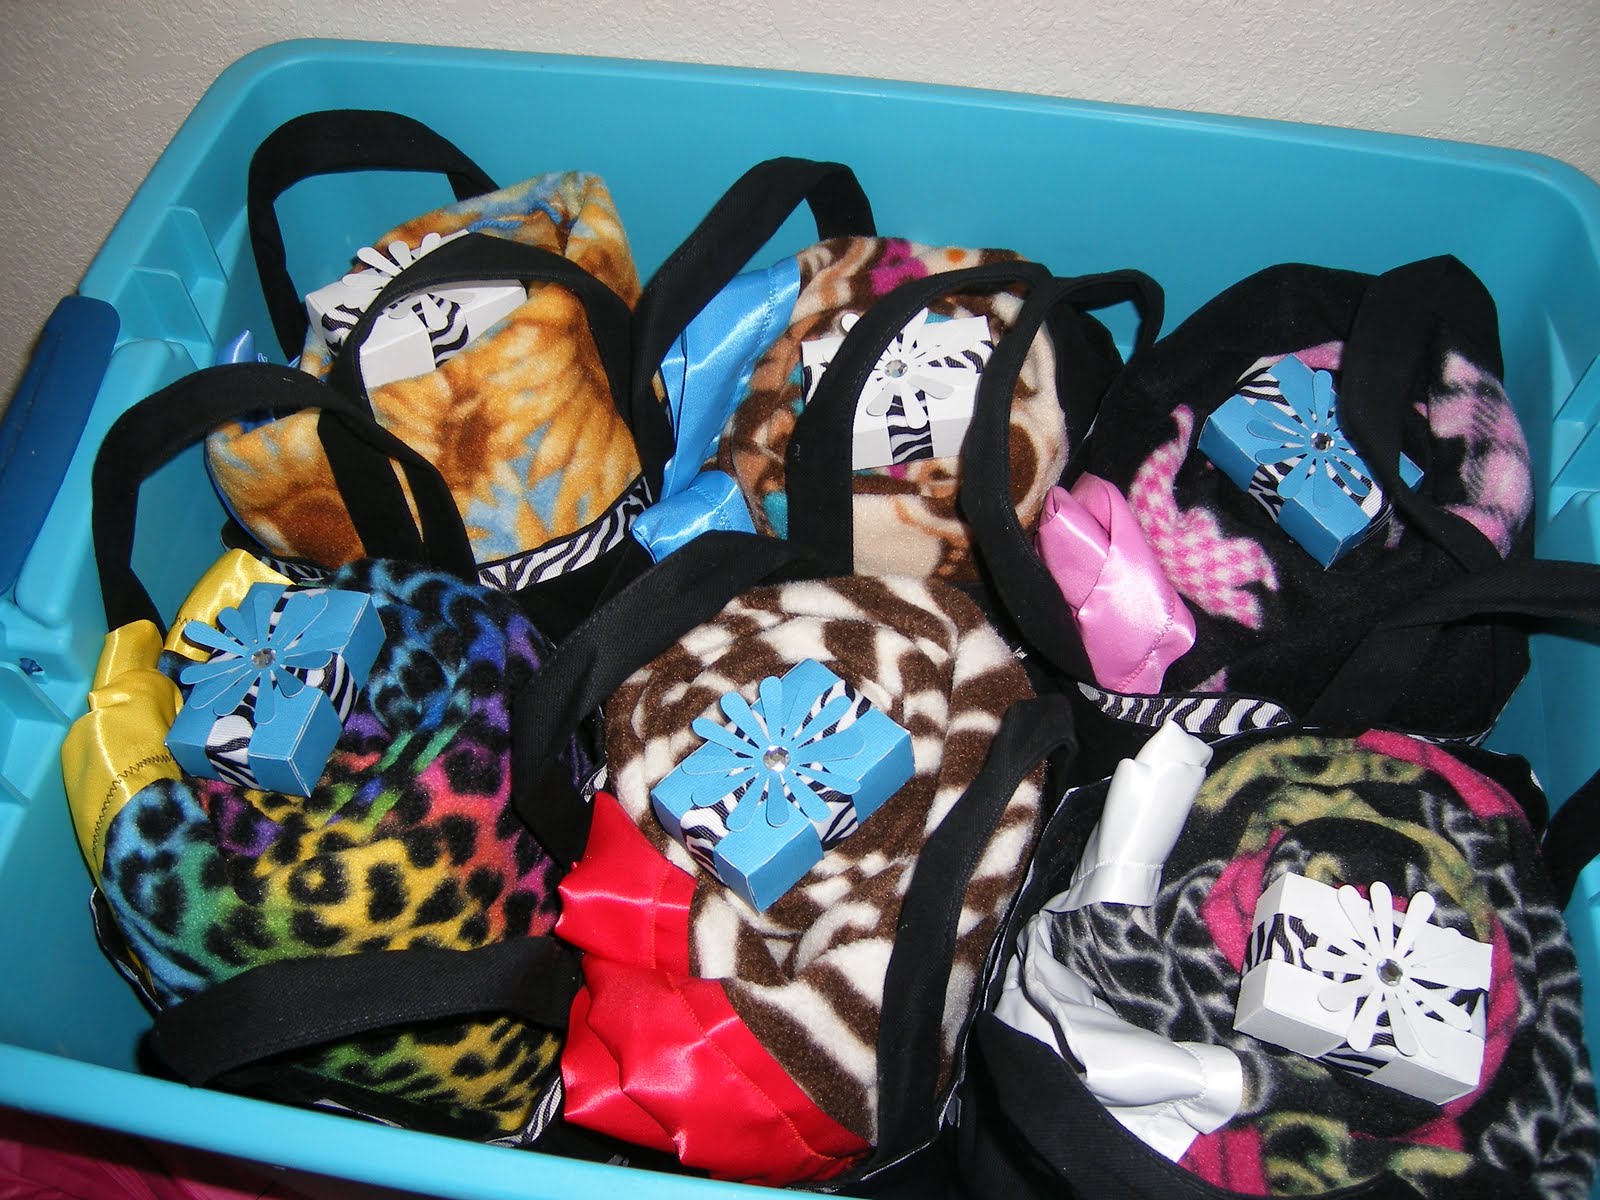
I made these little lovelies to hold a surprise for each of my bridesmaids for my wedding back in July. 


Each of the girls, myself and my wedding day coordinator all received an aqua chrysanthemum necklace purchased from Brittany at . 
You should definitely check out her shop! 
Such little pretties to be bought!! :) 


I used my absolute favorite crafting mechanism EVER, my Silhouette SD 
(which battles it out with my sewing machine for top spot…) 
to cut these box templates from heavy scrapbook paper. 


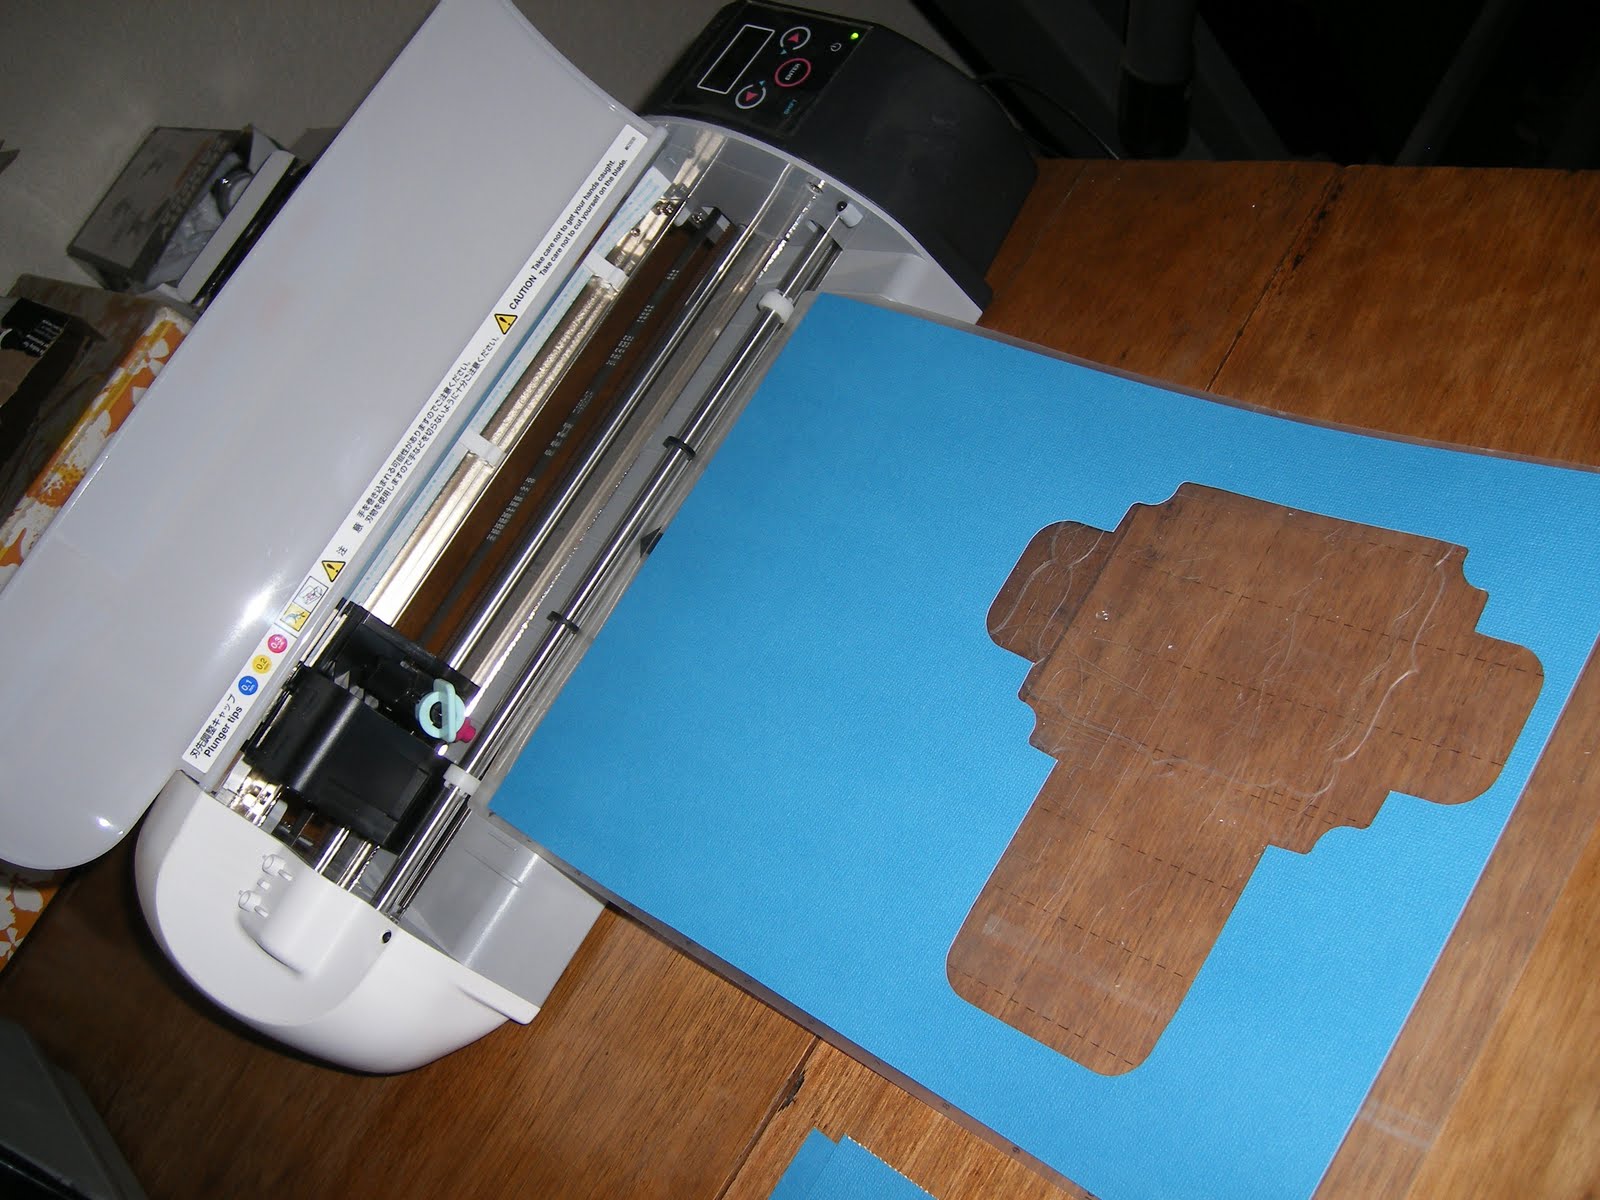
I used the free box template that came with my Silhouette SD software. 
You know, by using the free shapes, I have only actually purchased about three things!! 
Anyway…


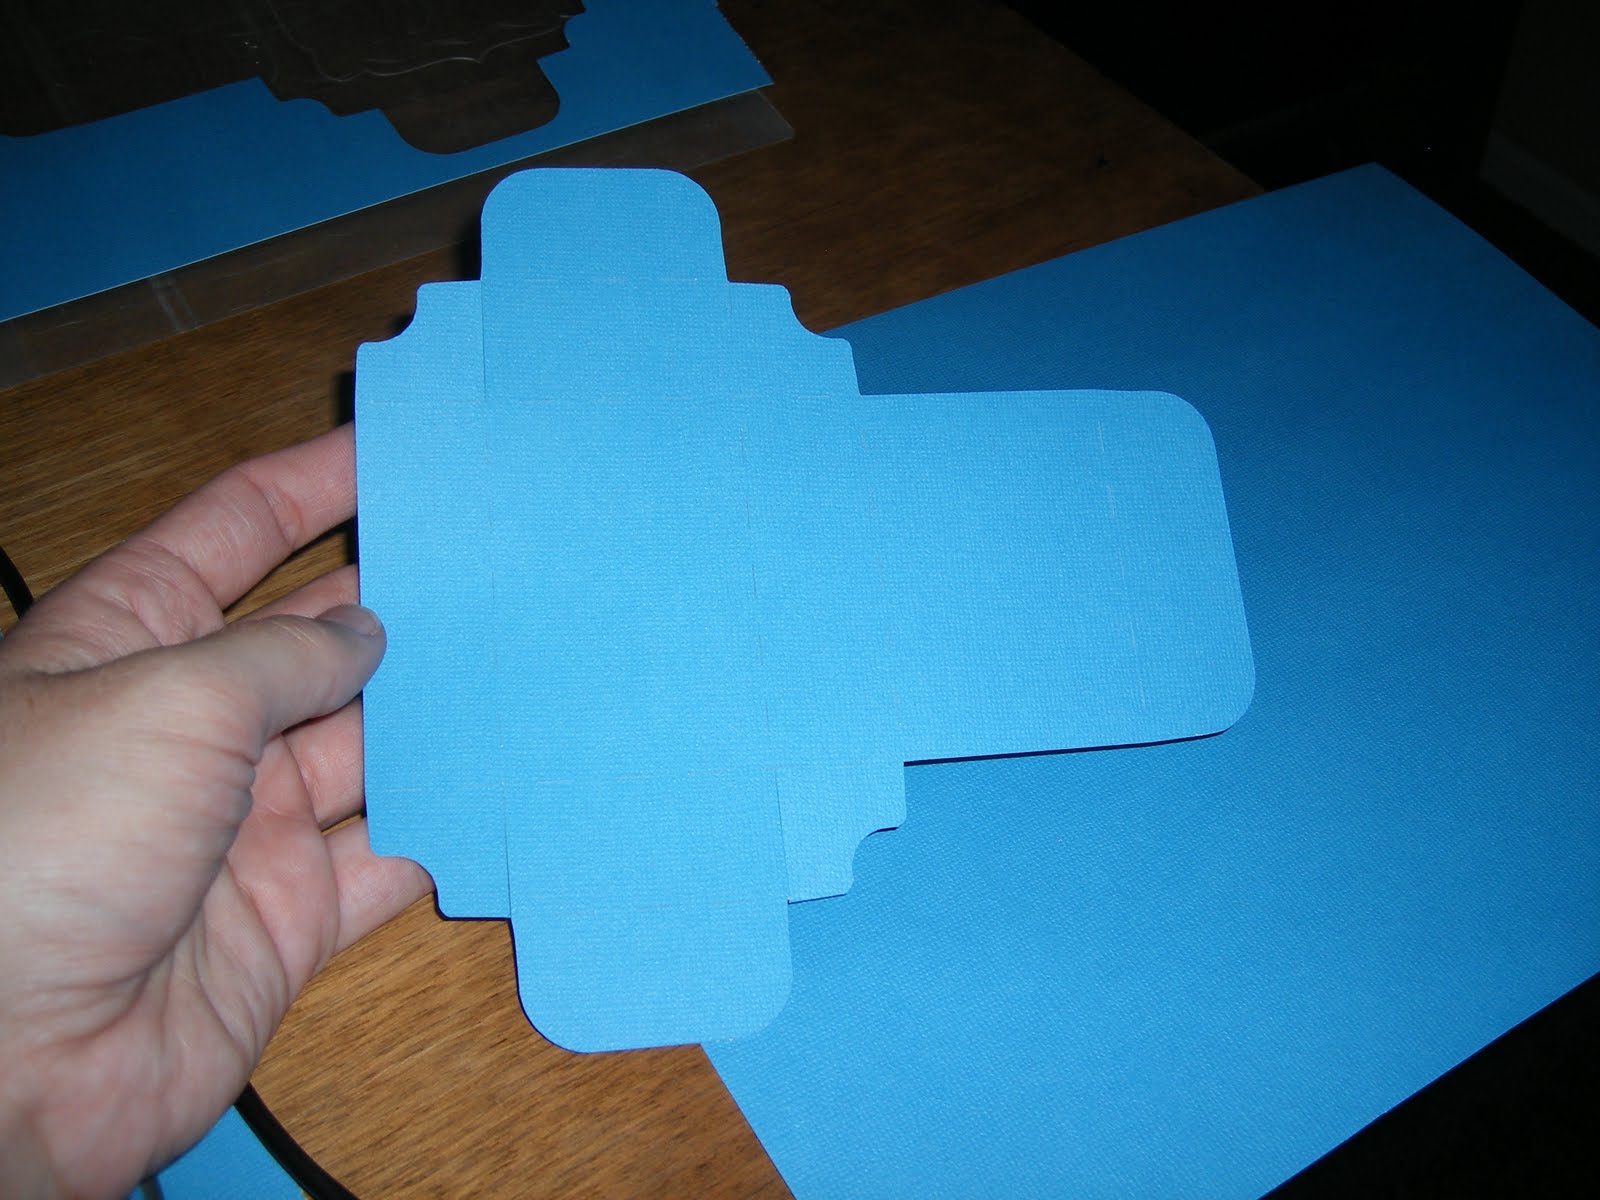
Once you pull the shape from your cutting sheet, it looks like this. 
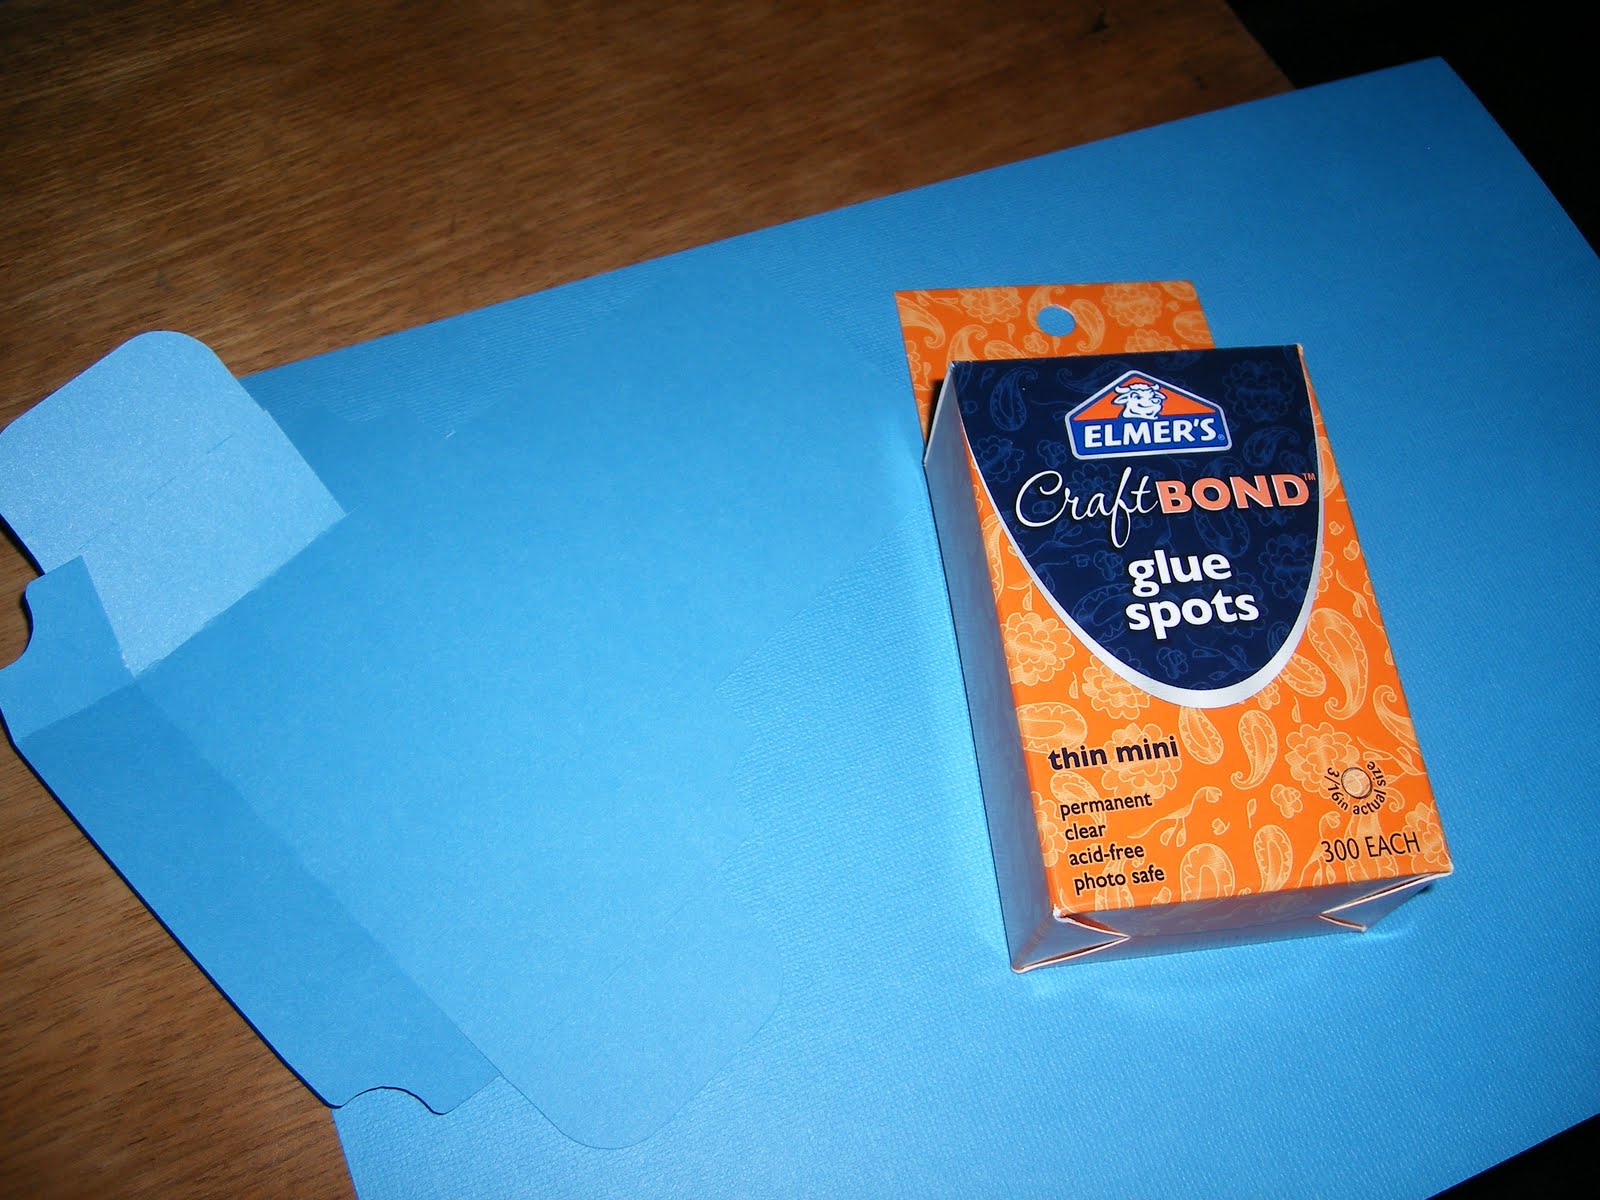
The box shapes are really easy to fold up into little boxes. 
I used Elmer’s Glue Spots on the inside tabs to hold the boxes together. 


Once I had them all folded up I cut several small pieces of white tissue paper to fill the inside of the box and keep the necklace from rolling around. 


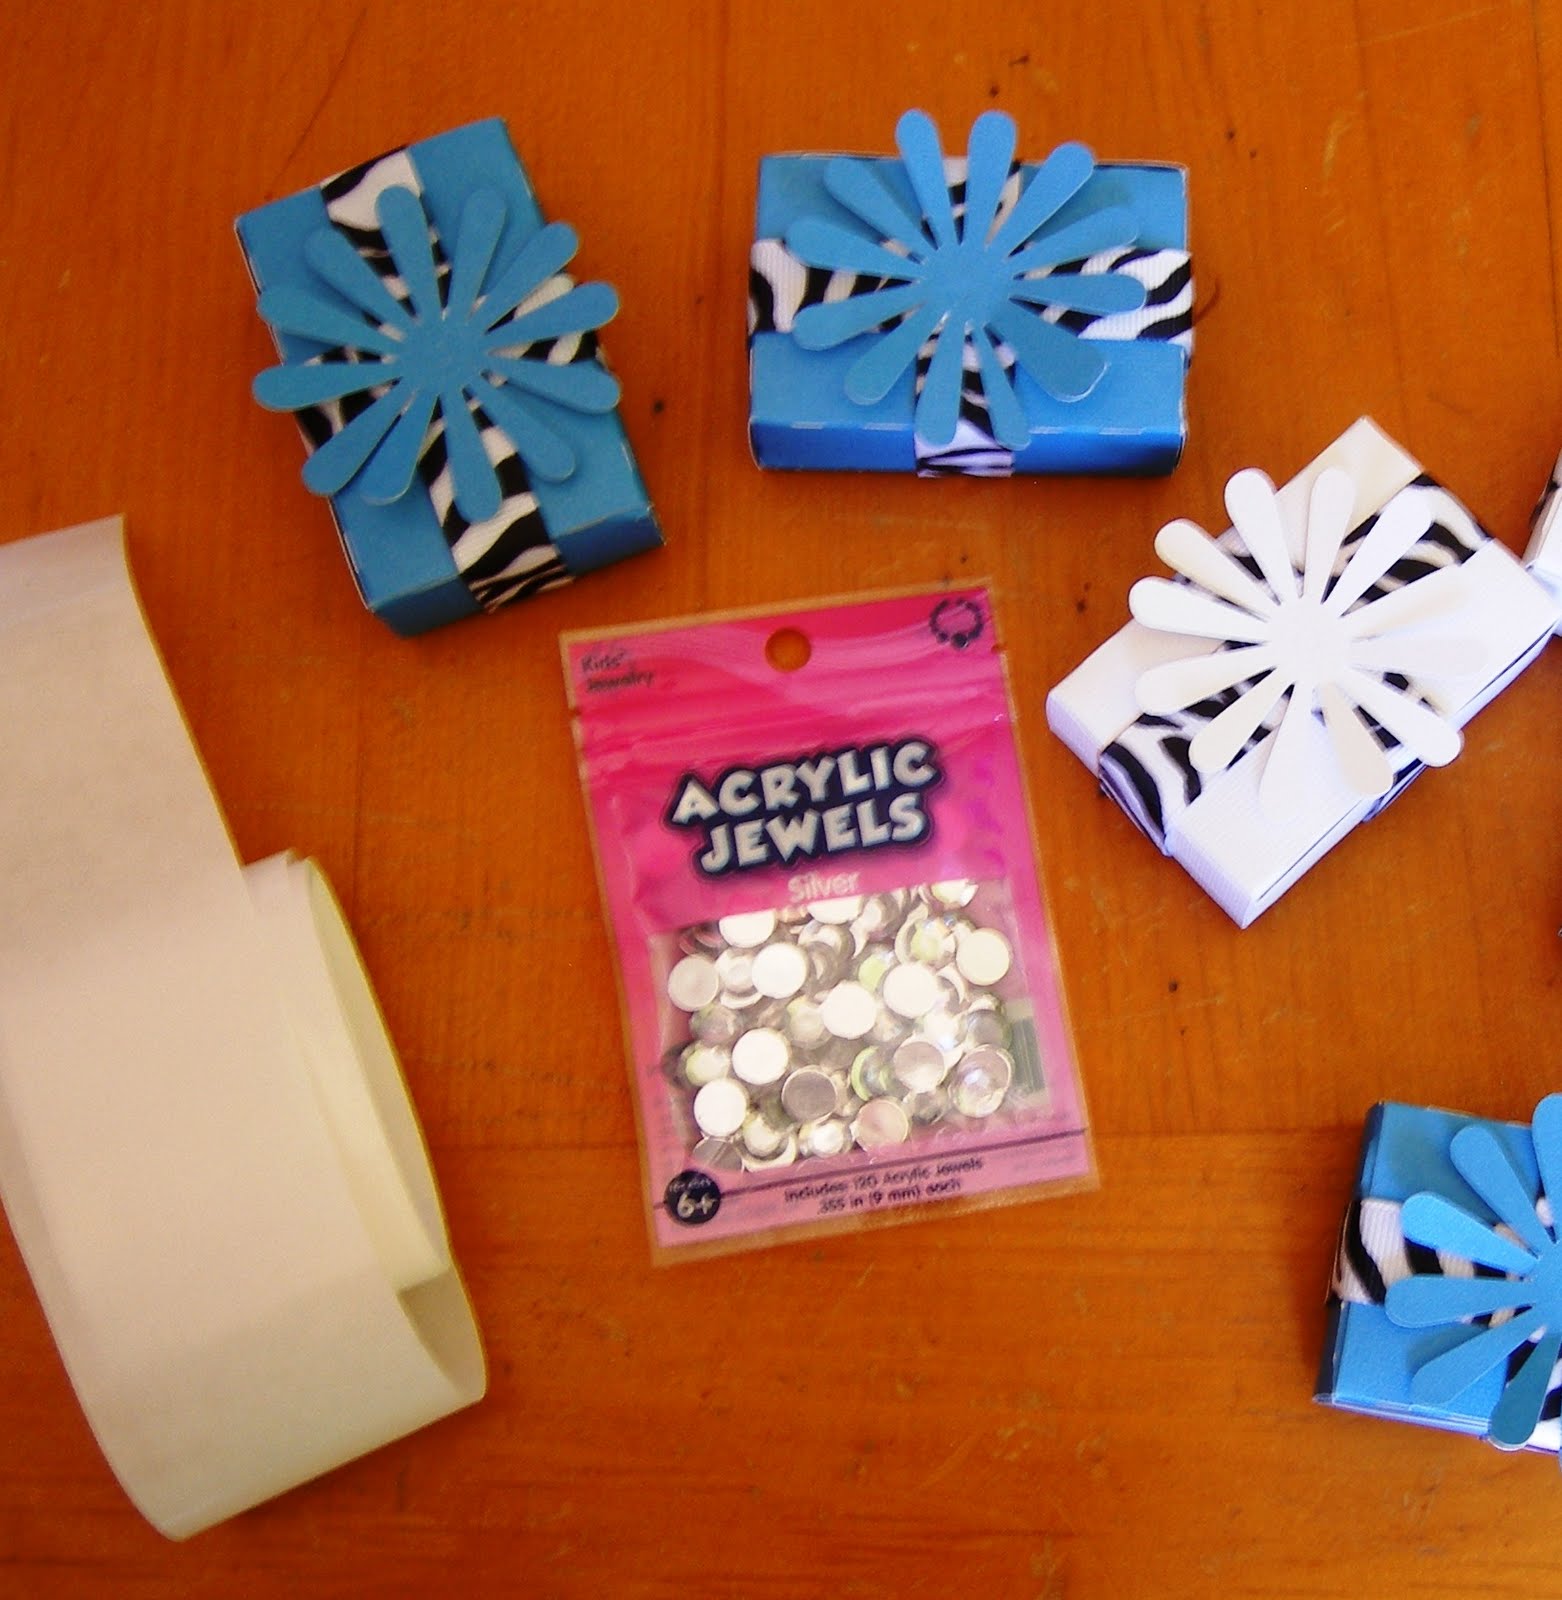
I cut several pieces of left over zebra ribbon from to add some fun to each of the boxes. 
The Elmer’s Glue Spots came in handy to hold those in place as well!


Next, I used my Silhouette to cut out a flower shape for each box in it’s coordinating color. 
Once the flowers were cut, an Elmer’s Glue Dot was applied to the back. 


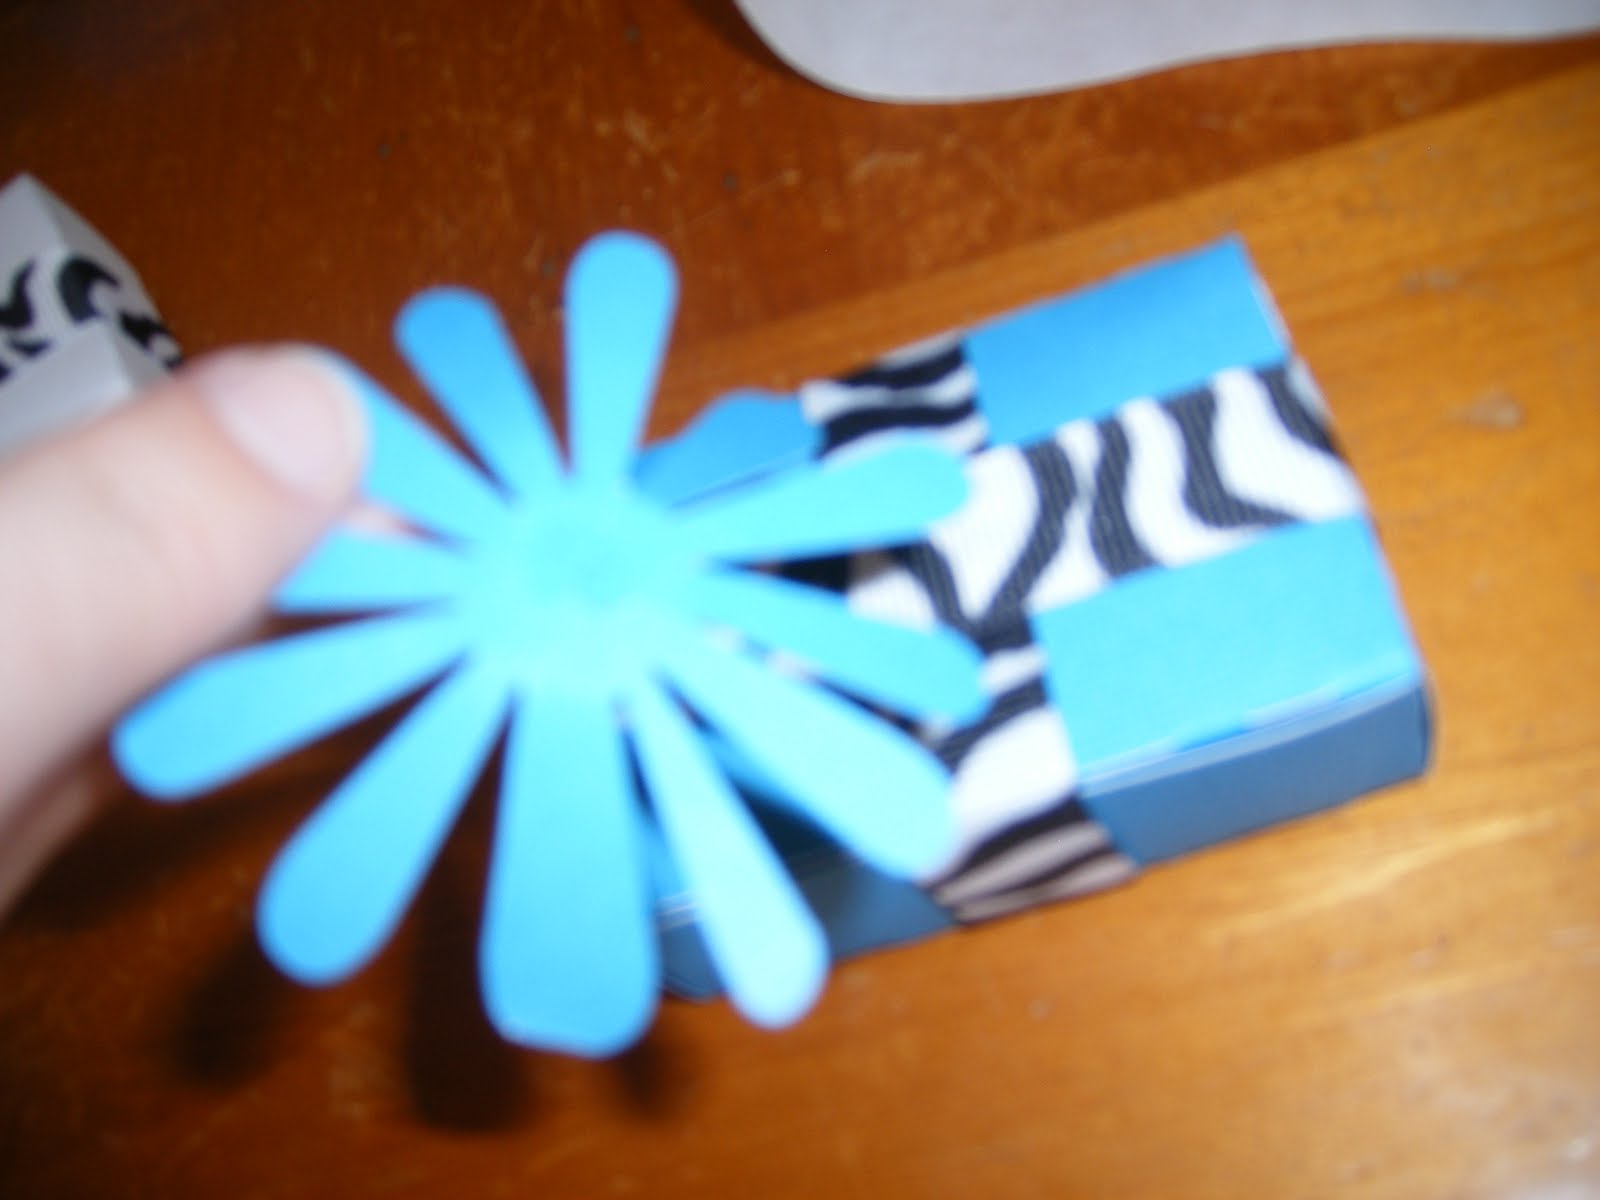
I just pulled a few petals up gently so they looked a little more “alive”, not in the literal sense of course… 
haha
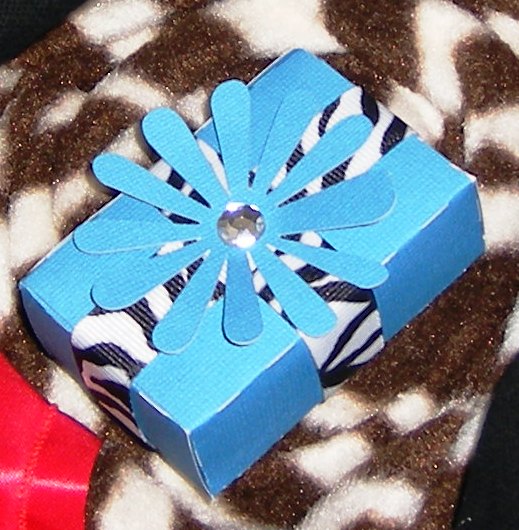
Cute, right?!? But they still needed a little something….


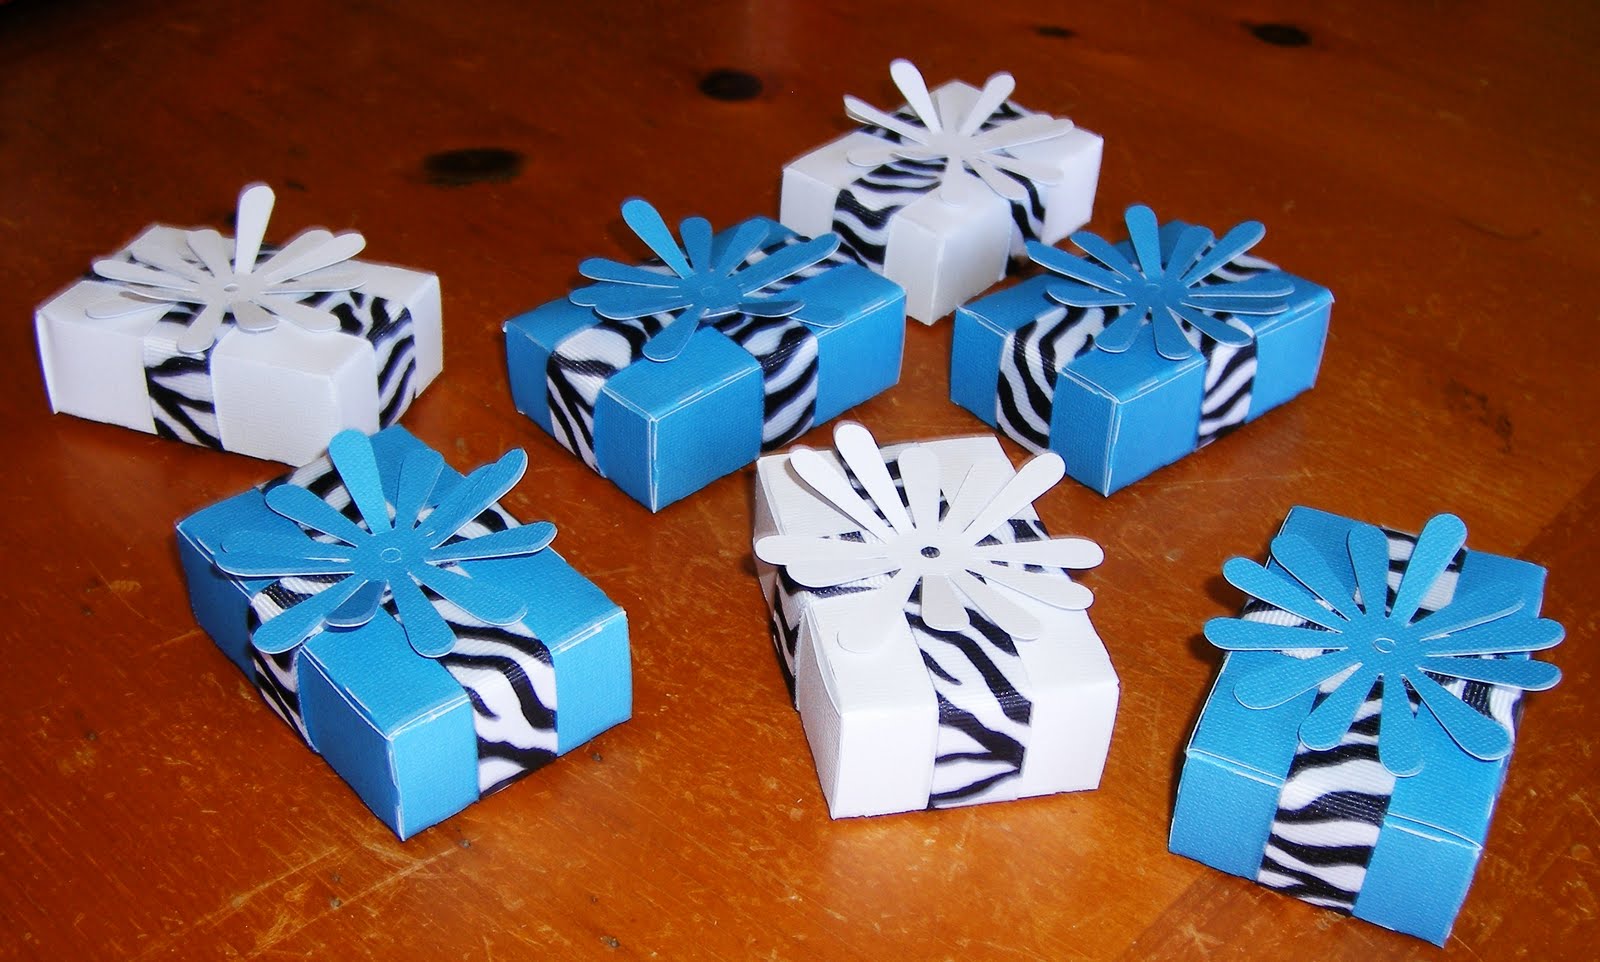
Some Acrylic Jewels and some more Elmer’s Glue Dots!!! 
Each box got it’s own little sparkly center. :)


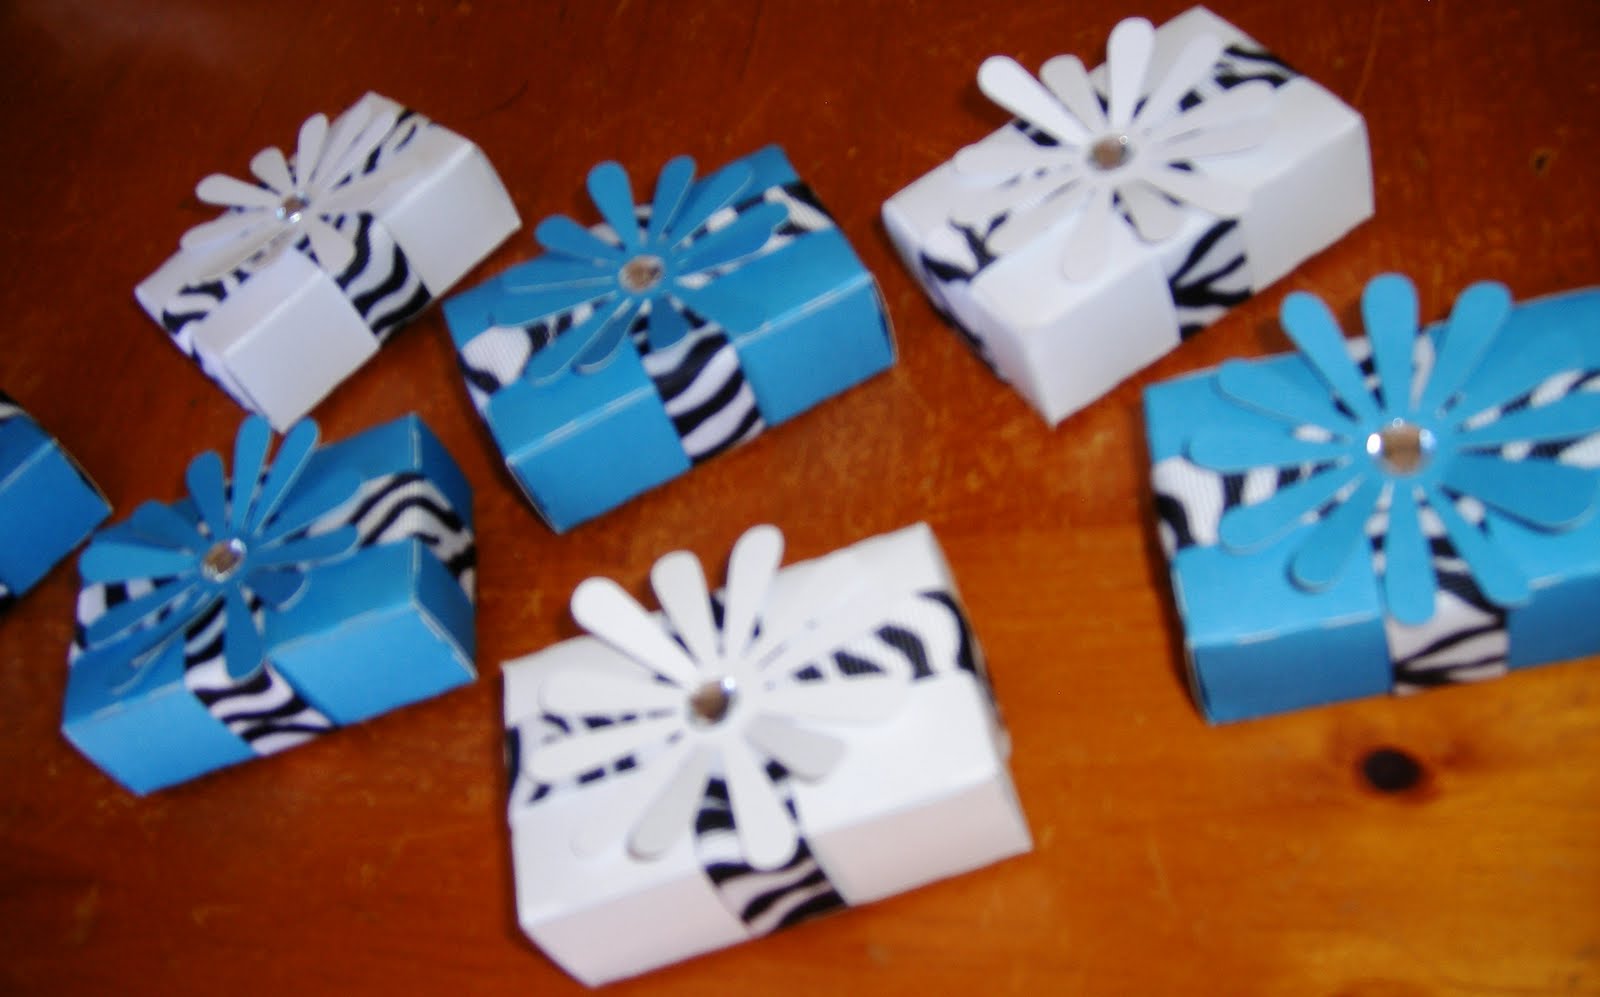
They made the perfect finishing touch to my bridesmaid gifts. :) 
I gotta say… I was pretty proud of myself with these!
ALL of the materials were things I already had in my craft stash!!! 


Happy crafting lovelies!! :)
Linking this here and here and .

Snickers Salad

Snickers Salad. Got to be an oxymoron, right? But it’s quite tasty!!!
I saved from Carlee at Ladybird Ln. snickers salad is SUPER easy to make!!
AND it only requires three ingredients!!!

3-5 apples
3-4 Snickers candy bars
12 oz. whipped cream

Simply chop up the apples and the Snickers bars into small pieces…
Stir them and the whipped cream together in a bowl…

And viola!!! 

Snickers Salad!


Happy Tasty Tuesday!!!

Fancy This Features #39

Well hello there lovelies! Time for another week, eh?
I’m back from my hometown County Fair!
Seems like this year things were a little slower than last… 

Me at my Scentsy Booth
I made a few good sales though and had a great time working my Scentsy booth with my mom, sister and niece!

Taylor and Mom
Kayli drawing our door prize winner
(Don’t you love her new college haircut?!)
While I was gone, we had some lovely link ups over the weekend!!!
On to the features!!!

I have a few friends getting married in the coming months, so these CUTE engagement cups from Sky of Capital B caught my eye! Bet he is a lucky mister!!


Next, these Butterscotch Squares sound SUPER delicious from Musings of a Glamourpuss!
I always love a new unique dessert!!


And finally, as summer seems to be winding down and everyone is getting ready for Fall, this lovely little hammock, shared by Anita at Cedar Hill Ranch, is calling my name!! 


Thanks to all the lovely linkers this last week! Can’t wait to see what you share this coming Friday!!!
For those that were featured, here’s a featured button for your blogs! 


Have a lovely week sweet friends!!! 

Fancy This Fridays #39

Happy Friday Lovelies!!!

***
I am at the County Fair today!! And the rest of this weekend actually!
Lots of fun happenings going on over there! My niece is showing and selling her first lamb!
I’ve got a Scentsy booth in the exhibitors building!
Miss Kayli is coming home from school for the weekend to help and visit…
And I’d be willing to bet it’s super HOT. 

My plan is to really take some good pictures with my poor ol point and shoot camera…
*Birthday coming up, hint, hint*

Really sell some Scentsy!!! 


My Scentsy Booth from last year!

And have a good time with the family. 
My hubs will be roping at HIS home county fair so it’ll just be me this weekend. 

So while I’m away, link up your lovelies so I can browse through your AWESOMEness when I come back, eh?
K, cool. :)

Time for some Fancy This Fridays…

Fancy This Fridays Party Rules!!! 

1) Must be YOUR OWN project (we’ve had a few sharing other people’s stuff… That’s awesome, but we wanna see what YOU did!)
2) Must be linked to that project’s specific post within your blog,
not the blog itself
3) Grab our party button so others can party too!
4) Share some linky love with the other participants, by visiting and commenting on their projects as well! We ALL love comments!!
(And it would be SUPER COOL of you to say your stopping by from the Truly Lovely or Fancy This Fridays link up!)


When you’re all finished linking… You can find us
, and !!!

Thanks for stopping by Truly Lovely today!! We LOVE having you over! :)


Bloggie Bestie Blog Swap with Veronica from Life in the Thrifty Lane

Hello dolls!!! Today we’d like to introduce you to 
Veronica from Life in the Thrifty Lane! 
She has quickly become a good bloggie friend and is quite the creative with her Etsy shop and what not… In other words, you’re going to love her!!!
I’m posting over at her place today! Hope you’ll stop by!


Here’s Veronica!!!


Hello everyone, I’m Veronica from Life In The Thrifty Lane and I’m so happy to be here at Kassi’s blog today. On my blog you can find crafts, DIY, recipes, thrifty finds, giveaways and couponing.


Lately I had my first craft show where I sell magnetic tie backs, hair accessories and upcycled cake stands. Today I would like to share with you an easy and cheep way to package your goodies for a craft show or for selling on Etsy.


You will need:
Cardstock
Paper Trimmer
Cello Bag
Stapler
Stamp
and of course the goodie to pack!


Stamp you logo or whatever you would like at the bottom of the cardstock. I got my cute stamp with the logo of my Etsy shop from .


Now score just above the image.


I than folded the stamped part of the cardstock and trimmed so that both sides are the same size.


At this point insert the hair accessory (a pony tail holder in this case) inside the cello bag (you can find them at any craft store by the baking section, they are from “Wilton”)


If needed fold the cello bag and place the cardstock on top of it. Staple each side and you are done!


So easy to make and it really do makes a difference when your goodies are all nicely packed!


If you have any question please feel free to e-mail me at lifeinthethriftylane (at) gmail (dot) com
and if you would see more of the goodies I make visit my Etsy shop .

It was such a pleasure to be here today, THANK YOU so much Kassi for having me. 
Please come visit me all at Life In The Thrifty Lane, I would love to make new friends!


Thanks Veronica!!! This really is a great idea for all you handmade sellers out there!!! I’ve received some of her lovely packaged goodies! 
And they are ADORABLE!!!


Hope you’ll leave some bloggie love for this week’s Bloggie Bestie!!!


Office Art and Wordle

Back to prettying up my office space!!
If you missed the first two posts in this series, go here and here.

Before I share the third frame in my office prettying project… 

I’d like to share my recent discovery with you.
Maybe I’m the last one to know, but if not, you’ve gotta check out this cool website called Wordle.

It lets you enter either a paragraph of text, a website/blog/any other url and then makes a word cloud from the most used words within what you provided.

 For example, I made a wordle using the .

 COOL, right?
The site chooses the most used words and creates your word cloud.
From there you can customize the colors, shape, and even remove words to make it your own.
Then you can print or share it as you please. :)

A Wordle made from my wedding blog, My Road to Mrs

You could frame a custom word cloud to be used as wall art, as a gift, or even to label random items!
I made a Wordle from my work website and framed it in the pink frame I talked about here, to display in my office!

I think I might frame my blog wordles as wall decoration for my craft room! :)
The ideas are endless!!!

*Wordle does not know who I am or care I’m sure… 
This is just a fun idea I found and wanted to share with others. :)

So… Wordle away friends!!!
I would love to hear about what you create!!!
There’s one more post to come in my office pretty-fying series…
Then the reveal of all the projects combined! So stay tuned!

Have a lovely day!

P.S. I’m sharing a Cupcake recipe I just kinda made up 😉 over here today!!
Hope you’ll come say hello and check out all the other 
CUPCAKE AWESOME SAUCE!!!

Pizza Quesadillas

We’ve talked about Pinterest ? I love it. 
But I have been really bad about pinning and pinning and never really doing anything about it. 
SO! I am making a real effort to actually do some of the fun ideas that I pin!

Take for example these tasty !
I got the idea from the lovely Miss Bella at Bella Before and After
I pinned that idea to my . 
And FINALLY I actually tried out that recipe… haha!

And it was quite tasty!


I made them one evening while our nephew was visiting. 
He’s 11.. So I thought they’d be right up his alley. 
That and we came home late from roping, so I needed something quick. 
Honestly, they were just as quick and easy as a plain ol’ cheese quesadilla, but offered a little something fun and different for dinner!

So thanks Bella, for the recipe! And thanks Pinterest for saving it so nicely for me until I actually got around to trying it out… :)

Happy Tasty Tuesday!

Fancy This Features #38

Hey, Hey Monday!!
And HELLO lovelies!!! 
Everyone have a fabulous weekend?? We spent this weekend at home! 
It was perfect! A few movie nights, some wedding picture sorting and some Scentsy booth preparation!
I’ve told you that I sell Scentsy, right??


Well, I do… And speaking of… 
Have you seen the NEWEST sponsor over at J&M’s Eye Candy? 😉


I’m doing a Scentsy booth at the upcoming County Fair!!
If you’d like to order, we ship anywhere in the U.S. and Canada!!
A portion of my proceeds will go as a donation to the County Fair Board for next year!!


Oh, by the way, I would appreciate if you would like my … Trying to build it up some… THANKS!!!


***********


Time for another Fancy This Features!!!


This week, we’re going with the theme of Before and After, since I shared a on Friday… 😉


First up… I am in LOVE with this Zebra dresser makeover!!! 
Love me some zebra print!
Angela and Debbie of Tre Chere, did a LOVELY job on several other makeovers as well!


Next, check out this LOVELY hutch remodel from
*UPDATE… SO sorry, I wrote the wrong blog name earlier!! APOLOGIES Kelli!!!
The fabric she backed it with is stunning!


And finally, I LOVED this laundry room makeover from the first time I saw it! 
The knobs Veronica of Life in the Thrifty Lane chose for her cabinets… PERFECT!!!


Thanks for linking everyone!!! 
For those featured, here’s a Featured button just for you!!!


Can’t wait to see what you all share this Friday!!!
Like I said earlier, I’ll be off to host my Scentsy booth, but there will still be a linky! As always!
Until then…

Fancy This Fridays #38

It’s FRIDAY!!! WHOOT WHOOT! 😉
And I got my hair DID! Also WHOOT WHOOT. 

What do you think?
Before                            After

Why I’m all smiley faced on the first one and sort of smirky faced on the second… 
I don’t know… Taking pictures of yourself is awkward, mmkay. 😉

And actually looking at these two… Maybe the before is better than the after…
Hmmm? Again, don’t know. But it’s something different! 
Haven’t done my hair in forever! 
I wanted to grow it out and leave it natural for our wedding and I did. 
So it was time to change it up. 
Got a trim and some highlights in case you couldn’t tell up there… bahaha. 

I used to dye up and cut up and other such all the time. 
But it was weird after not doing ANYTHING for so long. 
I’m also noticing I have SUPER tired eyes in the second one… GEEZ!!! 
No more closeups… heehee

Anywho… onto the party. What did you fancy pants up this week??
We wanna see!!!

Fancy This Fridays Party Rules!!! 

1) Must be YOUR OWN project (we’ve had a few sharing other people’s stuff… That’s awesome, but we wanna see what YOU did!)
2) Must be linked to that project’s specific post within your blog,
not the blog itself
3) Grab our party button so others can party too!
4) Share some linky love with the other participants, by visiting and commenting on their projects as well! We ALL love comments!!
(And it would be SUPER COOL of you to say your stopping by from the Truly Lovely or Fancy This Fridays link up!)


Thanks for linking lovelies! As always!!
Have a LOVELY weekend!!! :)


Bloggie Bestie Blog Swap with Monica of Monica Wants It

Happy Thursday lovelies!!
We have a double tutorial today from the lovely 
Miss Monica of Monica Wants it!
She’s sharing TWO yummy ideas with us as this week’s Bloggie Bestie!
Please leave her some comment love as always!!! :)

Here’s Monica!!!

Hello everyone! My name is Monica, and I blog over at Monica Wants It, and today I’m here to show you how make party décor on the cheap.

Monica Wants It

But before we dive in, I’d like to thank the ever-so-lovely for allowing me to guest blog over here. Isn’t she a total sweetie? After you’re done reading this post, hop on over to my blog to see Kassi’s post on how to create a cute, personalized décor piece for any place in your home/office.

Now, let’s talk about candy.

Don’t lollipops make you happy? I know they make me happy! Especially dum dums because there are 1.2 billion flavors! Okay, maybe not 1.2 billion…but there are a lot! And for a girl who’s on a diet, I mean, lifestyle change these little lollipops come in handy quite often to curb sweet cravings.

So, how did I make the lollipop centerpieces? You’ll find out RIGHT NOW! *throws confetti*

We’ll go over the smaller/easier one first-

101_0767

First you need some supplies:

1.) Styrofoam blocks (I bought the 3 pack at Dollar Tree, each centerpiece uses 2)

2.) Brown or green crinkled gift wrap paper filler thingy (Again, from Dollar Tree- each centerpiece uses about a third of a bag)

3.) Lollipops- about 15-20ish

4.) Popsicle sticks (about 5 per centerpiece)

5.) Cardboard animals or whatever your theme is (I bought them from Dollar Tree- I used 2 in each)

6.) Spray adhesive

7.) A glass container (Found mind at…you guessed it- Dollar Tree!)

8.) Ribbon

That should be it.

Step 1: Put foam block into glass container. Trim if needed.

101_0465

101_0466 

Step 2: Put second foam block on top using spray adhesive to adhere the 2 blocks of foam together. I used the Elmers spray adhesive that is about $5 at Target. This stuff lasts FOREVER! Then smash in some of the crinkled paper on the sides so the foam is less visible. I sprayed a tad of adhesive onto the paper so it would all stick together. You don’t have to do this, but I think it helps.

101_0470 

Step 3: Get all the decor that is going to be put onto popsicle sticks and put it onto the popsicle stick. I had Wild About Andrew signs and some safari animals. The Wild About Andrew sign is double-sided so everyone could see it. The animals are magnets, so I had to remove the magnet from the back of each animal. No biggie.

 101_0467

101_0468 

101_0469 

Step 4: Insert the popsicle stick decor into the foam. I want to note that guests sit on BOTH sides of the centerpiece, therefore I made the Wild About Andrew sign double-sided and with the animals I put one on each side. I covered up the not so pretty backside of the animals (backside=plain cardboard since I removed the magnet) by strategically placing a lollipop there. Here’s side 1 and side 2.

101_0474

101_0475

Step 5: Fill the top of the centerpiece with crinkled paper. This part REQUIRES spray adhesive or else when you move/transport the centerpiece, all the paper would fall/fly out. Now, it doesn’t require a ton, but my trick was to spray the green foam and then dab paper onto it. Like I mentioned in the supply list, each centerpiece requires about a third to a half of the crinkled paper bag. You see how the back of the elephant looks ugly? We’re going to put a big lollipop there to cover that up. Same goes with the lion. Moving on…

101_0476

Step 6: Insert lollipops! Each of these uses about 15-20 lollipops. I used Jolly Rancher lollipops and Dum Dums so they have some size variances, which to me is nice. You could use Blow Pops, Tootsie Pops, etc. Again, make sure to put a lollipop directly behind the animals/decor so you don’t see any icky backsides.

101_0477

Final Step: Add some ribbon around the center of the base. You’re done! Easy peasy centerpiece for under $5.00 and each takes less than 15 minutes to make. You cannot top that folks! How cute would these be adapted for holidays, birthdays, and office functions? They would be awesome!

101_0506

101_0504

Now, if you have about 30 minutes to an hour per centerpiece and twice the budget, you can also make these kick ass Dum Dum topiaries. Ready? Here we go!

101_0501

Supply List:

1.) Dowel- I wish I could remember the thickness- basically, thicker than a pen/pencil. You can trim to size, but more on that later.

2.) Styrofoam ball- A 4 or 5 inch ball would work well. I bought them at Hobby Lobby for about $3 each since my local Dollar Tree was completely out of the balls. Try there first though! Way cheaper.

3.) Dum Dums- About 100 per centerpiece. They sell a 400 count bag at Wal-Mart for $7ish.

4.) Ribbon- satin ribbon and curling ribbon in your choice of colors/patterns.

5.) Crinkled gift wrap paper filler- Dollar Tree! Each centerpiece requires about a quarter of a bag.

6.) Spray adhesive

7.) Acrylic paint to paint the dowel & a foam brush

8.) A planter of some sort- I bought it at Dollar Tree and spray painted them orange and yellow (2 of each). If the planter is not going to be used as-is, make sure to have some spray paint handy.

9.) Any animals or embellishments for the planter- I used the wooden animals from Hobby Lobby that are 60-cents each.

10.) Scissors

11.) Quick set cement

12.) Tissue paper or newspaper

Step 1: Unfortunately I got way ahead of myself and didn’t take pics of this part, but I’m sure you understand the basic principle of it. The base/planter was a silver tin type of thing from Dollar Tree that had bluebonnets on it. I used some Krylon spray paint and turned them from tacky to bright orange and sunny yellow. Get it? Cool. Next, I cut my dowel to about 24 inches since the dowel I bought was about 30 inches or so. I used a basic handsaw we had here at home.

Step 2: After your base dries, pour in the quick set cement so that it fills a little more than half of the base. Have the dowel handy- this is SUPER important since once your cement dries there is NO way of getting that dowel in there. NO WAY. The cement dries super quick, so just stick around and make sure the dowel sets up firmly and is straight. We bought the quick set cement at Wal-Mart for about $9 and it made 10 pounds of it. It was in a bucket type thing, and we almost used the entire bucket on the 4 topiaries I made. I did this to all 4 of my bases, let them set, let them dry, and then I moved onto step 3.

101_0450

Step 3: Again, no pictures of this step (I know, terrible), but it’s easy. Trim each dum dum so that the stick is only about 1 to 1.5 inches long. Insert into foam ball. Repeat 99 times. For this step, Daniel was cutting the sticks and I was inserting them into the foam ball. Each ball took about 10 minutes at most to do, but if you’re doing this step all by yourself, it would take longer. Make sure to have some heavy duty scissors to cut through the stick!

Step 4: Paint the dowel any color you’d like (I wanted them to look like trees, so I chose green- used acrylic paint and a foam brush) and put the ball of dum dums onto the top of the topiary. You’ll notice here my dowel isn’t painted. Yeah, about that, I painted it after because like usual, I get ahead of myself. Honestly, it doesn’t matter when you paint it. Sorry for the blurry pic!

101_0454

Step 5: Put some tissue paper on top of the dried cement. You could use newspaper here as well, it’s up to you. I had lots of tissue paper on hand, so I chose tissue paper.

101_0453

Step 6: Spray adhesive onto the tissue paper and gently cover with the crinkled paper.

101_0455

Step 7: Add satin ribbon to the base. My container was shaped funky, so I ended up with this ugly overlap. Not to worry…

101_0457

Step 8: Cover the ugly overlap or the overlap in general, with a cute animal. They have all sorts of themes/animals/colors at Hobby Lobby for about 60-cents each. I would recommend hot gluing the animal onto the ribbon/base because the spray adhesive simply isn’t strong enough.

101_0458

Step 9: Here’s where I painted the dowel… you should/could have done this earlier.

101_0459

Step 10: Add some pretty curling ribbon to the dowel. I used the spool of ribbon I bought at Party City because it was cheap and the colors were PERFECT! We obviously didn’t use the pink.

101_0462 

101_0463

And you’re done! Now, I will say that if you’re only making one of these, it’s expensive or not very cost effective. If you’re making 4 or more, it’s very cost effective, plus these created a big “Wow!” factor at the shower since most people hadn’t seen these…ever. They’re not blog addicts like you and I. These would be great gifts for grad parties, showers, office luncheons, or a Get Well Soon sort of thing. Or if you want to use these as décor for Halloween, school parties, or even centerpieces, you totally can! The possibilities are endless.

101_0483

I hope you enjoyed my tutorials, and if you use these for your parties or on your blog, please let me know! Thanks again to Kassi for allowing me to entertain (I hope!) you all for a little while.


THANKS MONICA!!! :) Great tutorials! Both of them! 
Thanks for being this week’s Bloggie Bestie! 
And for blog swapping with me today! 
Don’t forget to go say hello over there lovelies! :)

Have a GREAT Thursday!!