Sponsor Spotlight – Creations by Sasha

Hello pretties!! Happy Saturday!

We are SO excited to welcome Creations by Sasha as one of our newest large ad sponsors here on Truly Lovely! First of all, isn’t she BEAUTIFUL!!!
She’s also SUPER sweet!! We love chitchatting with her on and !!!

Sasha’s main goal with her online shop is, “To inspire people – whether it’s through creative designs for your home, unique gifts for loved ones, or having a place for cherished memories.


Currently many of the items on the Creations by Sasha website are 40% off.
You can also receive 10% of anything in her shop for signing up for Sasha’s newsletter!

I am in LOVE with this Aqua Vase from Sasha’s Creations for the Home section!
Don’t you love that color!!!

Her Spring Floral Coaster Set is perfect for displaying in your home this time of year!!

Be sure to stop back by Truly Lovely on Friday the 13th of April to enter the April Sponsor Giveaway! 13 is MY lucky number… Maybe it will be lucky for you too! 😉

Sasha has contributed a Simple Stories 6×8 Mix and Match Album and a Simple Stories Collection Kit of the winner’s choice (a $36.98 value) to be won by a lucky reader in the giveaway!

Hope to see you there!!!
OH, and please take a moment and say hello to our new friend Sasha!
We promise you’ll LOVE her!!! She can be found at her blog, on or on .

Enjoy the rest of your weekend lovelies!!! And HAPPY EASTER!!!!

Holiday Card Swaps

So I know we’re way past the December holidays and in blog world I’m already considered late because I haven’t posted anything on my resolutions or goals for the New Year. 
But guess what? I’m taking my time. 
There. I said it. 😉
I’m checking out the lists of goals everyone else is posting. Combing them for inspiration and in due time, I’ll share mine. But for today, how about some holiday card fun?!
I joined in two handmade holiday card swaps this year. 
The kind where you’re paired up with another blogger and send one another a card in the mail. Just for fun. 
I made my cards with scrapbook paper, a tree and a card shape cut with my Silhouette SD.

The cards I received were lovely!!! 
First off though, can I just say blogging and the relationships I’ve built through blogging are AMAZING!
Here you can see our holiday cards received in 2011. 
Several of those cards are from lovelies that I’ve met through Truly Lovely!!! Again, I am so thankful for this journey and the friends made because of it. :)


The first card swap I joined was on Sugar & Dots/Fingerprints on the Fridge
They paired me up with the lovely Vivian of A Dance for 5

I was so glad to be paired, not only with a fun card swap partner, but a fun blogger with a lovely blog to follow!!! Thanks Vivian!!! 

Next up was the card swap over on FTLOB
I was partnered with Alyx of Everyday is a New Adventure
I also received cards from Bobbi and Vic (admins over at FTLOB). 
Alyx lives in Germany! 
It was so fun to receive a card written in German! 
Thanks to Alyx for her translation!!!

I exchanged cards with a few other bloggie besties including Vic, Ali and Ami
So blessed to have made these amazing friends!!! 
Can’t get over it! haha. 
Here’s to making many more new friends in 2012 and growing the relationships with the lovelies I’m friends with already. 
P.S. Have you entered this AWESOME giveaway yet??

Tile Coasters

I recently took on a fun project!
I copied a status from someone else on Facebook to my own status… Basically it said,
“First 5 people to comment on this status get a handmade gift from me.”

I ended up allowing for two more, so seven handmade gifts in total.

The first two are finished, I decided to make them the same thing…
Cheap, easy, but super fun and way cute!! Tile Coasters!

I’ve been seeing these all over blogland. I initially saw them here at Mostly Food and Crafts where Danielle made some sweet Holiday coasters…


So I decided to take this idea and make my own.

The materials needed are:
  • 4 square tiles (I bought mine at Home Depot for $0.14 each)
  • Scrapbook paper (about half a sheet for each set of coasters)
  • I used my Silhouette SD for the cutting, but you could use any stencil or hand cut the designs yourself…
  • Hot Glue Gun
  • Modge Podge
  • Foam brush
  • Modge Podge Sealer
  • Scissors
  • Sheet of crafting felt
I think in total the materials only cost me a couple of dollars
for each of the 2 sets of coasters that I made.

I made the first set of coasters for my friend, Katie.
I LOVE personalized things and TYPOGRAPHY, so I chose to use her name for one of the coasters.
And I used a cup with a straw from the free designs that came with my Silhouette.


I followed the same steps for the second set of coasters for my friend, Tess, except I used her name and the free wine glass that came with my Silhouette.

This is the screen shot of Katie’s cutouts on my Silhouette screen.
I simply measured the tiles, decided the size I wanted for the squares, inserted the cutouts and then printed/cut the page onto the scrapbook paper.


Next I used the foam brush to brush a layer of Modge Podge onto the two tiles, then took my cutouts and placed them in the center. I let those dry for about 15 minutes.


I brushed two layers of Modge Podge over the top of the cutouts on the tiles and allowed those to dry for 15 minutes each in between coats.


Once the second layer was dry, I sprayed two layers of the Modge Podge Sealer over the cutouts and tiles. Those dried.

For my last step, I cut out strips of matching felt and hot glued those to the bottoms of two of the tiles. The bottoms of the tiles are rough, so they felt serves as a protective barrier between them and the table surface they get placed on.


For the bottoms of Tess’s coasters I cut out a full square of white felt.
This last week I saw where Jennifer of Green Door Designs used a full square instead of strips and I liked the look!!


Here’s Katie’s coasters!! :)
What do you think??
I think they turned out so lovely!
Great for my first attempt! haha!


And here’s Tess’s coasters!!!


Sorry for the glare on that one…

And here in use…

Now they will each have a set of their very own, personalized coasters!


I wrapped each set up in ribbon and tissue paper….


I found these perfect little boxes at the Post Office…


And they are on their way!!!

Two handmade gifts down! Five to go!


 P.S. I’m linking this project up to the CSI Project!
This week’s this is Typography!!
Go here to link your Typography projects!
Visit thecsiproject.com

And here…

Save the Dates with My Silhouette

I promised last week to share the Save the Dates that I’ve been working on… Guess what!? They’re done!!
About 3/4 of them are even addressed, stamped and sent out!!!
There’s about 40 or so that still need to be addressed and sent, but we’re almost completely done with that wedding planning duty! :)
I had magnets printed at the print shop in the building where I work.
I think they turned out lovely. And SO me and Mr. M.
We used one of my fave engagement pictures taken by
Treehouse Photography.
What do you think??
I also purchased some square envelopes from the print shop…
Did you know the USPS has a MINIMUM mailing size! They do!
You cannot mail a letter smaller that 5″ by 3″ through the post office.

News to me.. but anyway…

That being the case… I didn’t think sticking JUST the magnet in a bigger than I wanted envelope was very classy…

So don’t laugh… But my initial thought was this…

I know… Cutting out backing by hand for 125 Save the Dates was NOT my brightest idea.. Luckily I only cut a few before coming to my senses and realizing this would be a perfect SILHOUETTE project!!

I bought a fun frame shape from the online store…
I actually got 4 frame shapes for $0.99 so that was awesome!!
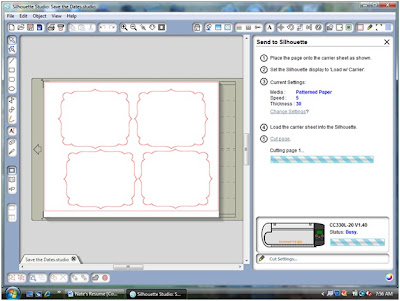
Then I figured out the size I wanted and that four of that size would fit on a page… This is a screen shot of my page…
Then I used my handy dandy Silhouette to cut out 125 of those shapes in different colors.
I had some trouble getting the correct cutting settings set up…
I used textured scrapbook paper purchased for $5 a book from Wal-Mart.
Since my paper was textured I finally used the Patterned Paper setting and that worked like a charm!

 Here you can see the four shapes cut from one sheet of scrapbook paper. To get the paper (the large square sheets) to fit in my Silhouette, I just trimmed them down with scissors.

I used double sided tape to secure the magnet to the backing paper.

Easy peasy! 😉
And they look much classier with some pretty paper backing, then just stuck in an envelope by themselves. I think anyway…
I know it was extra work to do this project than I could’ve gotten away with, but this is my wedding!
 A one time thing… My thoughts are to add as many extra details and nice touches as I can handle!

The funny thing is that the blogging world is giving me the inspiration to go ahead and add those extra details… Things to turn a plain ol’ project into something extra lovely!
So thanks to all you lovelies for helping me go the extra mile! :)
P.S. Linking up here…

Paper Boxes!

Alright so it’s almost Christmas- you bought your friend an awesome (but incredibly tiny) gift and you’re so excited to give it to them. BUT you have a few problems…. ONE! Sure the gift wasn’t cheap but it isn’t HUGE either and the last time you checked- they didn’t make bags and tissue paper this tiny… TWO! Now you’re panicking because you don’t know how you’re going to wrap it and you’re suddenly wishing you would have bought something bigger…
TAKE TWO DEEP BREATHS and chill- Kayli’s got you covered :) Use a paper box! Here’s a tutorial-

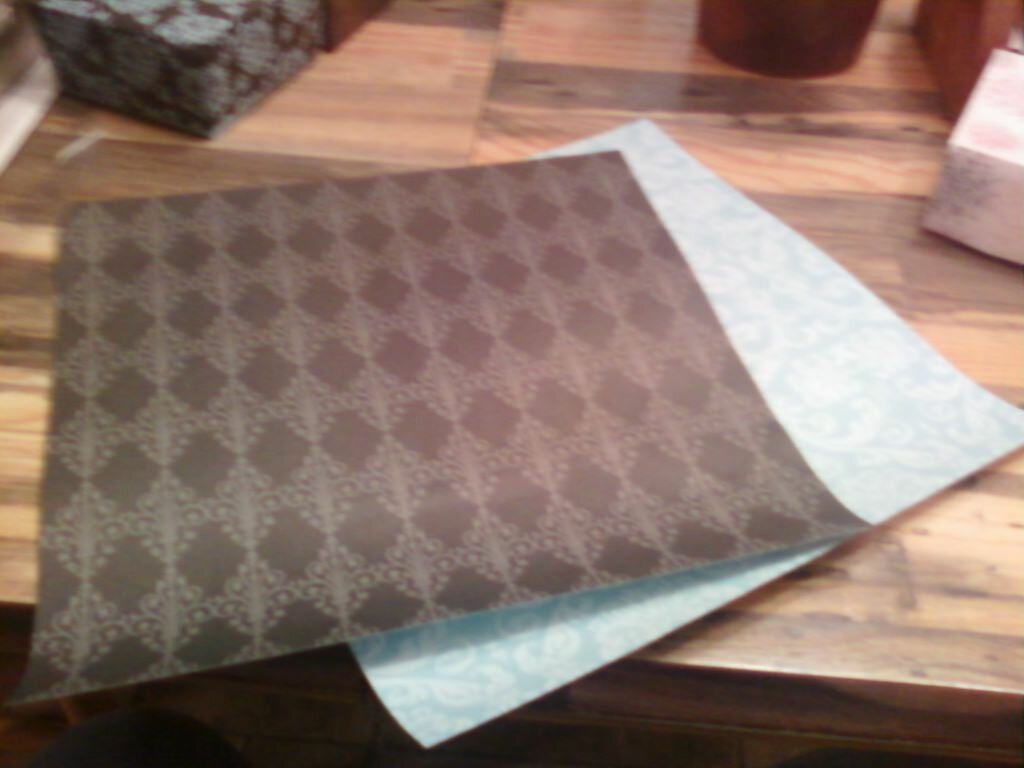
1. Get your materials together- two pieces of scrapbook paper (tissue paper and ribbon later for pretty wrapping) and some type of folding mechanism- I used my hands 😉 Yeah- that’s it. That will be all you need.

2. Take one sheet of paper (this sheet will be the bottom half of your box) and fold it pattern-in hot dog style one way- then unfold it and fold it hot dog style THE OTHER way.

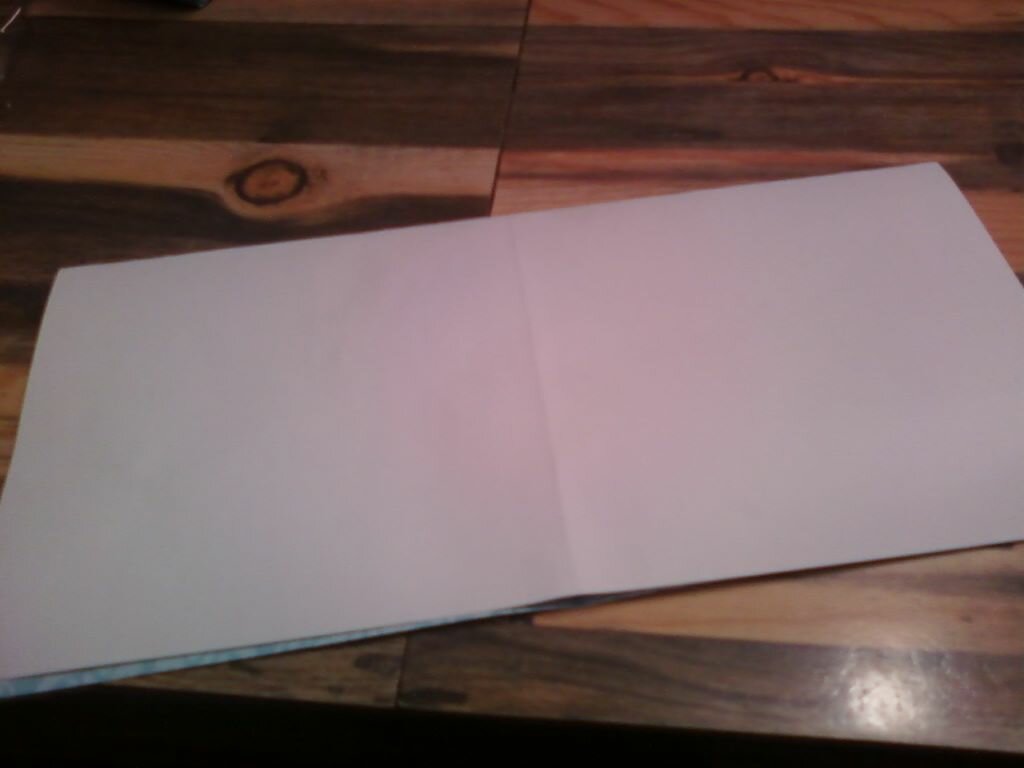
3. Alright now unfold again so it’s flat- and lay it pattern down. Now take each corner and fold it into the center of the paper so it looks like this…

4. Now take the bottom of your paper and fold it into the center and do the same with the other side, like this…

**When you make the top of your box, you’ll want it to be bigger- so at this step just make sure you don’t fold ALL the way into the middle- leave a space in between, nothing drastic- but if you make them touch like above- then the top won’t fit over the bottom..**

5. Unfold it so it looks like this-

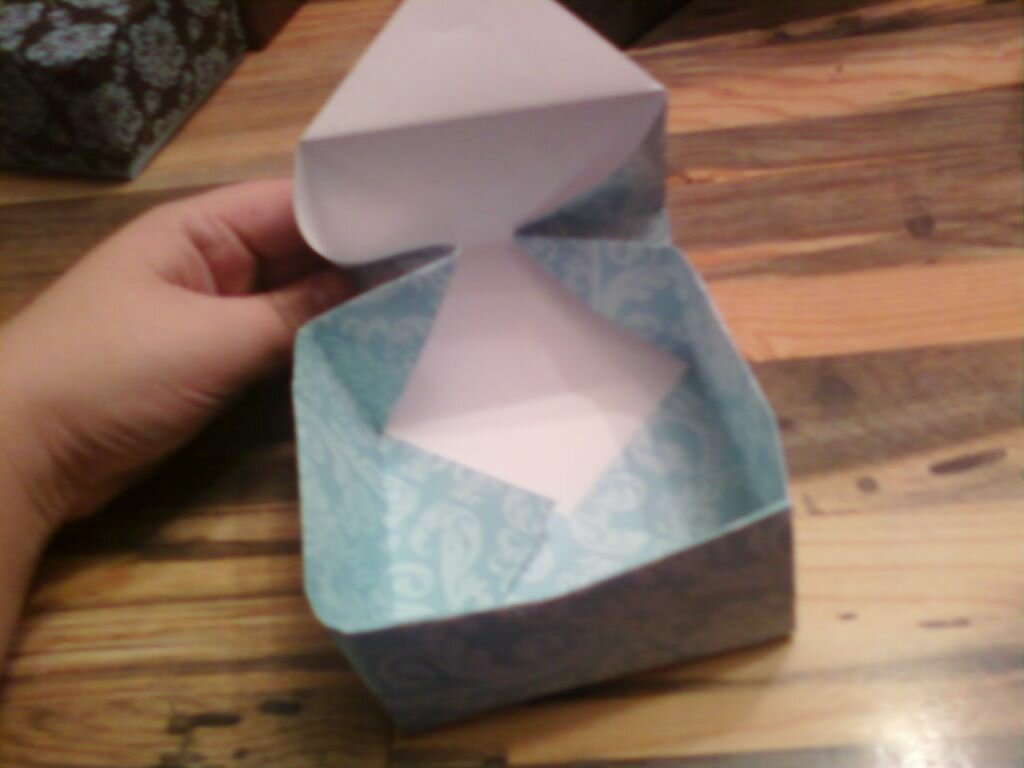
6. Now push both sides of your paper in like so-

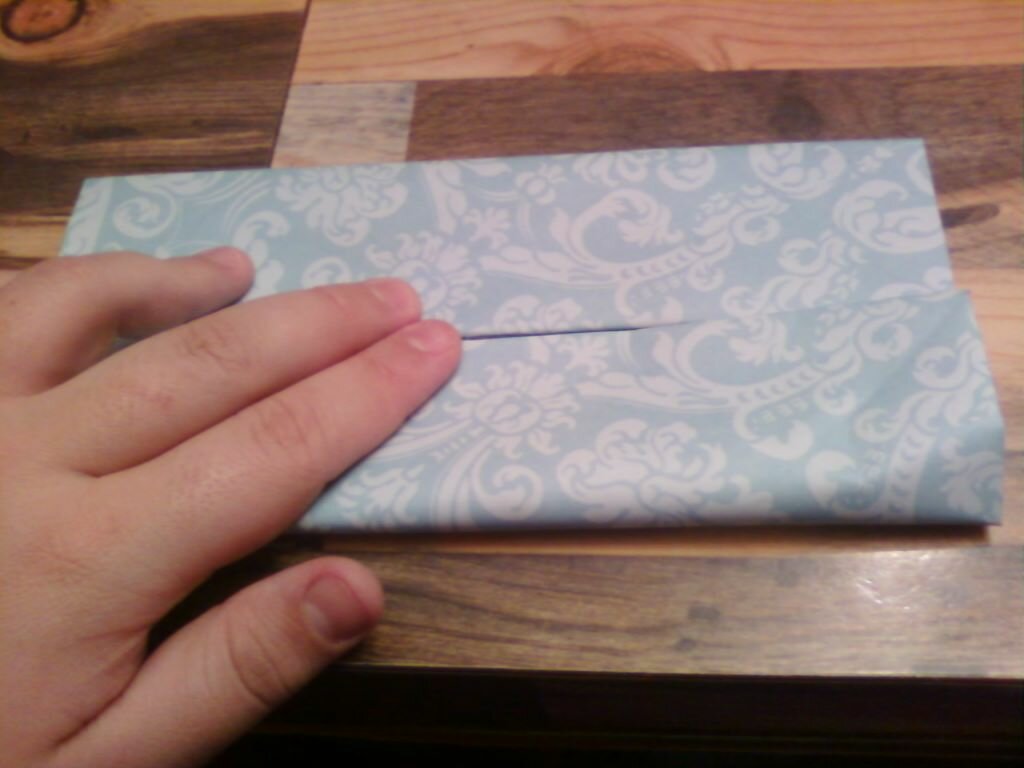
7. Then fold the top over on one side so it looks like this-

8. Then do the same to the other side and TADA!!! You have the bottom of your box! Confused look?? Where did I lose you?? haha

So I completely love these- I use them to hold notes and keepsakes, and for wrapping gifts! It might seem crazy complicated- but it’s really not- and once you’ve started, just keep one to use for future reference! Here are some others I’ve made- as well as the one I made for this post. Anyone else have clever ways to wrap gifts?? We’d love to hear your ideas!

Happy Folding and Merry Christmas!