Pumpkin Dump Cake

Welcome to Day 2 of…

I have another delicious pumpkin recipe to share with you!!!
See day one of Pumpkin Week on Truly Lovely here with a delicious Pumpkin Cheesecake Recipe!

This recipe for Pumpkin Dump Cake comes from .
They call them Pumpkin Pie Bars… But after making this yummy myself, I think it favors a dump cake more than bars.

Pumpkin Pie Dump Cake

The ingredients needed to Pumpkin Dump Cake are:

Bottom Layer Ingredients:

  • 1 large can of pumpkin (29 oz)
  • 1 cup of milk
  • 1 cup of sugar
  • 2 eggs
  • 1 tsp ground cinnamon
  • 1/2 tsp nutmeg
  • 1/2 tsp ginger
  • 1/2 tsp salt

Top Layer Ingredients:

  • 1 yellow cake mix
  • 3/4 cup of chopped walnuts
  • 1 1/2 sticks of butter, melted

ingredients for a pumpkin dump cake

First mix together all the ingredients for the bottom layer. Pour into a greased, 9 x 13 baking dish or pan.
Your bottom layer will look like so…

making a pumpkin dump cake

Next you’ll want to spread the dry yellow cake mix over the top of your bottom layer (I just shook it out of the cake mix bag so that it covered the entire bottom layer). Then top the cake mix with the chopped walnuts.
Finally pour the melted butter all over the top layer. At this point your cake will look like this…

making a pumpkin dump cake

Bake in a 350 degree oven for 45-55 minutes or until golden brown.

It’s completely AMAZING served while warm… I’m also betting it would be delightful topped with a little whipped cream!

Happy Pumpkin Week Lovelies!!!
Don’t forget to come back on Friday to link up YOUR pumpkin posts!!!

Linking this here and here and .

P.S. Hope you enjoyed this post! If so, we’d love if !

No Bake Pumpkin Cheesecake

Since we have officially declared this last week of September, the first week of Autumn… as…

Let’s get things rolling today with one of my favorite pumpkin recipes!
No Bake Pumpkin Cheesecake!
(Get your very own Pumpkin Week Button here!)

No Bake Pumkin Cheesecake Recipe

The ingredients needed for Pumpkin Cheesecake are:

  • 1 8 oz. package of softened cream cheese
  • 1 cup of canned pumpkin (about half a 15 oz can)
  • 1/2 cup of sugar
  • 1/4 tsp of ground cinnamon
  • 1/4 tsp of ground ginger
  • 1/4 teaspoon nutmeg
  • 1 graham cracker pie crust
  • 1 tub of whipped cream topping

pumpkin cheesecake recipe

Quick Tip: Make SURE your cream cheese is REALLY soft! If not, it will make for a very lumpy cheesecake!

Combine all ingredients, minus the whipped cream in a large bowl. I used my KitchenAid mixer.

making a pumpkin cheesecake

Mix all ingredients together until fully combined. Now, fold in about half the tub of whipped cream topping. {Save the rest for cheesecake topping later on.}
Spread your cheesecake mix into the graham cracker pie crust.

pumpkin cheesecake recipe

At this point you can take cool cheesecake reflection pictures in your metal mixing bowl if your like me… 😉
Or just refrigerate your pretty orange cheesecake for at LEAST 3 hours. Otherwise, it’s really hard to get out a decent slice…

Once you do cut a slice, top with a dollop of the left over whipped cream topping and enjoy!

delicious pumpkin cheesecake

Happy Pumpkin Week pretties!!!
Don’t forget to get YOUR pumpkin posts together to link with us on the 28th!

Linking this here and here and .

P.S. Hope you enjoyed this post! If so, we’d love if !

Fruit Kabobs and Dip

Good morning lovelies! Or evening, afternoon, etc… wherever you are! 

This summer has been CRAZY hot in Arizona (where I live) and all over the country really… You know, record heat um, everywhere?!? I don’t know about you but when it’s hot I prefer a cool, easy to whip up treat over hours in the kitchen with the oven on….

So here’s one of my favorite summertime dishes….

Fruit Kabobs with a two ingredient fruit dip!
So easy and SO delicious!

summer BBQ ideas

So, like I said the dip…. TWO ingredients. That’s it!
1. A tub of Marshmallow Creme
2. 8 oz. cream cheese

Mix them together and chill before serving.

summer BBQ ideas

For the fruit kabobs all you need is kabob skewers and various kinds of fruit.
We used strawberries, grapes and blueberries.
As long as their super careful with the skewers, the kiddos can even help with this part!

making fruit kabobs
And viola! A tasty cool treat for your next summer BBQ!!

summer BBQ ideas

Happy what’s left of your summer lovelies!!!

Linking this here and here and .

P.S. We’d love if ! Thanks new friend!!

Chocolate Mint Dessert Bars

So… remember that one time I shared a recipe for Reese’s Pieces Bars? Let me jog your memory… Cake mix, Reese’s Pieces, so easy it was nutso… 😉 Well, when I shared that recipe I mentioned you could use other types of cake mix and candies to vary the recipe…

So today… I’m taking my own advice and making…

Chocolate Mint Dessert Bars!!! 

chocolate and mint dessert

 Ingredients: 

Chocolate Cake Mix (I used Devil’s Food)
1/3 Cup of Oil
2 Eggs
1 cup of York Peppermint Pieces!

making a chocolate and mint dessert

Mix all your ingredients together in a bowl.
The mixture will be fairly dry and hard to mix, but that’s what makes them bars, so don’t stress over that, just take your time. 😉 Once the ingredients are all mixed together, I fold in the candy pieces carefully so as not to smash them.

making a mint and chocolate dessert

Press your mixture into a greased baking pan.
Bake in a 350 degree oven for 12-15 minutes.

easy dessert recipe

Cut and serve! I like mine with a tall glass of milk! :)

Happy baking lovelies!!! 

Linking this here and here and .

P.S. We’d love if ! Thanks new friend!!


Butterbeer Cupcakes

Hi there pretties!!!

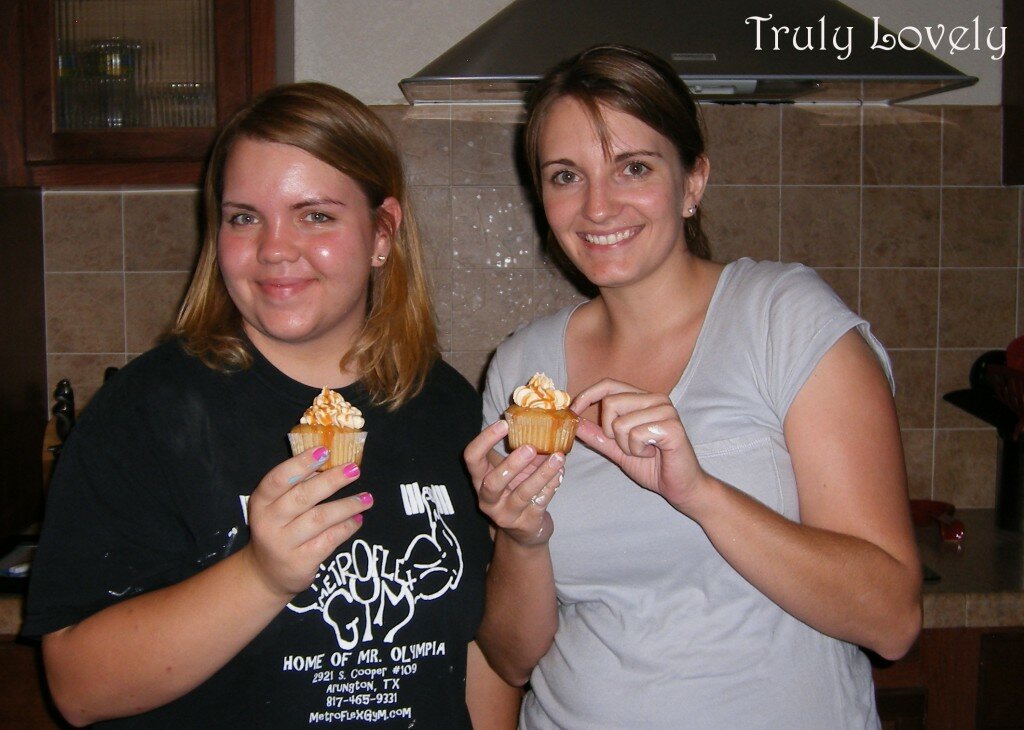
If you follow us on , you might have seen this post coming… I shared it over on Royal Daughter Designs last week! By the way, have you checked out her guest post yet? It’s a good one! Any who, Kayli was here a couple weekends ago and we, along with my SIL, Brianne and MIL, Tammy, made these AMAZINGLY delicious Butterbeer Cupcakes!

On a side note, don’t you think that pic pretty much sums us up?? Baking, then enjoying a delicious cupcake, all with paint on our hands from our current room makeover… 😉

We’re huge Harry Potter fans, so obviously, this scrumptious treat held a special place in our hearts…
That and they will rock your taste buds… just sayin…

Butterbeer cupcakes with butterscotch ganache and butterscotch frosting! 

We found the original recipe on Pastry Affair.

Butterbeer Cupcakes

2 cups flour
1 1/2 teaspoons baking powder
1/2 teaspoon baking soda
Pinch of salt
1/2 cup (1 stick) unsalted butter, softened
1 cup light brown sugar, packed
3 large eggs
2 teaspoons vanilla extract
1 teaspoon butter flavoring
1/2 cup buttermilk
1/2 cup cream soda

Preheat over to 350 degrees. Mix dry ingredients (flour, baking powder, baking soda and salt) in one bowl.

In another bowl combine butter and brown sugar. Add each egg one at a time beating as you go. Add vanilla and butter flavoring.

Fold in flour in thirds, then buttermilk, more flour, cream soda, finally flour. Fill cupcake liners 3/4 full. Bake for 15-18 minutes.

Butterscotch Ganache

1 package of butterscotch baking chips
1 cup heavy cream

Bring a saucepan of water to a boil, then place a glass pie pan on top (trick via Miss Kayli for easily melting baking chips!). Pour the baking chips and most of the heavy cream into the glass pie pan and stir while it all melts together.

Butterscotch Frosting

6 tablespoons unsalted butter, softened
1/4 cup butterscotch ganache (you’ve already made this FYI… 😉
1 teaspoon vanilla
1 teaspoon butter flavoring
Pinch of salt
3-3 1/2 cups powdered sugar
Splash of heavy cream

Beat the butter until fluffy then mix in vanilla, butter flavoring,  ganache, and salt. Start with 3 cups of powdered sugar adding more if you want a heavier frosting. Beat for about 2 minutes. Add heavy cream for fluffier frosting.

Assembling your butterbeer cupcakes!!! 

So, you’ll want to take each of your pretty butterbeer cupcakes and fill them with the butterscotch ganache!

making a ganache filled cupcake

Then of course, your cupcakes need frosting! With a little of the extra ganache drizzled on top, these make an amazingly delicious and oh so pretty treat!!!
There were 18 cupcakes when we were finished and by the end of the weekend they were ALL gone!

butterbeer Harry Potter cupcakes

 Thanks for baking with us today lovelies!!!

Linking this here and here and .

P.S. Hope you enjoyed this post! If so, we’d love if !

Happy Baking!!!

Patriotic Firework Cake

Hey dolls! Sorry so late with the post today… We had two yesterday since we announced the Sittin’ in the Sun Summer Package exchange, (have you joined yet?), so I’m a little behind today!

Do you realize Independence Day is next week! Yes! Already!

 Here’s a delicious and patriotic 4th of July Firework cake to help you celebrate!

Firework cake

To make this fun firework cake you only need a few ingredients. 
White cake mix and all the fixings called for on the box (eggs, water, oil {or apple sauce})
Red and blue sprinkles
Two round cake pans
White icing

making a 4th of July cake

 Mix up the cake mix like normal, then pour half the mix into each of your round cake pans. Add red sprinkles to one of the cake mix filled pans and blue sprinkles to the other.
Stir the sprinkles around so they spread throughout the mix. The color will probably bleed, that’s ok!

making a red white and blue cake

Bake according to the cake mix instructions. Allow your two cakes to cool just for a minute, admire the firework quality they already have… 😉 then turn them out onto a plate to cool the rest of the way.
Turning them out before they’ve cooled completely works the best, FYI… don’t wait too long!

patriotic cake recipe

 Once they’ve cooled, completely, stack and then ice in the white icing. Sprinkle some red and blue sprinkles on top. More in the center and less on the edges makes a nice firework affect… just sayin’… 😉

patriotic cake

Cut yourself and a friend a slice of delicious patriotic firework cake!
Again, admire the fun firework affect in the middle and eat up!

4th of July cake

Thanks for baking with me today lovelies! :)

Do you have any special Independence Day traditions?
Any patriotic treats on your menu this coming week?

Linking this here and here and .

P.S. Hope you enjoyed this post! If so, we’d love if !

Reese’s Pieces Dessert Bars

Hi friends! How about a Tasty Tuesday post today!
Here’s a SUPER easy dessert recipe I hope you’ll love! 😉

Reese’s Pieces Dessert Bars


Ingredients
: 1 Cake mix
(I use whatever is on sale. This time around it was Betty Crocker, yellow cake… You could also use a chocolate cake mix.)
1/3 cup of oil
2 eggs
Candy! The Reece’s Pieces are what MAKES this dessert I think, but you could also use M&Ms, etc.

When I said this was easy… I meant it.
All you do is mix your ingredients together… I mix everything else and then sort of fold in the candy…
Yes, I used that whole bag… Don’t judge… 😉

Once it’s all mixed together, press it into a cake pan and bake at 350 degrees for 15-20 minutes.
When it’s done, the edges will be golden brown if you use a yellow cake mix.

Slice into bars and serve!
My hubs’ isn’t a big dessert fan (weird, right!?!) but he likes this treat! Reese’s Pieces are his favorite!
Hopefully your family will like it to! 😉

Happy baking lovelies!!!

Linking this here and here and .

P.S. We’d love if ! Thanks new friend!!

Sunflower Peeps Cake

Happy Tuesday friends! It’s Kayli (:

So in the spirit of finally recovering from my Easter Candy hangover, how about a little something to put your leftover Peeps to good use?

This was actually our mom’s idea. She saw it in a magazine and thought it would be cool to try for Easter dinner. But I think it’s cute for Spring in general! Nothing screams Spring like some baby chickens in the form of marshmallows in the shape of a sunflower. Nothing. And in the event you don’t have any Peeps left after the holiday, (no judgment homie- sugar covered marshmallows are good stuff. I feel ya.) Easter is over and the price of candy always seems to go down dramatically once the big day is gone.

So here’s what you’ll need.

A cake mix

Chocolate frosting

A few packages of Peeps

A bag of chocolate chips

I started with a butter yellow cake mix. You can use whatever you want- but keep in mind you’ll need two layers- so the easier it is to handle the better. I stacked and frosted the cake with the chocolate frosting to get the brown for the center of the Peep flower. Then with a little help from my madre I put Peeps, tail out,  around the top edge of the cake.

I probably should have put them more on the top and less on the edge-we ended up having to anchor some of them with toothpicks. Which probably couldn’t hurt anyway… still cute and a little sturdier. But just for future reference. Also, feel free to take a moment and enjoy the Senior Picture wall in the background. Dang we’re cute…. But moving on. (:

Once we had the Peeps on and staked down, we filled the circle in the middle with chocolate chips to give it a little more of a sunflower look. And this is how it turned out!

It was freakin delicious. Just so you know. (:

Happy Eating!

Linking this here and here and .

{FOOD} Ten Weeks of Thanks: Week 9

Guys! It’s almost the end of my 10 week journey!


But it’s not over yet… (: So let’s talk about one of my favorite things EVER. Food.

Ahh glorious food. Here’s the thing, I’m a food kind of gal. Whatever I’m doing, unless it’s just something super exciting- I’d probably rather be baking. That’s something I inherited from my Granny- who was really who taught me almost everything I know about cooking. She showed me how to fry chicken and taught me how to rise dinner rolls. So I’m grateful for food because of that. Because it’s close to my heart. Because cooking is what has always brought our family together at the table. I’m grateful for farmers and ranchers, who grow and raise our food. I’m grateful food supports so many people, not just by sustaining them physically but by providing them with work. I’m grateful for it because nothing says “I’m sorry I was jerk face… my bad,” quite like a dozen cookies. That’s why I love food. It makes people happy. End of story.

Here are a couple of my favorite things to make and the links to them. (:

Next week is the FINAL week!!! The topic for next week is FAITH. What about your faith are you grateful for? Why?

Happy Wednesday friends! (: And happy eating!


Pizza Flag


This post is sponsored by Country Crock. I was selected for this opportunity as a member of , and the content and opinions expressed here are all my own.

If you’ve been hanging around Truly Lovely for very long at all, you’ll know I still consider myself a newlywed. As a new wife I am really enjoying all the little homemaking things that come with owning our first home and caring for my husband.
One of those things is cooking dinner.

The downside to cooking dinner… Hubs is a fan of junk food. Like pizza and wings every week kind of junk food…
I have really been trying to find new, healthier recipes to serve for dinner, but it’s difficult when he’d not interested in trying something of that sort… Enter the Clare Crespo Cookbook!

After downloading my free copy I discovered so many whimsical, step-by-step recipes that are sure to encourage healthier eating for your whole family! I’ll be honest… veggies are not a popular food in my house… But this cookbook which includes a little Country Crock in each recipe makes veggies into a fun and tasty meal that even the kiddos will enjoy!

The first recipe I attempted? Pizza. That’s right!
The hubs’ love of pizza combined with the healthier aspect of this dinner made this recipe a win win!

Ingredients for Pizza Flag:

6 ounces part skim mozzarella cheese slices
1 Tbsp. Country Crock® Spread
2 cups fresh spinach leaves, rinsed and patted dry
1 frozen pizza dough, thawed
1 cup Ragu® Pizza Quick Sauce
2  tomatoes, sliced in half lengthwise and cut into slices

This Pizza Flag (found on page 13 of the Clare Crespo Cookbook) was fun to make AND eat!
It wasn’t a difficult recipe by any means and the ingredients were all readily available at my grocery store.

Cooking the spinach in the Country Crock made my home smell delicious!! It was a simple and tasty way to add another vegetable to the pizza. More veggies is always a good thing, right!?!

How fun would it be to make this dinner with your family for the Fourth of July or Flag Day!?!
I used a toothpick to ‘draw’ out my stars in a slice of the cheese.

Once my flag was assembled I popped it into the oven (at 450 degrees) for about 13 minutes… Which… As you can see might’ve been a bit too long… But it still turned out delicious!!

And the hubs? When he asked me what was for dinner he sounded disappointed… Remember, he’s not a fan of veggies… But once he got home and tried it, he was impressed! He even said it was good and wouldn’t mind having it again!!!
Like I said, pizza + veggies + Country Crock = WIN WIN!!!

Did you know that 8 out of 10 kids think veggies with Country Crock are tasty?? It adds a little something that just seems to make everything taste better!

Are you looking for quick and simple tips and recipes to make serving veggies more fun? Download the free Clare Crespo Cookbook here for fun and whimsical recipes your family is sure to love!

Happy Cooking Lovelies!!!

Linking this here and here and .