Felt Jack O’ Lantern Treat Bag

JackOLanternPurse

This post was first shared over at Making the World Cuter last Halloween… I’m a contributor over there. If you’re interested you can see my other posts here.


One of my favorite holidays is right around the corner! As an October baby, I have always had a special place in my heart for Halloween. It could also be because my parents went out of their way to make it fun for me and my siblings…

So here’s a quick and easy craft to help you and your little ones get into the spirit of Halloween!

A Jack-o-Lantern treat bag!!!

DIY Halloween Treat Bag

Materials needed:

  • Felt – I used a sheet of orange and just a little bit of green (for the stem)
  • Clear plastic wrap
  • Scissors
  • Glue gun and a stick of glue
  • Yarn

FeltHalloweenPurse

First, you want to trace your pumpkin shape onto the orange felt. I just folded my sheet in half and traced on one side, then cut out my shape to have two sides of the pumpkin. You’ll also want two pieces of green for the stem. (I just cut two rectangles.)

Pumpkin Treat Bag

Felt Jack O Lantern

Next, you’ll want to draw on your Jack ‘o Lantern face. (The kiddos can help with this one, unless you’re making it as a Halloween surprise!) And cut it out with the scissors. You only want the face on one side…

Halloween Treat Bag

Because the other side needs a slit in the back so you can stuff goodies inside later on…

DIY Halloween Treat Bag

Now, cut a sheet of the clear plastic wrap, I doubled mine over for extra strength and hot glue it to the inside of the jack ‘o lantern side. This makes it so you can see through the face at the goodies in the treat bag! Trim any excess.

DIY Jack O Lantern Bag

Make sure the ‘stem’ is on the inside and hot glue your two pumpkin sides together, front to back. Glue shut all the way around.

While you’re waiting for the hot glue to dry well, take three strands of yarn and braid a strip for your ‘handle’.

Halloween Felt Bag

Hot glue your braided handle to the back of your pumpkin.

DIY Halloween Felt Bag

Now you can stuff your Felt Jack ‘O Lantern Halloween treat bag full of treats! Candy is always nice… but glow sticks, spider rings, and other small toys would be fun too!

DIY Halloween Candy Bag

For a fun new Halloween tradition, hang your treat bag on the kiddo’s bedroom door for them to find and enjoy! If you have a little doggie to guard the goodies until the kiddos find it… even better! 😉

DIY Halloween Treat Felt Bag

Your turn: Do you have any fun Halloween traditions that you do with your kids or family??

Happy Fall pretties!!! And Happy Halloween!

Check out where we link up on our Party With Us Page!

DIY Halloween Fabric Table Topper

Hey dolls! It’s been awhile since I shared a tutorial for anything… This baby momma business really changes the way you spend your time. :) And that’s perfectly ok with me! I love every minute of it… But I DO happen to have a sewing tutorial to share with you before Halloween rolls around! So here we go…

DIY Halloween Table Topper

The fabric for this table topper came from Joann’s. I chose four different Halloween fabrics for the top of my table topper and I used some purple fabric from my stash as the bottom. Then I cut a long triangle out of cardboard for my ‘stencil’.

Step 1: Cut three triangles of each Halloween fabric.

Halloween Table Topper Tutorial

Step 2: Sew each of the triangles together alternating the direction in which they’re pointing to keep a fairly straight strip of fabric. To do this I laid two triangles together one on top of the other. Have the designed face of the fabrics touching while the base of one triangle meets with the point of the other. {Hope that makes sense… If I can clarify something just let me know in the comments.}

DIY Halloween Table Topper 2

Then sew the two together, again, with the design facing inward you’ll be sewing along the underside of the fabric so that each of the seams is on the underside of the topper when you’re finished. The finished strip of triangles will look like so… This is the top side of your Halloween table topper.

Halloween Fabric Table Topper

Step 3: Trim down the two end triangles so that your top strip becomes an even rectangle.

Step 4: Cut a rectangle of your bottom fabric to match the top fabric (the sewn together triangles). Pin the bottom fabric and top fabric design faces together. In other words, pin them together insides out.

Sewing a Halloween Table Topper

Step 5: Sew around your two pieces of fabric, sewing them together. Leave a small opening so you can turn them right side out. Then sew the opening closed.

Step 6: Top stitch around the edge of your table topper. I did a zig zag stitch in bright purple thread to match my Halloween fabric.

Tutorial for a Halloween Table Topper

Step 7: Top your table with your new Halloween Fabric Table Topper! Preferably paired with a fun No Tricks Just Treats Jar! 😉

Halloween Table Topper

So tell me lovelies, have you decorated for Halloween yet? DO you decorate for Halloween? It’s one of my favorite holidays to decorate for! As soon as October 1st rolls around my decorations are out!!! 😉

Happy sewing and happy decorating!!!

Check out where we link up on our Party With Us Page!

Happy Halloween!!!

Happy Halloween lovelies!!!!
To celebrate one of my most favorite holidays, here’s a couple of the CUTE pumpkin photos I took of my friend, Meghan Jo’s baby boy!

He was an absolute sweetheart for these fun photos… Guess he felt really secure cradled in the pumpkin. :)

Such a sweet boy!

Have a SAFE and Happy Halloween friends!
Preferably with lots of candy! 😉

Halloween No Tricks Just Treats Jar

Happy Halloween Week lovelies!!!

Since Halloween is tomorrow, here’s a quick and easy craft you can whip up this evening!
A No Tricks, Just Treats Jar!
I made mine as a cute place to stash those candies that come unwrapped…
Things like candy corn. FYI – I love candy corn. :)

You only need a few materials for this cute craft!

  • Small jar with a lid (again, I chose one with a lid to store candies that aren’t wrapped)
  • Small sheet of black vinyl or stickers if you don’t have a craft cutter
  • Glow in the dark spider ring
  • Glue gun

 I designed my vinyl using my Silhouette SD software. The font is Chiller, a fun font for Halloween projects!
The spiderweb was a free shape in the software.

I cut my design out using my Silhouette SD, then used transfer paper to apply the teeny tiny lettering and the spider web, an intricate design, to my jar. Sure, you could peel and stick, but with something as small as this, it’s just WAY easier to use transfer paper!
{See all those teeny tiny cutouts for the web!!!}

To add another touch of cuteness/fun I hot glued a spider to the lid of my jar, after applying the web.
I just cut the ring part off the spider then glued it down. {Like I did with these spiders}

Next, fill your cute treat jar with cute treats!!!! 😉

Happy Halloween friends!!!!

Linking this here and here and .

P.S. Hope you enjoyed this post! If so, we’d love if !

Princesses, Ghostbusters and other Halloween Favorites!

Today we’d like to introduce you to our XL and Large Ad Sponsors!
October’s Sponsor Spotlight theme is, of course, HALLOWEEN!!!!

You’ll find each of our sweet friends has shared a Halloween photo and a few fun Halloween interview answers! Take a sec, see what you have in common with these lovelies and click over for a quick hello!
____________________

Amanda’s costume shown here is her as Phedre from the Kushiel series by Jacqueline Carey. Costume inspiration from here.
Blog | | | |

____________________

Blog | |

____________________

Blog | | | | Shop

____________________

What was your favorite candy to get while trick or treating?
We had a neighbor that made popcorn balls… LOVED them!!!

Roasted Pumpkin Seeds

Actually this should be called The Roasted Pumpkin Seeds that Weren’t…
But we’ll get to that…
So, one of the things I love most about carving pumpkins is getting to roast and enjoy the pumpkin seeds.
After years of attempting to get it right, I think I’ve almost got it…

how to roast pumpkin seeds

It’s simple enough in theory… Cut your pumpkin open. Clean the pumpkin guts and seeds out separating the seeds as you go.

Once your seeds are separated, soak them in a bowl of water for a few hours.

Swish them around a little to get the rest of the pumpkin guts off.

Then lay them out to dry at LEAST overnight.

FYI – They roast 100% better if they’re dried out!

Then to season your pumpkin seeds, use about a tablespoon of melted butter, and your seasoning of choice. I prefer garlic salt…
Mix the seeds, seasoning and butter in a bowl until they’re fully coated.

Lay them out on a baking sheet. And bake for about 25 minutes at 325 degrees.


Here’s the key though…. stay in the KITCHEN. Keep an eye on those suckers….

Because apparently… it’s really easy to burn them if you don’t pay close attention and stir them once in awhile…

Just keepin’ it real! 😉
Like I said… I’ve ALMOST got it right….

What’s your favorite pumpkin seed seasoning???

Halloween Puffy Paint Pillow Covers

Glow in the dark pillow covers

So the month of October is admittedly my favorite…
My birthday was last week, Pumpkin Spice lattes are back and Halloween is right around the corner!
Before October even rolled around I already had my Halloween stash out and scattered all over the house! Turns out though, I don’t really have all that much in the way of decorations… Needless to say I was pumped when I received a fun set of Glow in the Dark Puffy Paints via iLoveToCreate to try out!

I don’t know about you, but glow in the dark screams Halloween decorating to me! 😉

materials for Halloween pillowcases

Materials Needed for Halloween Puffy Paint Pillow Covers:

  • Glow Puffy Paints
  • 1 yard of black fabric
  • Glow in the dark spider rings
  • Glue gun
  • Scissors
  • Sewing Machine

{If you don’t want to sew your pillow covers, you could easily purchase some pre-made from the craft or department store.}

I always use this tutorial when making simple envelope pillow covers. I made two 16′ pillow covers so I cut and measured my fabric accordingly and pinned the two sides and seems.
Then I sewed the top and bottom edges of my pillow face so I would know where to paint on my Halloween pictures.

pinning an envelope pillow cover

For pillow cover #1 I decided on a spiderweb. I used the Gray Glow Puffy Paint to freehand my web. Drawing (in this case Puffy painting) a spider web is fairly easy. Start with several crisscrossing lines, like so…

making a spider web with puffy paint

Then draw paint curved lines between each of your crossed lines… Like so….

Halloween Spider Web pillow

For pillow cover #2 I hand wrote the words Happy Halloween using the Orange Glow puffy Paint. Each of my pillow faces were left to dry overnight… The Puffy Paint dries in four hours according to the package, but I wanted to be on the safe side.

Each pillow received a couple of glow in the dark spiders… I just cut the ring part off each spider ring, then hot glued them where I wanted them.

The final step was sewing the sides of my pillow covers closed then flipping them inside out. I stuffed a 16′ pillow inside each one and viola!

Glow in the dark Halloween pillow covers! And more fun Halloween decorations for casa de Kassi!

You can find all kinds of fun craft supplies and ideas at iLoveToCreate!
Find them on , and as well!

Disclosure: I received the product mentioned as part of a campaign via iLoveToCreate and The Blue Print Social. As always the opinions shared are 100% my own!

Check out some of the other fun ideas shared through this campaign below!


Halloween Spider Web Candles

Halloween is now less than a week away!
Here’s a quick, easy Halloween craft for those last minute decorations!! 

Spider Web Candles


I bought two white candles at Wal-Mart. 
Then used my Silhouette SD to cut out two spider webs in black vinyl. 
The spider web is another FREE shape included with the software. 


Carefully stick them onto the candles and smooth all edges. 


Done! Quick and easy! And so cute!


What are you scaring up these last few days before Halloween lovelies?? 

By the way… I am guest posting over here today! 
It’s not my usual crafty post either… This time I’m talking….
MARRIAGE!!! Hope you’ll stop by and say hello!

Linking this here and here and .
P.S. Thanks to Kara for letting me share this here first! :)

Girlie Skull and Crossbones Jack-O-Lantern

Halloween is nearly upon us!!! Only a week and a half away now! 
It’s one of my favorite holidays! The candy, the decorations, the costumes!
Carving pumpkins, though, has to be the ultimate Halloween activity. :)

A couple of years ago… 
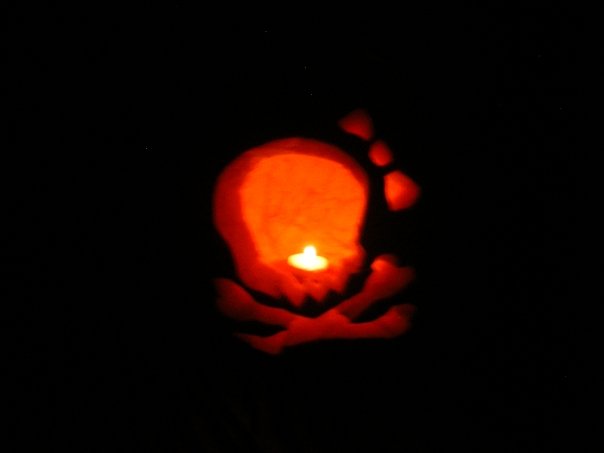
Before this Truly Lovely blog, my college roommate, Charli, and I carved up a lovely pumpkin. A Girlie Skull and Crossbones Jack-o-Lantern, or Jill-o-Lantern as it were, with a hair bow! :)


Isn’t she fabulous!
We found a picture we wanted to imitate online, blew it up on the computer and printed it out. 
Then we traced it with a pencil onto our pumpkin and cut it out. 


Definitely an easy and fun way to get a unique Halloween Jack-O-Lantern!


It’s still one of my favorites from Halloweens past! 
What about you?? Are you carving pumpkins this year?? 
Do you have a favorite method for getting a fun Jack-O-Lantern?

Linking this here and here and .