Shutterfly Wedding Save the Dates

I love Shutterfly… We use them for our Christmas cards every year and I am always pleased with the quality and look. I just found out that Shutterfly also does Save the Dates!!! For real, pretty personalized wedding stationary that you can order online and have shipped right to you OR have them ship directly to save you a little wedding planning stress!! Every bride I know needs less stress, so that’s a win and a lovely Save the Date card to make your wedding day more memorable for you and your guests… WIN WIN! The card shown below, a 5X7 Scallop Trim Save the Date is one of my absolute favorites!

ShutterflySaveTheDate (1)

I am dying over their entire large design collection! They are a high quality card that come with matching white envelopes. You have the choice of a flat, ¾ fold, or tri-fold format. Then the sizes you can choose from, 6×8, 5×7, 4×8, 5×5, 4×5, are all perfect for grabbing your guests’ attention when they arrive in the mail.

ShutterflySaveTheDate (2)

Did you notice that you can add a little something to the back as well! An engagement photo, your names, both! Love that you have that extra space to share something with your guests!

ShutterflySaveTheDate (5)

Another little detail I am really digging is the Foil Stamped Designs like the Save the Date wording on the card above. Really makes it pop!

ShutterflySaveTheDate (4)

Shutterfly’s save the date cards come in several trim options:

ShutterflySaveTheDate (3)

The ticket trim like those shown above are so classy! What trim option would you choose for your Save the Date Cards??

Did you send Save the Dates for your wedding? I think it’s important to give your guests a heads up and I love that you can do that with these Shutterfly cards all while expressing your personal sense of style!

Disclosure: This is a sponsored post on behalf of Shutterfly. As always the opinions I share here are 100% my own. If I didn’t really love it I wouldn’t share it with you. ;)


Fun Wedding Ideas from Wedding Bonanza 2013

Now that #weddingbonanza2013 is past I thought it would be fun to share a few photos and a few of the fun wedding ideas I gathered from the experience. I had two consecutive weekends in September that I was honored as a bridesmaid for two of my closest friends. The first wedding, for my friend Charli, took place in NM, a three hour drive from home.

Charli's Wedding

FunWedding Idea #1: Charli (the bride) booked a local salon for the entire morning of her wedding day. She and each of her bridesmaids spent the morning getting our hair and makeup done. They had lunch delivered, sandwiches, chips and drinks from a nearby deli.

Fun Wedding Idea #2:  The mother in law of the bride sent champagne, spiced cider and chocolates to the salon for us to enjoy while we were getting ready!

Fun Wedding Idea #3: Caitlin, a fellow bridesmaid, gifted each of us with a shirt to wear while getting wedding ready. Each shirt was a white button up that she prettied up with our first initial in rhinestones on the front shoulder and the word ‘Bridesmaid’ in rhinestones across the back. Charli had a special Bride shirt with zebra print cuffs.

Fun Wedding Idea

Fun Wedding Idea #4: The bride chose pretty pink dresses for the bridesmaids from Macy’s Juniors Section. They were even on sale and dresses that we will actually be able to wear again!!!

Fun Wedding Idea #5: Our bridesmaid gifts from Charli were CUTE personalized makeup bags (that she got on Groupdealz!), pretty rose wine stoppers and turquoise necklaces to wear during the wedding.

Mortensens

Nate, Kassi and Klara – Charli & Garrett’s Wedding


The second wedding for my friend, Kayce, took place on South Padre Island, TX.

Fun Wedding Idea #6: Instead of a rehearsal dinner they planned a rehearsal dolphin watch cruise. Maybe you can’t host a dolphin watching cruise, but the fun could be in doing something unexpected after your wedding rehearsal instead of just a plain old dinner!

dolphins in south padre

Fun Wedding Idea #7: I was lucky to be able to take my sister, Kayli, with me to both weddings. Klara is only two months old so Kayli went as my “wedding nanny” and took care of Klara while I was doing my bridesmaid duties. If you have young children, and the wedding is kid friendly, it might be a good idea to take someone along to watch the kiddos so that you can be fully engaged in being there for your friend, the bride. My husband was at both weddings as well, but he couldn’t come until later for the first wedding and was the best man in the second, so it was nice to have Kayli there the whole time.

weddingnanny

Fun Wedding Idea #8: Kayce gifted her bridesmaids with a pretty silk robe for getting wedding ready and a black bead necklace to wear during the wedding. Again, gifts that you can use again are always a good idea!!!

wedding'

Fun Wedding Idea #9: Make sure you plan a ride to the wedding venue for the bride and her bridesmaids… We were ready to head to the ceremony when we realized we didn’t have a ride!!! I had to call my father in law who had rented a van while we were on the island to come and get us! But it did make for a funny story later…

Overall, both weddings were completely different in style and location but they were the same in the love shared for the couples and their families! Each wedding was beautiful and fun in its own way. I am very honored to have been a part of both of them.

Your turn: Did you have anything unexpected happen during your wedding?? {Like realizing you didn’t have a ride to the ceremony… haha}

Granny’s Wedding Quilts

Have we ever told you what an amazing woman our Granny was?
I’m sure we’ve told you about how she taught us to bake (both of us), to love to send and receive letters, how to grow things, to embroidery, how to sew and craft.
How she is one of the people in my life that I am most thankful for.

My husband, me and Granny at her 90th birthday party!

But one thing we haven’t shared about her was that she was a quilting extraordinaire! I remember watching her embroider and stitch each quilting square, then piece them together in her sewing room. I remember being at her house as just a tike and strangers would stop by to pick through her stack of baby quilts and purchase them as gifts or for their own kiddos.

Our sweet Granny passed away in 2010, but she had the foresight to make and leave wedding quilts for each of my mom’s children.
While I was home this weekend, we dug them out. Each one wrapped in a bag with our names on the one for us and our future spouse.

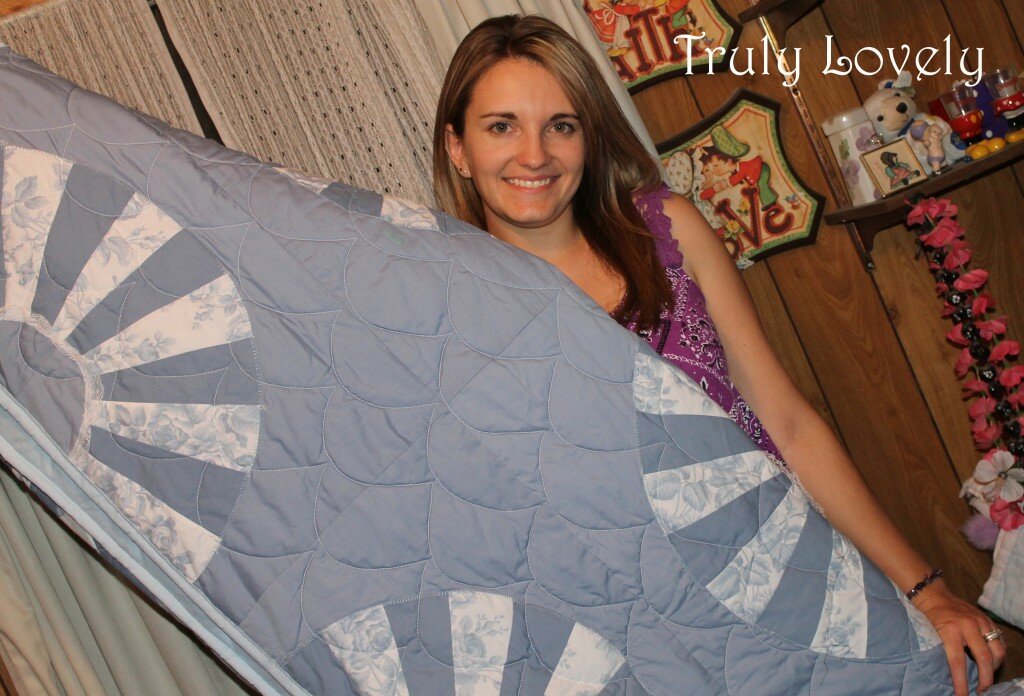
Blue Fan Wedding Quilt

She took such great care with these quilts. Mine has a blue fan pattern with lace around the middle of each fan.
It’s large enough to fit nicely on a queen sized bed.

In the corner of each quilt is a fun ‘Specially Created by Grandma‘ tag.
I vaguely remember her ordering these and showing just the tags to me once after they’d come in. She had said at the time, she couldn’t find any that said made by Granny, so these would do. (Granny is what everyone called her as opposed to grandma.)

sewing tags

I’ve been married over a year now and have my married home all set up… so I got to bring my wedding quilt home with me.
It’s a gift that my husband and I will treasure forever. A gift that my sweet Granny made and thought to leave even though she wouldn’t be here to give it to us herself. She instead left it in the care of my momma knowing that it would be shared when the time came.

My brother just got married in August, so we got his quilt out and shared it with my sister-in-law, Jessie. They are currently working on settling down, so until they have their permanent home ready she’s decided to leave it with my mom. A safe place to keep it until they’re ready to take it to their married home.

And just for fun, we got a picture of Kayli and her future wedding quilt! Someday when she’s married we’ll get it out again and pass it on from my Granny to her and her future husband.

My hope is that I can live to leave a legacy like my Granny did. A legacy that lives on even after I’m gone.

Linking this here and here and .

Sponsor Spotlight – Bethani of Cheers, Bethani

Well hello Saturday!!! So glad you’re here! 😉
Today we’d like to share our lovely friend 
with you!
Like , Bethani is a large ad sponsor here at Truly Lovely and THIS is HER feature weekend!
Bethani’s Favorite Date – “The perfect date for me is always dinner and movie (I mean we did that as our first date after all).  We love watching movies, so anytime we have a chance to watch one we love to. Whether it’s going downtown for a quick bite then a movie in an old fashioned theater or grabbing take out sushi and watching a movie at home together it’s perfect for us.

Looking for more fun date ideas?? 
Check out t and where our other AMAZING sponsors shared their favorite dates as well! :) 

Miss Bethani runs the shop, Cheers, Bethani on Etsy
Getting married this year?? You’ll definitely need some of these pretty , personalized with YOUR wedding date!

OR how about these cute with YOUR wedding date! 
Think of the things you could tag with these pretties!!! 

I actually used these exact tags on the gifts I gave to my bridesmaids for my wedding in July 2011. 
They’d be great to attach to handmade items from your Etsy shop as well… 
*wink, wink*

A HUGE THANK YOU goes out to Bethani for being a FANTASTIC sponsor of Truly Lovely! :)
Hope you’re having a FANTASTIC weekend! 

Handkerchief Pillow Covers

We used turquoise and pink handkerchiefs as part of our table centerpieces in our July wedding. See…

You can see them on the tables here while Kayli is about to give her toast. 😉

I wanted to come up with an idea to reuse them after the wedding, and this is attempt number one!

I used two handkerchiefs for each pillow cover and two 16 inch pillow forms. 
I started by cutting one of the two {for each pillow} handkerchiefs exactly in half. 
I pinned and then hemmed the inside edges of the two halves on my sewing machine. 
Then I pinned the two halves to the other full, uncut {for each pillow} handkerchief. 
I slightly overlapped the two halves to make the envelope backing of the pillow cover. 
Once they were pinned, I sewed the two handkerchiefs {one halved, one full} together around the outer edge using my sewing machine. 
Flip the sewn pillow cover inside out and iron. Then stuff with a pillow form. 
On one of the pillow covers I added a ribbon to tie the open edges closed just for some added interest. 
I simply sewed it to one side, cut slits in the other side and tied it through in a bow. 
And there you have it!!!
Two handkerchief pillow covers with sentimental ties to my wedding day!

Happy crafting lovelies!!! 


Linking this here and here and .

Wanna cookie, sugar? Er…sugar cookie…?

Hello loves! It’s Kayli! 
So…. I don’t know if you know this but… I’m sort of a party animal. I really can’t be tamed. Quit laughing, I’m for real. 
IF by party you mean chilling with my Nook, a bag of pretzels and some Nutella, it’s true. I’m wild. 😉 

 I really did PLAN a party once though. It was a bridal shower! 
I was pumped because it’s all food and games and catching up with everyone. I’ve been to a few bridal showers- so I knew the protocol. Cupcakes, some toilet paper, women walking around with clothespins clipped onto their clothes…. no biggie. 
I wasn’t really up for baking and frosting 3 dozen cupcakes though. 
So the Sugar Cookie Bar was born!

{All spread out.}
So I started with a super delicious, easy sugar cookie recipe. 
But you can use yours if you want. Whatever slides your toboggan.
  • 2 cups of sugar
  • 1 cup of butter
  • 2 eggs
  • 1 tsp baking soda
  • 1/2 tsp baking powder
  • A pinch of salt
  • 1tsp vanilla
  • 1 tsp nutmeg
  • 3 cups of flour
I refrigerated the dough overnight so I could put them in the oven in the morning and they’d be ready in time for the partayy. 
I pulled them out of the fridge, and baked them for about 10 minutes at 375 F.

Once you get your baking rotation going, let each batch cool for a bit and then put them on wax paper, then put more wax paper on top and stack. This will keep your cookies in good shape while you wait for guests and are serving the food and what not.

Now for the bar part! Beforehand I went out and bought all kinds of candy. Gummy worms, Gummy bears, Pieces Candy, Sour Patch Kids, all that fun stuff. Just whatever catches your eye! 
Then I opened up a few cans of frosting. 
(I might be becky homecky but I am NOT superwoman homes. If you ARE super woman, feel free to whip up a few flavors yourself, but count me out- I’ll be at the other end of the table “opening” the potato chips. 😉

{My kind of bar!}
And that’s it! 
The rest is up to your guest and the strength of their sweet tooth!

Happy Eating!
P.S. In case you were wondering, the bride we showered that day IS living Happily Ever After. :)

Lovely Stationary

This post brought to you by Hello!Lucky. All opinions are 100% mine.

Hello lovelies! 

Let’s detract from all things completely drenched in holiday for a moment while I share a fun site with you!

If you’ve been following this blog for very long you’d know I married my sweetheart in July. 

A HUGE part of planning for our wedding was the stationary. Save the dates. Invitations. Thank you notes.
At the time I really wish I would’ve known about Hello!Lucky. They have some of the most beautiful and classy wedding invitations that I have ever seen! And any theme you could imagine really. 

Our wedding was set out in the mountains, under some towering pine trees. 
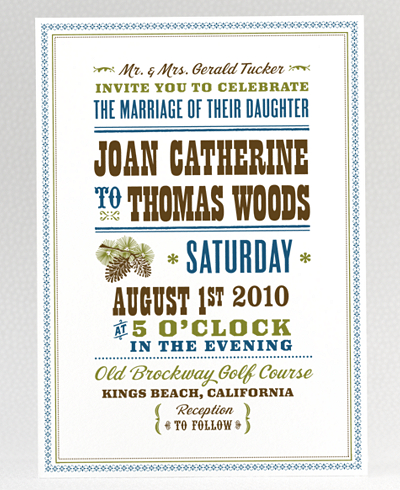
The Tahoe Rustic invite with it’s pine cone details would’ve fit with that perfectly. 

There’s even a whole set of stationary that matches! Save the dates, menus, RSVP cards!

The Tahoe set is a digital design, but they also have several beautiful letterpress wedding invitations
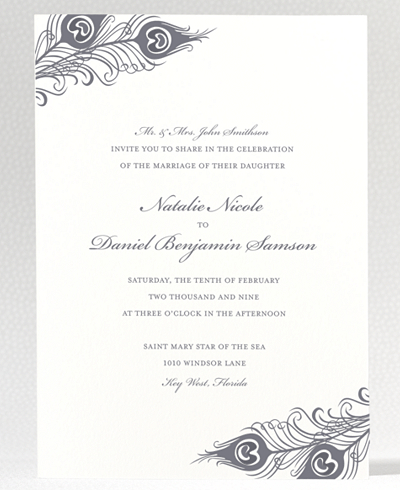
For example, this lovely Antoinette letterpress set would’ve fit my friend Vicki’s peacock wedding theme perfectly. So classy!!

Hello!Lucky has baby announcements, that are ABSOLUTELY adorable. 

They also do holiday greeting cards if you haven’t purchased yours for this year yet!

There’s gorgeous personalized stationary if your looking for a gift for that hard to buy for person this season!

As far as pretty stationary goes, they pretty much do it all!

If you happen to pop over and check them out be sure to come back here and share your favorite designs! 
I would love to hear what you would choose!

Lovely Little Gift Boxes

How about a tutorial on making lovely little gift boxes today?
I’ve BEEN so anxious to get this post together for you guys!!
So, finally… here you go! 😉

I made these little lovelies to hold a surprise for each of my bridesmaids for my wedding back in July. 


Each of the girls, myself and my wedding day coordinator all received an aqua chrysanthemum necklace purchased from Brittany at . 
You should definitely check out her shop! 
Such little pretties to be bought!! :) 


I used my absolute favorite crafting mechanism EVER, my Silhouette SD 
(which battles it out with my sewing machine for top spot…) 
to cut these box templates from heavy scrapbook paper. 


I used the free box template that came with my Silhouette SD software. 
You know, by using the free shapes, I have only actually purchased about three things!! 
Anyway…


Once you pull the shape from your cutting sheet, it looks like this. 
The box shapes are really easy to fold up into little boxes. 
I used Elmer’s Glue Spots on the inside tabs to hold the boxes together. 


Once I had them all folded up I cut several small pieces of white tissue paper to fill the inside of the box and keep the necklace from rolling around. 


I cut several pieces of left over zebra ribbon from to add some fun to each of the boxes. 
The Elmer’s Glue Spots came in handy to hold those in place as well!


Next, I used my Silhouette to cut out a flower shape for each box in it’s coordinating color. 
Once the flowers were cut, an Elmer’s Glue Dot was applied to the back. 


I just pulled a few petals up gently so they looked a little more “alive”, not in the literal sense of course… 
haha
Cute, right?!? But they still needed a little something….


Some Acrylic Jewels and some more Elmer’s Glue Dots!!! 
Each box got it’s own little sparkly center. :)


They made the perfect finishing touch to my bridesmaid gifts. :) 
I gotta say… I was pretty proud of myself with these!
ALL of the materials were things I already had in my craft stash!!! 


Happy crafting lovelies!! :)
Linking this here and here and .

Fancy This Fridays #37

OK dolls!!! It’s Friday once again!!!

The is STILL open! 
I’ve decided to extend it through this week’s Fancy This Fridays, so you have two chances to get your links in! 
The giveaway will be closed at midnight on Sunday, same time as the linky party. 
The winner will be drawn and announced in the Double Feature post (since there wasn’t one this week) on Monday! 
Comments for the giveaway will only be counted on . 
So please go there to enter after linking here of course. :)

So… How was your week??? 
One evening Mr. UPS Man stopped by to deliver us this lovely…


I am SO excited!!! The mister not as much… but he has yet to realize our new treasure’s potential! 
Did I ever tell you I have some of THE most AMAZING sisters in law? Well, I do. I’m lucky like that. :)
This was our wedding gift from two of them. Thanks Steph and Arina!!! 
I don’t know if they even read this blog… Pry not… haha. 

Anywho…. 

Time to link up lovelies!!!

Here’s the Fancy This Fridays Party Rules!!! 

1) Must be YOUR OWN project (we’ve had a few sharing other people’s stuff… That’s awesome, but we wanna see what YOU did!)
2) Must be linked to that project’s specific post within your blog,
not the blog itself
3) Grab our party button so others can party too!
4) Share some linky love with the other participants, by visiting and commenting on their projects as well! We ALL love comments!!
(And it would be SUPER COOL of you to say your stopping by from the Truly Lovely or Fancy This Fridays link up!)


Thanks for linking lovelies and for entering the giveaway! 
Good luck!!


Easy Fleece Blanket Tutorial

Hey pretty friends! 
You might have seen this tutorial floating around blog land awhile back…. I hadn’t posted it here yet because it was a SECRET!!! Why a secret you ask?? Because I made these for my bridesmaid gifts for our wedding!!!
So today I’d like to share the tutorial for an easy fleece blanket that makes a great gift! Especially for a bridesmaid or two!
The materials needed are:
2 yards of fleece fabric
1 package of coordinating satin blanket binding
Coordinating yarn
Coordinating sewing thread
Pins
Yarn Needle
Scissors
Sewing Machine
In this case I went with zebra fabric and all red coordinating materials.
First trim your fleece fabric of any uneven edges or those funky white labeled edges… You know what I’m talking about… :)
Then, using the Yarn Needle, stitch your thread down the two length sides of your fabric like so… I spaced each stitch about a half an inch apart…

Next you’ll pin and trim your satin binding to the two width sides (the two shorter sides)… The binding will have a fold down the middle, simply line that fold up with the edge of your fabric, making sure it’s centered so there’s an even amount of binding on both sides…

binding a blanket

Fold over the edges of the binding to make your four corners and pin those as well. You can either trim or fold the extra binding inside to make your corner.

pinning binding on a blanket

Once you have the binding pinned onto both sides, get out the sewing machine. I used red thread to match the binding…

If you sew really well, you can use a varying color of thread for added pop!!!
I don’t so much… SO matching thread hides my inexperienced sewing skills. :)
(I’m a little addicted to zebra print… can you tell?!?)

sewing binding

Simply sew the binding to the fleece pulling pins as you go.

And TaDA!!!! A SUPER EASY fleece blanket made by you!
They make great baby gifts, or gifts for friends or family!! :)
And most especially, GREAT Bridesmaid gifts!!!

zebra print blanket

You can see… I made six of these blankets, then each blanket was rolled up and tucked inside a personalized tote bag for each of my lovely bridesmaids for my wedding a few weeks ago!

personalized tote bags

For the personalized tote tutorial, you can . :)

Have a lovely rest of the week!

Happy Sewing!!!!