Halloween Spider Web Candles

Halloween is now less than a week away!
Here’s a quick, easy Halloween craft for those last minute decorations!! 
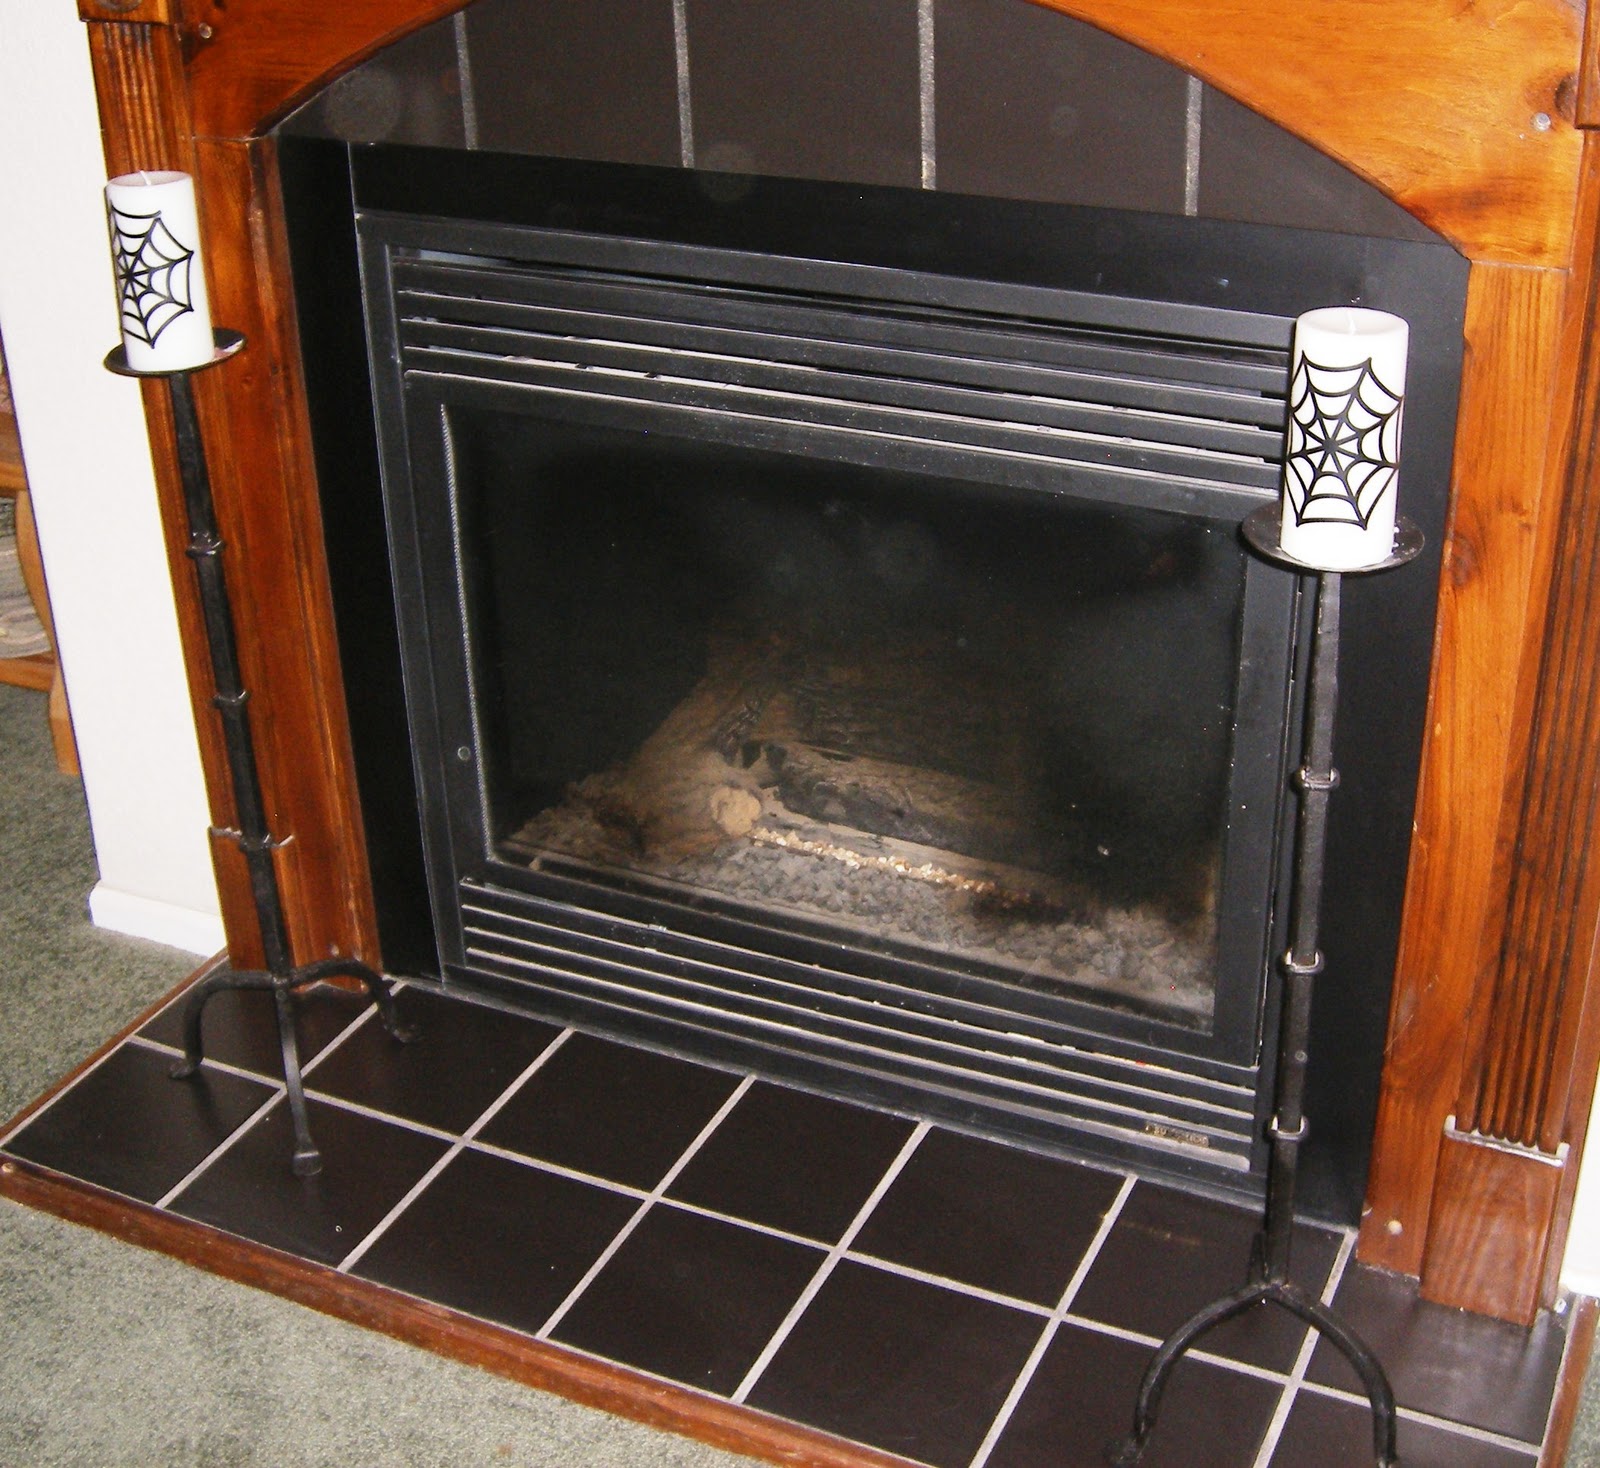
Spider Web Candles


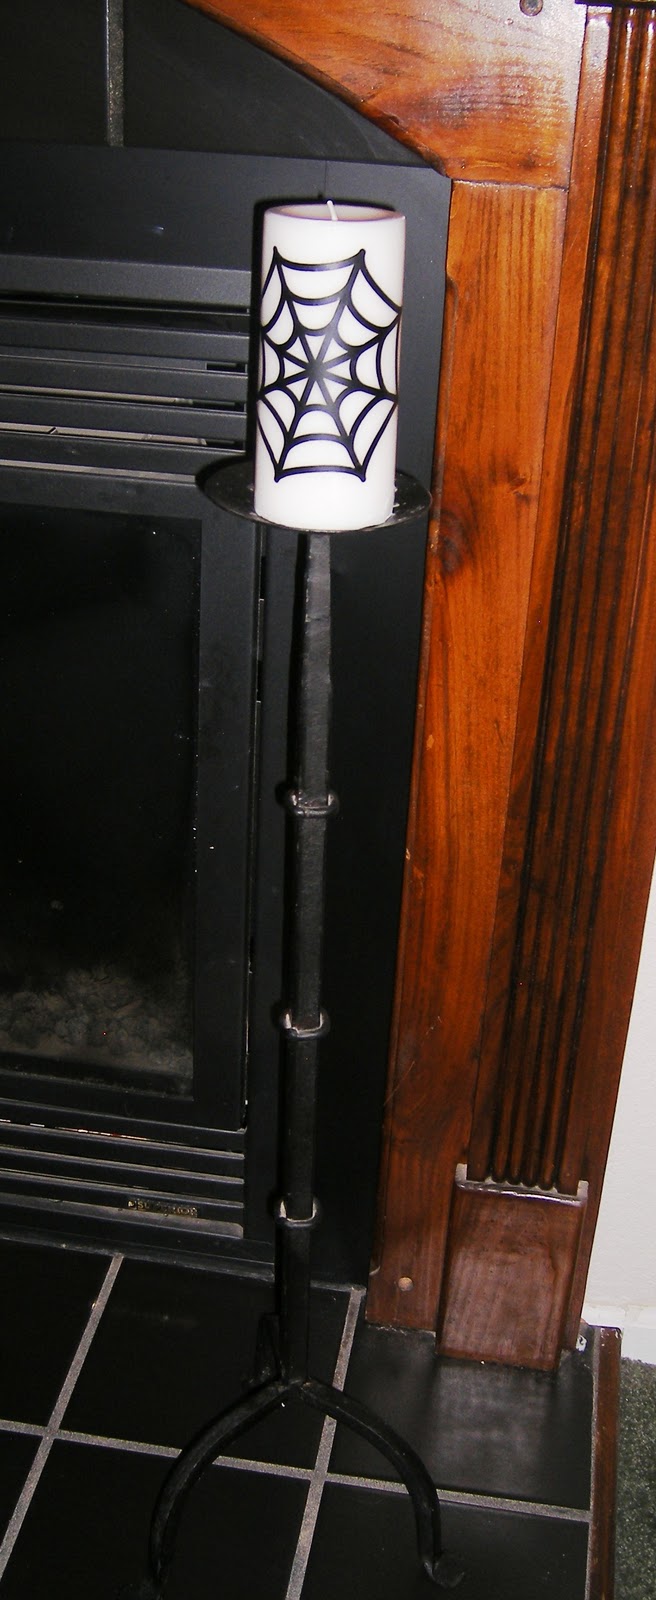
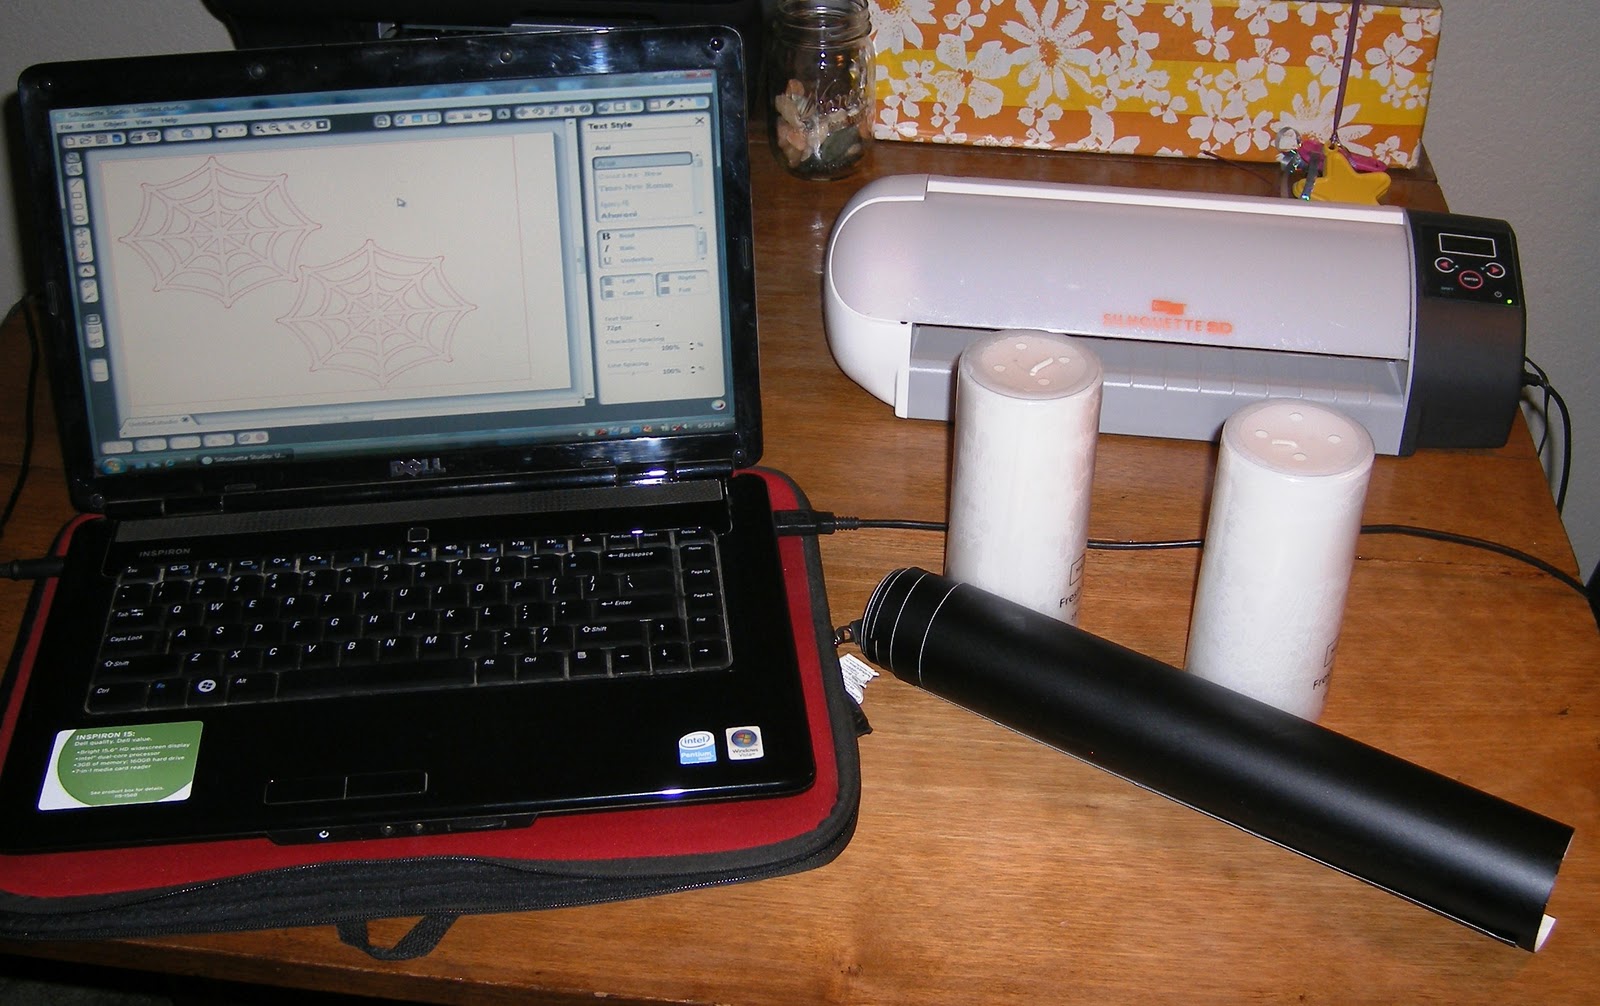
I bought two white candles at Wal-Mart. 
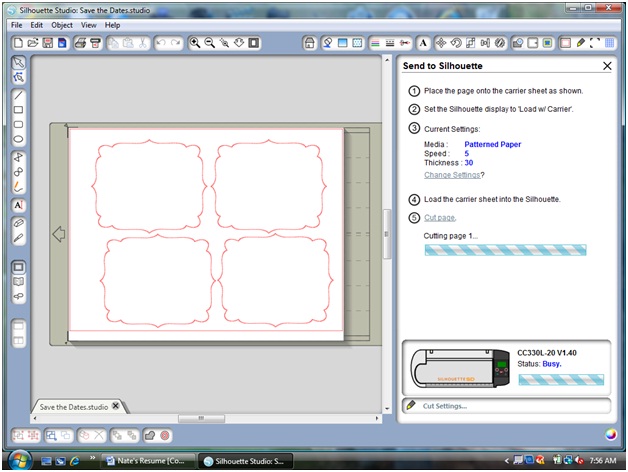
Then used my Silhouette SD to cut out two spider webs in black vinyl. 
The spider web is another FREE shape included with the software. 


Carefully stick them onto the candles and smooth all edges. 


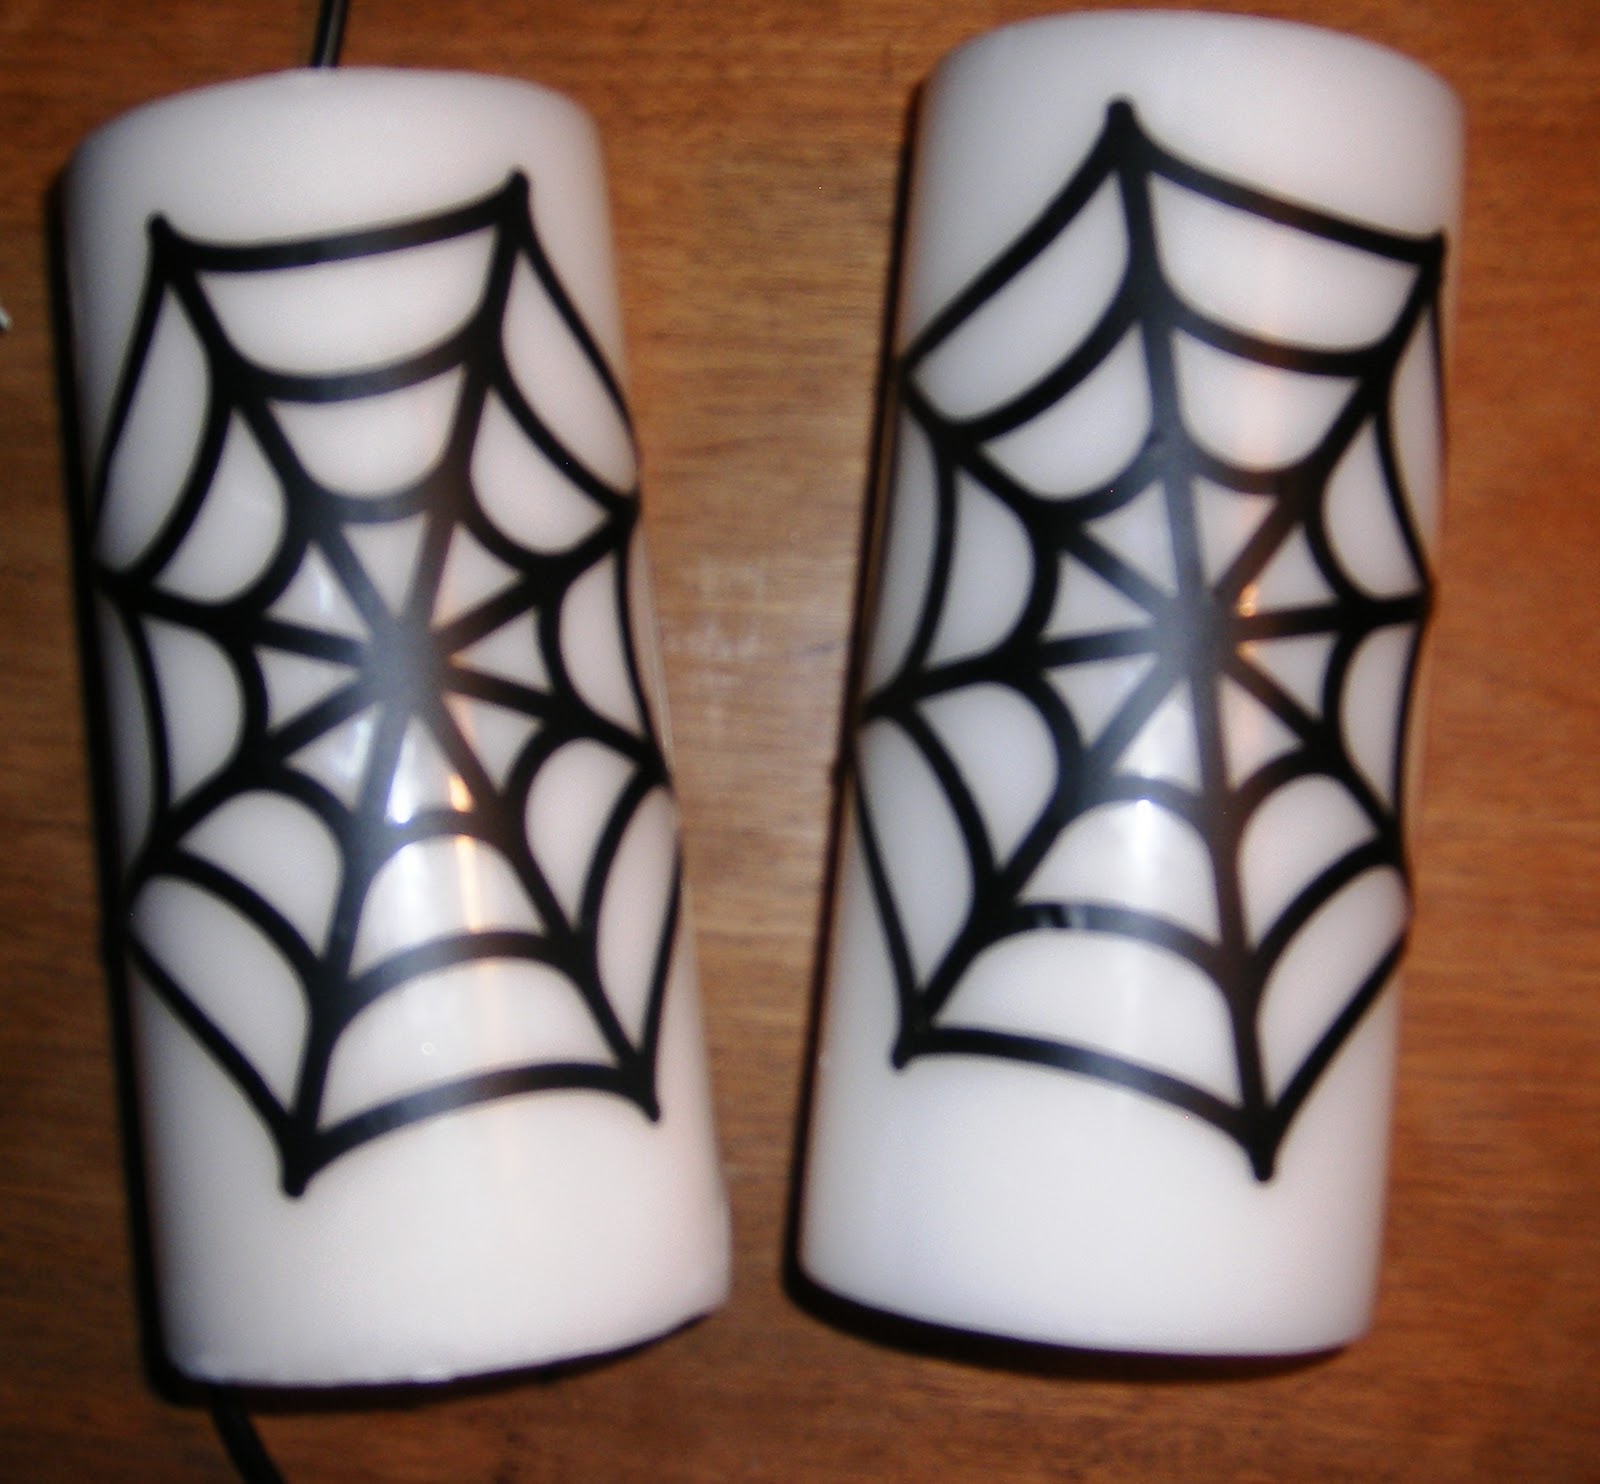
Done! Quick and easy! And so cute!


What are you scaring up these last few days before Halloween lovelies?? 

By the way… I am guest posting over here today! 
It’s not my usual crafty post either… This time I’m talking….
MARRIAGE!!! Hope you’ll stop by and say hello!

Linking this here and here and .
P.S. Thanks to Kara for letting me share this here first! :)

Painted Pyrex

Hello friends!! 
A couple weeks ago my sweet friend, the new Mrs. Knight, got married. 
The same sweet friend who did MY hair at my wedding!
So I wanted to make her something special for a bridal shower gift. 


She had a set of Pyrex bake ware on her registry… 
But naturally, they needed a little Truly Lovely spiffying up. 😉


This was a project that plagued me for weeks.
I had two FAILED attempts before I found something that worked, and turned out the way I wanted.


First… Don’t buy this stuff. It doesn’t look like glass etching at all.
More like gunk just globbed on there. Unless that’s the look you’re going for of course…
And it my case it wasn’t… So off it came!

Second… If you’re going to paint glass… You have to be very careful and very patient.
Otherwise it leaks and streaks and just looks yucky.
Those pictures up there really don’t even do justice to the craft fail that they actually were… haha.


Mrs. Knight’s kitchen and home in general has a western/country look and feel to it.
Her kitchen is red and brown.

So, in the method that worked out the way I wanted, I used brown glass paint and Silhouette cut vinyl stencils to add her new last name to a set of Pyrex dishes. 

What saved me SO much time and trouble was using a foam sponge (makeup dept.) to dab the paint onto the glass dishes instead of using a paint brush. 

Foam sponge and after math of my other attempts… :)


I also used the stencils as the INSIDE of the letters so that it didn’t have to look so precise. This is one of those projects where exact perfection isn’t going to happen… BUT that was perfect in this case leaning toward my rustic-y theme.

Following the directions on the paint I used, I let the painted dishes dry for several hours, then cured them in the oven. 


In the end… I really like them! 
I think they have a rustic-western-y quality to them. 
Plus, they’re different, and personalized. Can’t go wrong with that! 


All wrapped up and ready to be boxed and sent to the bridal shower! 
Mrs. Knight says she likes them too! 
Guess all that crafty trial and error was worth it!
P.S. I’m sharing a quick and EASY Halloween craft over here today! 😉
P.P.S. Linking this here and here and .
P.P.P.S… I am sharing my picks from the Take a Look Tuesday party at Sugar Bee Crafts over here today too! :) Check out Mandy’s blog by the way… I LOVE it! :)

Vinyl + Tile = Booth Sign

Remember in having a Scentsy Booth at the County Fair?
Well, here’s a quick little lovely I crafted up to display at my booth. 


Materials needed:
A tile from my local Home Depot (they cost less than $1)
Purple Krylon spray paint
White vinyl 
(Did you know the vinyl you can purchase at Wal-Mart for the Cricket machine works just lovely in the Silhouette SD? You just gotta trim it down to size.)
And a small tabletop easel

I spray painted the white tile with a couple of coats of the purple paint. 
(Purple for Scentsy of course)
Cut out the wording in the white vinyl using my Silhouette SD.


Then using transfer paper applied the lettering to the tile. 


By the way, if you’re interested in hosting a Scenty Catalog/Online party to earn FREE Scentsy products, let me know! We can ship all over the U.S. and Canada, so you can host a party anywhere!

See the sign? There toward the left corner of the picture.
And speaking of the County Fair… 
How cute is my niece, Taylor, showing her VERY first lamb! 
She won THIRD place in the fair and was able to sell her lamb at the auction. 
We were all VERY proud of her! 


Well done Miss TayTay!!! 

Have a lovely day friends!!!

My Stashe Jar

Did you know, Miss too?
I’ve talked about before…
And we’ve shared some projects from my Pinterest like .
But today, how about a Kayli pinned project??
How fun is this that she pinned?
Our inspiration…
The end of a foam paint brush… 😉
Then I just stuck the mustashe on… Smoothed it out… And viola!
Kayli’s very own My Stache jar!
The pink matches her bedroom at college!!
I think she likes it. 😉
Happy crafting lovelies! And happy pinning!!!
By the way… a follow too! 😉
Linking this here and here and .
AND
P.S. Linking this to The CSI Project as our Most Viewed project of 2011!
Visit thecsiproject.com

My First Vinyl on Glass Experience

Have you heard of Groupdealz yet? 
If not, you should just go ahead and go sign up. :)
I’ve gotten some great deals on some really fun items through their daily deal email alerts! 

One of my recent purchases was a Wedding Day Subway Art Vinyl Decal, 
a $20 value for ONLY $10!

*My Treehouse Treasures
I ordered my vinyl in black and patiently waited for it in the mail! 
Meanwhile, I bought a floating glass picture frame from Wal-Mart, also in black. 


When the vinyl arrived, I sat down to apply it to the glass… And realized it was a little harder and took a little more patience than I’d thought.
First, peeling of the backing without tearing the intricate lettering took awhile… 
And it was a large sheet, so it was kind of hard to place it on the glass, centered, all at once. 
But I finally managed. :)

Then came the problem of getting it all smoothed out. 
But once it was done… 


I LOVE IT! 
I am planning to use it on  the guest book table or somewhere as a decoration for the wedding… 
But for now it’s sitting on our less than exciting… but hoping to get better mantel. 😉


So… What do you think? Should I include an engagement picture of the mister and I behind the letters?
 I could do one in black and white?
Or leave it as is? 

Thanks to the it’s now 25 days away, 
instead of four… 
That means more time for lovely little wedding projects! 
See there is an upside!

Hope you’re having a FABULOUS week! :) 

Bride Tote Bag {Silhouette}

Well hello there lovelies!!!
Apologies for the lack of crafty posts here lately…
I have been crazy busy trying to get the paperwork together for our new home financing… YAY! :)
And I’ve been SUPER busy working on wedding planning…

So THANKS so much for sticking with us through this busy time!!!

As of today we are 101 days away from our June wedding!!!
Wedding Countdown Ticker
If you’d like to follow my wedding planning in more detail,
I have a ‘just for the wedding’ blog over here. :)

A wedding craft that I did just for me, just for fun, was my Bride Bag!

Every bride needs a handy little bag to carry around the wedding planning essentials!
So…
I am so excited to be able to share my Bride Bag tutorial with you today!
Materials Needed:
  • Plain Tote
  • Sticky backed Vinyl or other stencil
  • Fabric Paint
  • Iron on embellishments (I used my wedding flowers, daisies)
  • Cute little craft iron… Or a regular iron will do 😉

    (All these materials were Christmas gifts from my sweet sister, so thanks Miss Kayli for gifting me some awesome craft supplies!!)

First, I used my new Silhouette SD (Christmas gift from the hubs-to-be) to cut out the lettering, “Kassi’s Bride Bag June 2011”.

Next, I pulled the cutout lettering away from the vinyl sheet.
This became the stencil.
Then I peeled the backing off of the vinyl and stuck it to the tote.

*Tip Sticky backed vinyl is great because once the backing is removed you can stick it onto pretty much anything and it’ll last long enough to work as a stencil.

The only fabric paint I had at the time was puff paint… but that wasn’t the look I was wanting for my bag… So I improvised…

I just used a small paint brush to brush the puff paint onto the stencil… I used pink and turquoise paint, my wedding colors of course!

It took a few coats of the puff paint to get it dark enough on the black tote to pop, but once I got those coats on, I just left it to dry overnight.

The next morning I simply peeled the vinyl stencil from the tote and walla, insta-tote wording!! :)

To spice it up a bit, I ironed on a few daisies (my wedding flower of choice) using my nifty little craft iron! (Again, thanks Kayli!)

The next, and final step is to fill your new Bride Bag with all the wedding planning essentials!!

In went my wedding planning notebook, wedding ring brochures, hand written guest list draft, and our engagement pictures CD.

I literally carry this bag with me everywhere I go!!
At less than four months til the wedding, it’s so nice to have everything I need right on hand in my handy little Bride Bag!

 This picture was taken by my Maid of Honor, Miss Kayli of course, after a LONG day of trying on wedding dresses!!!
As you can see, it’ll wear a girl out! 😉
But the Bride Bag in tow means less stress for the bride-to-be!!!
Now it’s YOUR turn…
We would love for you to share any wedding planning or overall marriage advice! We can use all the help we can get! 😉
P.S. I’m linking this to the Spring Themed CSI Project!!
What’s more Spring-y than a Bag for a June Bride!! :)
 Visit thecsiproject.com

And here…

Tile Coasters

I recently took on a fun project!
I copied a status from someone else on Facebook to my own status… Basically it said,
“First 5 people to comment on this status get a handmade gift from me.”

I ended up allowing for two more, so seven handmade gifts in total.

The first two are finished, I decided to make them the same thing…
Cheap, easy, but super fun and way cute!! Tile Coasters!

I’ve been seeing these all over blogland. I initially saw them here at Mostly Food and Crafts where Danielle made some sweet Holiday coasters…


So I decided to take this idea and make my own.

The materials needed are:
  • 4 square tiles (I bought mine at Home Depot for $0.14 each)
  • Scrapbook paper (about half a sheet for each set of coasters)
  • I used my Silhouette SD for the cutting, but you could use any stencil or hand cut the designs yourself…
  • Hot Glue Gun
  • Modge Podge
  • Foam brush
  • Modge Podge Sealer
  • Scissors
  • Sheet of crafting felt
I think in total the materials only cost me a couple of dollars
for each of the 2 sets of coasters that I made.

I made the first set of coasters for my friend, Katie.
I LOVE personalized things and TYPOGRAPHY, so I chose to use her name for one of the coasters.
And I used a cup with a straw from the free designs that came with my Silhouette.


I followed the same steps for the second set of coasters for my friend, Tess, except I used her name and the free wine glass that came with my Silhouette.

This is the screen shot of Katie’s cutouts on my Silhouette screen.
I simply measured the tiles, decided the size I wanted for the squares, inserted the cutouts and then printed/cut the page onto the scrapbook paper.


Next I used the foam brush to brush a layer of Modge Podge onto the two tiles, then took my cutouts and placed them in the center. I let those dry for about 15 minutes.


I brushed two layers of Modge Podge over the top of the cutouts on the tiles and allowed those to dry for 15 minutes each in between coats.


Once the second layer was dry, I sprayed two layers of the Modge Podge Sealer over the cutouts and tiles. Those dried.

For my last step, I cut out strips of matching felt and hot glued those to the bottoms of two of the tiles. The bottoms of the tiles are rough, so they felt serves as a protective barrier between them and the table surface they get placed on.


For the bottoms of Tess’s coasters I cut out a full square of white felt.
This last week I saw where Jennifer of Green Door Designs used a full square instead of strips and I liked the look!!


Here’s Katie’s coasters!! :)
What do you think??
I think they turned out so lovely!
Great for my first attempt! haha!


And here’s Tess’s coasters!!!


Sorry for the glare on that one…

And here in use…

Now they will each have a set of their very own, personalized coasters!


I wrapped each set up in ribbon and tissue paper….


I found these perfect little boxes at the Post Office…


And they are on their way!!!

Two handmade gifts down! Five to go!


 P.S. I’m linking this project up to the CSI Project!
This week’s this is Typography!!
Go here to link your Typography projects!
Visit thecsiproject.com

And here…

Save the Dates with My Silhouette

I promised last week to share the Save the Dates that I’ve been working on… Guess what!? They’re done!!
About 3/4 of them are even addressed, stamped and sent out!!!
There’s about 40 or so that still need to be addressed and sent, but we’re almost completely done with that wedding planning duty! :)
I had magnets printed at the print shop in the building where I work.
I think they turned out lovely. And SO me and Mr. M.
We used one of my fave engagement pictures taken by
Treehouse Photography.
What do you think??
I also purchased some square envelopes from the print shop…
Did you know the USPS has a MINIMUM mailing size! They do!
You cannot mail a letter smaller that 5″ by 3″ through the post office.

News to me.. but anyway…

That being the case… I didn’t think sticking JUST the magnet in a bigger than I wanted envelope was very classy…

So don’t laugh… But my initial thought was this…

I know… Cutting out backing by hand for 125 Save the Dates was NOT my brightest idea.. Luckily I only cut a few before coming to my senses and realizing this would be a perfect SILHOUETTE project!!

I bought a fun frame shape from the online store…
I actually got 4 frame shapes for $0.99 so that was awesome!!
Then I figured out the size I wanted and that four of that size would fit on a page… This is a screen shot of my page…
Then I used my handy dandy Silhouette to cut out 125 of those shapes in different colors.
I had some trouble getting the correct cutting settings set up…
I used textured scrapbook paper purchased for $5 a book from Wal-Mart.
Since my paper was textured I finally used the Patterned Paper setting and that worked like a charm!

 Here you can see the four shapes cut from one sheet of scrapbook paper. To get the paper (the large square sheets) to fit in my Silhouette, I just trimmed them down with scissors.

I used double sided tape to secure the magnet to the backing paper.

Easy peasy! 😉
And they look much classier with some pretty paper backing, then just stuck in an envelope by themselves. I think anyway…
I know it was extra work to do this project than I could’ve gotten away with, but this is my wedding!
 A one time thing… My thoughts are to add as many extra details and nice touches as I can handle!

The funny thing is that the blogging world is giving me the inspiration to go ahead and add those extra details… Things to turn a plain ol’ project into something extra lovely!
So thanks to all you lovelies for helping me go the extra mile! :)
P.S. Linking up here…