St. Patrick’s Day Burlap Wreath with Monogram

I guess I’m just in a wreath making mood… 😉 Did you see my Valentine/Spring wreath? Well here’s my St. Patrick’s Day wreath for March!

StPatricksDayBurlapWreath (1)

I followed this . I looked on Pinterest and found a couple of methods but that one looked the easiest and it worked fine for me! You can get the green burlap from any craft store. They even have it at Wal-Mart. I used a roll and a half because that’s what I had, but you could use more and make it fuller.

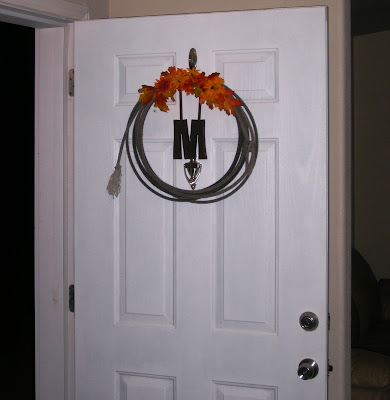
I got the M from the Wal-Mart craft section and painted it with Extreme Sparkle paint in Emerald. Love the glittery look! I embellished it with a few clover stickers, also from Wal-Mart in the cards section.

StPatricksDayBurlapWreath (2)

The whole thing took me less than an hour to make including drying time on the paint. Yay for quick wreaths and a rainy day project!!!

StPatricksDayBurlapWreath (3)

Do you decorate for St. Patrick’s Day?? I’ll be honest… this is my only decoration so far!! 😉

FYI, we’re linking this to these fun parties.

Rustic Valentine’s Day and Spring Interchangeable Wreath

Friends!!!! I’m still here, I know it’s been a LONG time, but sometimes, life just happens and the blogging doesn’t. But I am BACK today with a craft for you!

We have moved again, long story, ask me about it sometime, but long story short, we’re in a new place for awhile and our pretty red front door needed a wreath! Since Valentine’s Day is right around the corner that’s what I went with…

ValentinesDayWreath (6)

Materials needed:
Wreath form
Burlap ribbon
Pink Handkercheif
Scissors
Glue Gun
Flowers
Not pictured: Twine, scrapbook paper, alphabet stickers, glue dots

ValentinesDayWreath (1)

Step 1: Wrap your wreath form in burlap ribbon. I wrapped mine twice because you could see the form through the ribbon with just one layer. I also glued each end on to make sure the burlap stayed put with hot glue.

ValentinesDayWreath (2)

Step 2: Create your wreath hanger with the pink handkerchief. I just cut a strip from the square and glued it to the wreath form, then tied a bow at the end so it would hang from my wreath hanger correctly. Then I reinforced the glue with tacks to make sure it held.

ValentinesDayWreath (3)

Step 3: Embellish your wreath with flowers. Again, YAY for hot glue! I just glued each of my flowers to the wreath form.

ValentinesDayWreath (4)

Step 4: This was where I had planned to be finished initially, but decided the wreath needed a little something more to make it more holiday centric and just finished. 😉 So I cut some little pendants out of pink scrapbook paper with my Silhouette, tagged them with some black alphabet stickers and made a little LOVE banner! I strung it across the wreath with pink twine (glued the pendants on with glue dots) and gold tacks.

ValentinesDayWreath (5)

Step 5: Since I’m all about multi-purpose these days, especially after moving twice in three months… Less is more! I made a SPRING banner using blue scrapbook paper and different pendants that I can change out on the wreath after Valentine’s Day!

ValentinesDayWreath (8)

So tell me? What have you been up to these last few months?? Comment below with the link to one of your favorite posts as of late… I can’t wait to catch up with everyone!!!

FYI, we’re linking this to these fun parties.

Happy 4th of July! Plus a Pennant Rope Wreath

HAPPY FOURTH OF JULY LOVELIES!!! 

I hope you’re enjoying the day with your family and friends!

I wanted to share my patriotic wreath with you dolls today, just for fun…

Fourth of July Door

Here’s my front door – one patriotic rope wreath, two flags from Wal-Mart and a cute doggie later. 😉

To make the rope wreath I used one of the hubs’ old discarded ropes. I’ve talked about them before here.
Then I used some old denim jeans and some red/white bandanna paisley fabric to make the pennants.

denim and bandanna fabric

You can see my “pattern” in the above photo. I just cut a triangle out of cardboard then cut around it through the fabric.
I placed two pieces of denim for one pennant then two pieces of the paisley front to back to make each of the alternating pennants. Then I sewed up the sides leaving the top quarter inch on each side un-sewn.

sewing denim pennants

I used some red cord and sewed the top of each pennant closed with the cord towards the inside. See the photo above.
I sewed a hanger from the paisley fabric, wrapped it around the rope and sewed it closed by hand.

That’s it! Super easy and fairly quick!

Denim and paisley pennant rope wreath

Please ignore the scratches on the door… They’re from my barbed wire wreath…
Guess the door needs .

Enjoy the rest of your Fourth celebrations friends!

Linking this here and here and .

P.S. Hope you enjoyed this post! If so, we’d love if !

Make it Merry – Unique Wreaths

Hello lovelies!!!
Hope everyone had a BLESSED and yummy food filled Thanksgiving!!!
Today it is my pleasure to be a participant in Make it Merry!
My topic… Wreaths & Door Swags!
Please be sure to visit the other participants as the festivities roll on! 
You can actually click over to their blogs through this image by the way!


nifty thrifty things the blue velvet chair homework project possessed meridian road modern country style home sweet homemade Jill Ruth & Co. Rustique Art hello lovely inc. Decor to Adore Ladybird Ln


OK, so wreaths… Wreaths are always a HUGE part of the Holiday season!
ANY season really… Especially if you tend to mingle in blog land!
There are a ton of great wreath ideas out there!
But what I would like to share today has to do with the main part of your wreath and making it unique!


You can use just about anything to make a fun and unique wreath! I’ve always been a fan of taking an idea and making it your own, so here are a few unique wreath ideas to get you started!!!


Here at Truly Lovely, I like to use my husband’s old discarded team ropes!


My

--> -->


My


There have been several Christmas ornament and yarn ball wreaths floating around blog land, but here’s one that combines BOTH elements!

Source: via on


OR! How about a wreath made completely from CANDY!!!

Source: rubberstampingdiva.com via on


Got an old picture frame just hanging around??? 😉

Source: via on


Want a unique wreath while recycling at the same time??
Check out this wreath made from reused tin cans!!

Source: ripegreenideas.com via on


Or how about a wreath made from materials purchased at the hardware store!?!
Something like this metal wreath would be fun!

Source: soyouthinkyourecrafty.com via on


You can click on each of the above images to be taken to my Pinterest and then onto their subsequent links. 


I definitely think a FRAME wreath is in my Holiday future!! 
How about you? Any other unique ideas for a fun wreath??? 
Please, share the links in the comments, or do tell! 
I’d love to hear what you come up with!!!


HUGE thanks to Diane of Home Sweet Homeamade for putting this together and inviting me to participate!!!

P.S. The Shabby Apple Dress Giveaway is ! :)

P.P.S. If you’re here to link up Fancy This Fridays is open below!

Christmas Rope Wreath

The Holidays are upon us! I wanted to make a Fall wreath but when I went shopping for the fall flowers and leaves to put on the wreath, the stores here have already switched to Christmas! There was no orange, yellow or brown to be found! So instead I got some Christmas flowers and began focusing on a Christmas Wreath!

I made the wreath using one of my fiance’s old greenish colored ropes and the Christmas flowers I bought. I simply coiled the rope to form the round wreath and tied it using some brown twine/string stuff that I found at the house. Then I used the twine and a little bit of glue from the hot glue gun to attach the flowers and leaves atop the rope.

The “pine” needles added a fun touch I think! I realize it’s a little early for Christmas decorations since we just made it past Thanksgiving, but I couldn’t resist hanging it on the front gate to see how it looked.

That’s Ziggy in the background. She liked the wreath I’m sure! :)
It was such an easy craft!! It didn’t even take a full hour… But still turned out really nice! And it adds a rustic holiday spirit to the front of our house, don’t you think??


P.S. I linked my festive Christmas Rope Wreath to these fun linky parties!!! Check them out and link up your ideas too!!! :)

Join us Saturdays at tatertotsandjello.com for the weekend wrap up party!