Personalized Hanging Bow Holders

It’s been a long while since I’ve shared a DIY or tutorial here on le blog… So it’s about time for one don’t you think?? That’s what happens when you become a first time mommy and the rest of life completely takes over. 😉

Way back in August, a month after my girl was born, she had a ton of cute bows, flowers, barrettes, etc. and no real place to put them. Especially a place where I could easily see them and pick one to match her outfit. So, I decided to make her very own bow holders. Plural because one just wouldn’t be big enough for all the pretty hair accessories this girl had already collected!

Personalized Hanging Bow Holder by Truly Lovely Blog (1)

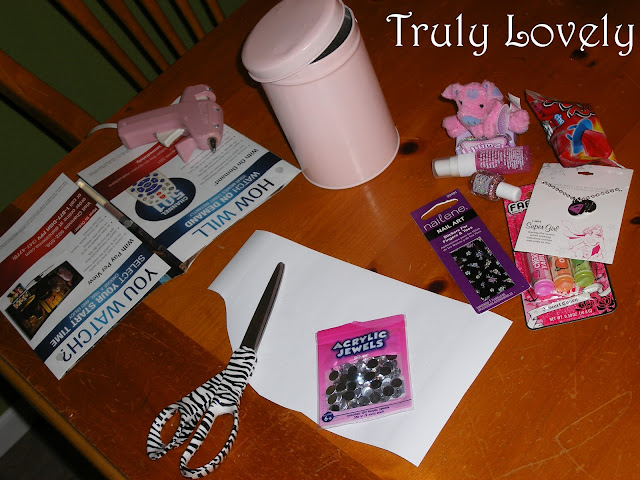
The materials needed include:

  • Wooden Craft Plaque (I used two purchased from Hobby Lobby for $2.99 each)
  • Craft Paint
  • Paint Brushes
  • Vinyl (for the personalization, I cut Klara’s name out of white vinyl using my Silhouette machine)
  • Glue gun and glue sticks
  • Ribbon
  • Flat head thumb tacks
  • Craft rhinestones

Personalized Hanging Bow Holder by Truly Lovely Blog (2)

Step 1: Paint your wood craft plaques. I painted mine pink and purple with brown accents to match the other colors of Klara’s bedroom.

Personalized Hanging Bow Holder by Truly Lovely Blog (3)

Step 2: If you’re like I was at the time, take a moment while your plaques dry to enjoy your sleeping baby and a cup of tea… oh… and the drying laundry hung over the dining table chairs. You do what you gotta do as a new mommy, right?! 😉

Personalized Hanging Bow Holder by Truly Lovely Blog (4)

On a side note can we just take a minute and sigh over how tiny my girl was at one month old!!! She’s nine months old now and there’s no way she’d fit in that cute little bed anymore, much less stay in it… haha

Step 3: Once your plaques are completely dry, add the vinyl lettering for the names. I chose to use Klara’s first and middle name. Again, like I mentioned above, I cut out the names in white vinyl using my Silhouette machine and then applied them using transfer paper.

Personalized Hanging Bow Holder by Truly Lovely Blog (5)

Step 4: Hot glue a strip of ribbon to make a loop on the top of each plaque for hanging. Then hot glue three strips of ribbon to the bottom of each plaque for the hair accessories. After I hot glued the ribbons I added the flat head tacks for added support. I just really wanted it to hold up well. {Side note, so far it has! 8 months + later and there are WAY more hair accessories on them now!} The ribbon I used was a cute set of cowgirl ribbon, to match Klara’s bedroom theme, also purchased from Hobby Lobby.

Personalized Hanging Bow Holder by Truly Lovely Blog (6)

Step 5: After hanging them up as they were at this point I decided they lacked sparkle and hot glued three rhinestones to each plaque to fancy them up a bit… Much better! Then just hang on the wall and had your hair pretties!

Personalized Hanging Bow Holder by Truly Lovely Blog (7)

Your turn: Do your girl(s) have tons of hair accessories? How do you store or display them?

Check out where we link up on our Party With Us Page!

Every Cowgirl Needs a Horse

It’s a known fact. Every little cowgirl needs a pony of her very own. Our little cowgirl is still a bit too tiny to have her very own real horse… Even though she’s already made her first ride with her daddy on his…

Klara's First Horse Ride

BUT I found a fun way for her to have her very own horse to enjoy until she’s old enough to have the real thing. Or at least old enough to ride her bouncy horse… 😉

A horse wall sticker from Icon Wall Stickers.

Horse Wall Sticker

They have all kinds of fun wall stickers to choose from including several different horse stickers. I was able to choose the sticker I wanted for Klara’s wall, the size I wanted and then the color. I chose this Galloping Horse Sticker in the small size and nut brown color.

When it arrived it was on one large sheet… I was nervous about applying such a large sticker to the wall, but the instructions included made the process quite easy.

Step 1: Tape the four corners of the sticker with masking tape to the wall. You want the see through side facing out and the more opaque side against the wall. Tape a strip of masking tape through the middle of the sticker to serve as your anchor point.

applying a large sticker to the wall

Step 2: Remove the tape from one side of the vinyl. Peel the back off the sticker to the middle (to the anchor tape). Cut the backing off as close the anchor tape as possible.

applying a large vinyl to a wall

Step 3: Smooth the sticker onto the wall using a credit card to remove any bubbles. It’s best to work from the middle out.

Horse Wall Vinyl

Step 4: Repeat steps 2 and 3 on the other side of the sticker.

Step 5: Carefully peel away the top clear paper leaving your fun new wall sticker in place.

Little Cowgirl Bedroom

Now Miss Klara has her very own horsey on the wall of her bedroom/nursery. I hope to share more of the room with you sometime soon. Including those hair ribbon holders you can just get a peek of in some of these photos. :) It’s a little cowgirl theme and the horse was a perfect addition.

The sticker itself was easy to apply, especially with the instructions that came with it. A word of caution though, our walls are textured so it took some time to really get everything smoothed out so that it would adhere to the wall. But once it was finished it turned out really nice.

Your turn: Do you have a theme for your child’s nursery or bedroom? What is it?

Disclosure: I received the horse wall sticker from Icon Wall Stickers in exchange for this review. As always opinions shared here are 100% my own!

Turkey Pillow Cover

Cute pillow covers for the holidays, and just in general, have kind of become my thing as of late… Making the pillow cover itself is super easy, especially if you use this Envelope Pillow Tutorial that I always use from Marissa at Rae Gun Ramblings. I made a western welcome pillow and a team roping pillow cover for everyday, then I made puffy paint Halloween covers for Halloween of course… Which brings me to the next holiday on my list, Thanksgiving.

Thanksgiving throw pillow

I initially made this turkey pillow cover last November, but missed getting around to posting it before Thanksgiving 2011.
{Thus the horrible pictures for the tutorial steps… so please be forgiving of the blurriness.}

To make your own turkey pillow you’ll need:

  • Turkey body stencil
  • Turkey feather stencil
  • Fabric for your pillow cover (I use half a yard for a 16 inch pillow, following the tutorial mentioned above)
  • A few different fabrics for your feathers (I got a 1/4 yard of four prints that I thought looked fall-ish)
  • Fabric for your turkey body (I used brown)
  • Googly eyes
  • Glue Gun
  • Sewing machine

To make the cute turkey I designed the body on my Silhouette software using ovals welded together. Then I designed a turkey feather shape just modifying an oval to have sort of a feathery point. I cut those shapes out on vinyl to make my stencil.

I cut the turkey body out of the brown fabric.

making a turkey throw pillow

And then the feathers from the varying fabrics prints. I just laid my feather stencil on the fabrics, traced a few feathers with a pencil and then cut them out. Sorry for the blurry photo, but you get the point, right? 😉

vinyl turkey feather stencil

I decided where I wanted my turkey to be (the center of my pillow cover), then pinned each of the feathers where I wanted them making sure the turkey body covered the points when laid on top. Then I sewed around the edge of each feather.

making a turkey throw pillow

I pinned and sewed around my turkey body next adding a little orange triangle for the beak, a little red for the waddle, and hot glued on two beady eyes.

Now… that was where I stopped last year… but this year when I got it out to decorate I felt like it needed something more. An added touch of cuteness.
So I cut out a little orange bow to make it a cute ‘girl’ turkey and cut a strip of orange leaf fabric for her to ‘rest’ in. 😉 Again, I just used my sewing machine to sew around the edges.

With a good washing the cute feathers now have ‘feathery’ edges.

Thanksgiving pillow

Tell me lovelies? Do you decorate for Thanksgiving?
I only have a few items…but I think it’s fun to decorate for every major holiday.

Linking this here and here and .

P.S. Hope you enjoyed this post! If so, we’d love if !

Halloween No Tricks Just Treats Jar

Happy Halloween Week lovelies!!!

Since Halloween is tomorrow, here’s a quick and easy craft you can whip up this evening!
A No Tricks, Just Treats Jar!
I made mine as a cute place to stash those candies that come unwrapped…
Things like candy corn. FYI – I love candy corn. :)

You only need a few materials for this cute craft!

  • Small jar with a lid (again, I chose one with a lid to store candies that aren’t wrapped)
  • Small sheet of black vinyl or stickers if you don’t have a craft cutter
  • Glow in the dark spider ring
  • Glue gun

 I designed my vinyl using my Silhouette SD software. The font is Chiller, a fun font for Halloween projects!
The spiderweb was a free shape in the software.

I cut my design out using my Silhouette SD, then used transfer paper to apply the teeny tiny lettering and the spider web, an intricate design, to my jar. Sure, you could peel and stick, but with something as small as this, it’s just WAY easier to use transfer paper!
{See all those teeny tiny cutouts for the web!!!}

To add another touch of cuteness/fun I hot glued a spider to the lid of my jar, after applying the web.
I just cut the ring part off the spider then glued it down. {Like I did with these spiders}

Next, fill your cute treat jar with cute treats!!!! 😉

Happy Halloween friends!!!!

Linking this here and here and .

P.S. Hope you enjoyed this post! If so, we’d love if !

Stenciled Welcome Pillow

Hi there lovelies!

Today let’s make a Stenciled Welcome Throw Pillow!

My living room is decorated in a western theme, mostly browns and tans.
I thought a team roping throw pillow would be fun, and it was, but the space was screaming for some more COLOR! Turquoise in fact. :)
{Remember talking about this here…?}

fabric painted throw pillows, western home decor

Materials needed:
Envelope pillow cover – I use this tutorial for all the pillow covers I sew.
Fabric paint or craft paint (the team roper pillow was done with craft paint!)
Stencil – I designed the Welcome and the cowboy boot (purchased through the Silhouette store) on my Silhouette software then cut it out with my Silhouette in vinyl to make my stencil.
Paint Brush

making a stenciled throw pillow

I sew the envelope pillow cover to make the face of the pillow, but stop before sewing up the sides.
This makes it WAY easier to stencil and paint!

Peel and layout your stencil on the face of the pillow.

stenciling a throw pillow

Then fill the stencil in with the fabric/craft paint, very carefully, with the paint brush!
I leave mine to dry at least overnight before sewing up the sides of the envelope pillow cover.

western home decor

Viola! Your very own stenciled throw pillow!
I could make these all day! So fun! :)

stenciled throw pillow

Adds a nice pop of color to my otherwise fairly plain living area, don’t you think??

country home decor

Thanks for crafting with me today lovelies!

Linking this here and here and .

P.S. Hope you enjoyed this post! If so, we’d love if !

Clever Snack Jar

Hey there lovelies!!!
Did you know that one of my favorite crafting supplies is vinyl!

You can add a touch of fun to just about anything with vinyl and a cutting machine or scissors!

For the project that I’m sharing today I decided to fancy up a snack jar to hold snacks at my office.
I thought and thought about a clever saying to use that would be fun but still appropriate enough to show off at work… Finally (with a little help from Kayli) I came up with this!

Funny right!?! At least I thought so… 😉
To make your own clever snack jar you’ll need a jar or other container of your choice.
Some vinyl, I used pink and turquoise for mine. And a cutting machine. I have a Silhouette SD.
If you are really talented you could trace and cut the words with scissors too!
OR even use alphabet stickers to spell out your saying! You know… just throwing a few options out there!

Since I have a Silhouette I designed my saying, “SNACKS! Hey, a Girl’s Gotta Eat!” on the computer then cut it out using my machine.

Then I used a little transfer paper to apply the vinyl onto my jar! Easy, peasy!

The last, but most important step for this craft… Filling your jar with yummy snacks!!

Hopefully yours are more creative than mine!
Maybe something like these dessert bars I made recently… 😉

Happy crafting lovelies!!!

Linking this here and here and .

P.S. We’d love if ! Thanks new friend!!

Pallet Welcome Sign

Today I have a fun DIY/Craft to share with you dolls.

The hubs and I made Pallet Welcome Signs for some friends of ours and I’d love to share the tutorial with you!

First, hubs cut up an old pallet into several similarly sized pieces. We decided three pieces would make a decent sized welcome sign. Next, I cut out some words in vinyl using my Silhouette SD to make some stencils.

I stenciled the words onto the pieces of pallet using the vinyl stencils, a small paint brush and some black acrylic paint.

We let them dry for several hours.

Once they were dry, we took the three stenciled pieces (per sign) and connected them using two Strong-Tie straps purchased from Home Depot, and a few well placed screws.

 You can also see our sign “hanger” in the above photo. The barbed wire was the hubs’ genius idea. Adds to the rustic look, don’t you think?? We simply cut a small piece of barbed wire, bent it to our liking, then screwed each side down on the back of the sign.

So…. What do you think??

Hubs’ was a great help on this one… It would appear he’s got an eye for rustic design. 😉

Have you jumped on the pallet crafting train?? If you have I’d love to see what you made!
Feel free to share a link in the comments!

Linking this here and here and .

Visit thecsiproject.com

Happy crafting lovelies!

P.S. We’d love if ! Thanks new friend!!

Painted Throw Pillow

Hello lovelies!!!

Did you know you can paint fabric?
Don’t laugh all you crafty smarties out there… I just had this revelation recently, so if it’s old news to you…
Don’t judge… haha.

With my new found fabric painting knowledge I made a Painted Throw Pillow Cover for our living room!!!

This tutorial isn’t about sewing an envelope pillow cover, but if you’re really looking for a few instructions this tutorial from Rae Gun’s Ramblings is a really good one.

To make a painted throw pillow I go ahead and hem the top and bottom (for the edges of your envelope) as well as sew the top and bottom of the pillow cover so that you’ll know where the ‘face’ of your pillow will be.

Then I used my handy Silhouette SD to cut a stencil out of some sticky backed vinyl. If you don’t have a craft cutter (Silhouette, Cameo, Cricut), you can always make your stencil using freezer paper and scissors.

I chose some team ropers for my team roping hubby and because our living area is western themed/decorated.
{Stay tuned for a full reveal of our entire made over living room coming soon!}
I centered the stencil on what was to be the face of my pillow cover. Using a soft bristle paint brush and some brown Enamels paint, I carefully filled in my stencil.

I let it dry completely overnight, then went back to the sewing machine and stitched up the sides of my pillow cover.
Note – It’s SO much easier to paint the stencil on before finishing your cover!!!

That’s it! Now you can display your pretty painted throw pillow in your home! 😉

You could do this with any shaped pillow cover, any stencil, and {it would appear} any paint…
If it’s going to be washed often, I would make sure to get fabric specific paint so that it can be washed frequently.

 Happy crafting lovelies!!!

Linking this here and here and .

Visit thecsiproject.com

Etched Glass Drink Set

Remember the I made?? Well I got a little braver and went a little bigger with this one and made an Etched Glass Drink Set for my friend!
*As first seen on The Simple Things. Thanks for letting me share, Angela!

etching glass
Etching glass REALLY isn’t that hard! It just takes a little bit of time and patience…
As well as the RIGHT etching cream!
First off, you’ll need the glass you plan to etch…
For this gift I chose a glass wine pitcher and four glasses. You can etch just about any type of glass though… For example you can to see those candle holders I etched awhile back…
You’ll also need etching cream. I have tried a few different kinds, but the EtchAll etching cream has worked the best for me so far.
Please keep your hands safe by wearing protective gloves and keep your table top safe by laying down at least a layer of newspaper.

You’ll also need the shape or words you plan to etch on the glass. I use sticky backed vinyl cut with my Silhouette SD for my stencils. This time around I cut out my gift receiver’s name for the pitcher, and ‘her’ glass, and some pretty swirly shapes that were included with my Silhouette software.

Glass etching is really as easy as sticking the stencils to the glass, smoothing it down… Then (while wearing gloves) use a small sponge (I used a makeup sponge) to apply* the etching creme inside the area you’d like to be etched… And wait.
*The key is by apply I mean really glob that stuff on there!
(The etching cream does come with directions for how long to wait, etc.)
Finally, you’ll peal the stencil off, rinse in cold water, and viola!
You have pretty, personalized, etched glass.

Just so you know… Sort of a disclaimer…
Etched glass is CRAZY hard to photograph! haha.
You can click the picture to enlarge it and really get a good look if you’d like. :)
Happy etching lovelies!! 

Painted Gift Tins

Today I’m going to share a fun gift ‘wrap’ idea with you!!!

Painted Gift Tins!

My mom received a huge stash of those Christmas cookie, treat tins from a friend awhile back… It was actually her idea to paint the tins and add some vinyl cut outs to fancy them up! (Obviously where we get a lot of our craftiness from, thanks Mom!!!)
We laid them all out on some newspaper outside and spray painted each tin with a couple of coats of paint.
We used a few different colors and let them dry really well…


Once the tins are painted and dry, it’s time to embellish.
I made this small light pink tin into a birthday gift ‘wrap’ for my niece.

I used white vinyl cut out in her name and some flowers plus little acrylic diamonds to pretty it up.
If you use the sticky back vinyl you can stick the cutouts on just like stickers.
The little jewels were attached with hot glue.

If you don’t have sticky backed vinyl, you can just use regular stickers too! 😉
I filled the tin with several little treats tied it with a ribbon and gave it to our niece for her birthday.
She loved having her own little tin she could fill with her treasures!

We have since made several of these for different gifts… You can use any shape or size of tin and decorate with paint, vinyl, stickers, anything you have on hand to fancy it up!

Happy Crafting!!!
Linking this hereherehere and .