Sunflower Peeps Cake

Happy Tuesday friends! It’s Kayli (:

So in the spirit of finally recovering from my Easter Candy hangover, how about a little something to put your leftover Peeps to good use?

This was actually our mom’s idea. She saw it in a magazine and thought it would be cool to try for Easter dinner. But I think it’s cute for Spring in general! Nothing screams Spring like some baby chickens in the form of marshmallows in the shape of a sunflower. Nothing. And in the event you don’t have any Peeps left after the holiday, (no judgment homie- sugar covered marshmallows are good stuff. I feel ya.) Easter is over and the price of candy always seems to go down dramatically once the big day is gone.

So here’s what you’ll need.

A cake mix

Chocolate frosting

A few packages of Peeps

A bag of chocolate chips

I started with a butter yellow cake mix. You can use whatever you want- but keep in mind you’ll need two layers- so the easier it is to handle the better. I stacked and frosted the cake with the chocolate frosting to get the brown for the center of the Peep flower. Then with a little help from my madre I put Peeps, tail out,  around the top edge of the cake.

I probably should have put them more on the top and less on the edge-we ended up having to anchor some of them with toothpicks. Which probably couldn’t hurt anyway… still cute and a little sturdier. But just for future reference. Also, feel free to take a moment and enjoy the Senior Picture wall in the background. Dang we’re cute…. But moving on. (:

Once we had the Peeps on and staked down, we filled the circle in the middle with chocolate chips to give it a little more of a sunflower look. And this is how it turned out!

It was freakin delicious. Just so you know. (:

Happy Eating!

Linking this here and here and .

Holiday Card Swaps

So I know we’re way past the December holidays and in blog world I’m already considered late because I haven’t posted anything on my resolutions or goals for the New Year. 
But guess what? I’m taking my time. 
There. I said it. 😉
I’m checking out the lists of goals everyone else is posting. Combing them for inspiration and in due time, I’ll share mine. But for today, how about some holiday card fun?!
I joined in two handmade holiday card swaps this year. 
The kind where you’re paired up with another blogger and send one another a card in the mail. Just for fun. 
I made my cards with scrapbook paper, a tree and a card shape cut with my Silhouette SD.

The cards I received were lovely!!! 
First off though, can I just say blogging and the relationships I’ve built through blogging are AMAZING!
Here you can see our holiday cards received in 2011. 
Several of those cards are from lovelies that I’ve met through Truly Lovely!!! Again, I am so thankful for this journey and the friends made because of it. :)


The first card swap I joined was on Sugar & Dots/Fingerprints on the Fridge
They paired me up with the lovely Vivian of A Dance for 5

I was so glad to be paired, not only with a fun card swap partner, but a fun blogger with a lovely blog to follow!!! Thanks Vivian!!! 

Next up was the card swap over on FTLOB
I was partnered with Alyx of Everyday is a New Adventure
I also received cards from Bobbi and Vic (admins over at FTLOB). 
Alyx lives in Germany! 
It was so fun to receive a card written in German! 
Thanks to Alyx for her translation!!!

I exchanged cards with a few other bloggie besties including Vic, Ali and Ami
So blessed to have made these amazing friends!!! 
Can’t get over it! haha. 
Here’s to making many more new friends in 2012 and growing the relationships with the lovelies I’m friends with already. 
P.S. Have you entered this AWESOME giveaway yet??

Our first family Christmas party

A few days before Christmas last week we had our local family members over for a Christmas party of sorts. I don’t think I’ve mentioned it before, but my husband’s older brother and his wife bought a home directly behind, catty corner to ours. 
They just moved in over this last month. 
This was our first real, of many I’m sure, get together as neighbors!! 

We had ham and mashed potatoes that my SIL Brianne made and brought over.
I whipped up my friend Meg’s recipe for a yummy chile/corn side dish, and we had for dessert! 
We actually took these post opening presents, thus the reason the presents are shown in the pictures haha.
Guess you know you did well when they don’t want to put them down… 😉
While we were getting dinner finished up the kiddos, (Corryn and Chancey) made some ice cream cone Christmas trees. They decorated their trees with M&Ms after their momma iced them. 

Chancey and his tree. 
Corryn and her tree. 
Once we’d finished eating it was time to open presents!
Chancey got some little trucks and Corryn, a Barbie doll and doll clothes. 

Brianne, Chancey, Corryn (Hubs and BIL in the background)

My FIL and his wife, Tammy. 

Like Uncle like Nephew… 😉

Opening their bigger presents. 
A game for Chancey. 

And a Piggy Scentsy Buddy for Corryn. 

It was really fun to have our first Christmas get together with our nearest family. 
I’m sure they’ll grow through the years, but as our first married Christmas, it was nice to have a small get together and enjoy the ones we love in our new home. 

We spent Christmas Eve and Christmas Day with my parents and family in my hometown. 
For one reason or another I didn’t take any pictures! BAH!!  :) I still have a few things I’ll share about that later as well as how AWESOME the hubs did for his first Christmas as a married man. 😉 

We hope your Christmas was MERRY and BRIGHT and spent with the ones YOU love. 

P.S. We’re looking to schedule some FUN NEW Bloggie Besties!!! Interested??
Leave a comment with your email address or email us at trulylovely.laney @ gmail.com (no spaces). 

Christmas at Kassi’s

So I had mentioned awhile back that I had a post planned to show you the Christmas decor at my house… Let’s just say it’s been tough getting things I HAD to have done, done… much less take good pictures of the decor and what not… haha. It’s just that time of the year!! :)

But here’s a few pictures I did get before the craziness set in…

Our little Christmas tree.
It’s a pre-lit tree with colored lights. My parents got it for me several Christmases ago. 
I love it!
The star was also a gift from my mom. I got the gold tinsel string on sale a few post-Christmases ago for $0.50! 
Thought I needed some gold to match the star. 
The red tree skirt belonged to my mother-in-law. 
It was a perfect addition with its gold glitter!

The angel in the gold dress (on the right) has a twin that belongs to Kayli. :)

The top left ornament is for our first married Christmas (). 
The top right is two little stockings I made for our doggies a few years ago. Just wrote their names in puff paint. 
And the bottom pic is a hand beaded ornament from a sweet lady at work. She has given me one or two every year so far. 

Funny story…. Our four year old nephew found a Cars gift bag and filled it with odds and ends for his “girlfriend’s” Christmas present, then put it under the tree. 
It has a plant holder, some rolley wheels, a State Farm stuffed dog, some fake flowers and a plant food stake in it. 
Hubs said at least he did good with the stuffed dog and fake flowers. 😉

This little tree was my very first Christmas tree when I went off to college.
I had a teeny tiny apartment and it was all I could fit (and afford). I have a set of pink ornaments for it too, but sometimes I interchange the red and chile pepper ornaments (a gift from my Nana) for a different look.  
It even has it’s own string of clear lights. 

The snow globe came from ! :)

You saw the mantel in the post where I shared our , but here it is again. I fancied up those
The little wooden Santa is an advent that you slide the beads from one side to the other to countdown the days until Christmas. I’ve had that since I was a kiddo.
The nativity is a Precious Moments set that I’ve had since I was little as well. 
LOVE IT!!!
FYI – I collect Precious Moments pretties. 😉
The card display that is overflowing with cards! We’ve received several from friends over the last few weeks! I LOVE getting them in the mail and hanging them on our card holder. 

(Don’t mind the filled in nail holes… We have yet to paint in the living room….)
Kayli and our brother’s (Brent’s) girlfriend, Jessie helped me hang multi-colored icicle lights around the top edge of our house outside a few weekends ago. 
Luckily the people that had lived there before had hung lights at some point so there were already nails… We just had to climb the ladder and hang the lights. 😉
There you can also see the I made last year hanging for the first time on our very own front door! :)
Well, that’s pretty much it! 
Thanks for stopping by Kassi’s at Christmas! 😉
We wish you the most AMAZING of holiday seasons! 
And TODAY a Happy Hanukkah!!!

By the way, there won’t be a Fancy This Fridays link up this week, but be sure to come back  next week! 
We’re taking a little holiday vacation through Monday! 
We will be responding to emails and you might see an occasional Facebook/Twitter update… but other than that it’s FAMILY FOCUS time!

I will, however, be back tomorrow to show you our Christmas cards! :) 
Until then have a lovely day dolls!!!


Christmas Ribbon Candles

Hello lovelies!!!
I am really enjoying fancying up these pillar candles for my two candles stands!!!
It’s fun to take something you use year round and adjust it for each holiday/season, don’t you think?!?


You can see my here and my Thanksgiving Candles here. 


For Christmas here’s another (EASY and CHEAP) candle decorating idea!!!
First seen on An Irish Italian Blessing! Thanks Katherine!!!

Christmas Ribbon Candles

Materials needed:

1-2 (or more) pillar candles
Ribbon of your choice 
(You could make these for anytime of year depending on the candles and ribbon you choose, by the way!)
Scissors
Spray Adhesive
Glue gun

Eyeball Carefully measure around your candles, then cut your lengths of ribbon. 
I cut three ribbons for each candle for a total of six ribbons, alternating the colors. 

Spray the adhesive around the inside of the ribbon then attach to your candle, pressing down so it adheres. 

Then to make sure it stays put… 
I just dabbed a little hot glue on the outside end of the ribbon. 

Match your ribbons on both candles if you want a cohesive look. 
If not, you can alternate ribbon placement.
And viola! 😉 
Really, this whole tutorial is a glorified set of instructions for glueing ribbon onto some pillar candles to spice them up! Easy peasy, right?!? Haha. 
We like easy and inexpensive projects here in case you haven’t noticed… 😉

What easy Christmas decorations are you/have you been working on?
Or not so easy… We’d love to hear about those too!
Linking this here and here and .

Make it Merry – Unique Wreaths

Hello lovelies!!!
Hope everyone had a BLESSED and yummy food filled Thanksgiving!!!
Today it is my pleasure to be a participant in Make it Merry!
My topic… Wreaths & Door Swags!
Please be sure to visit the other participants as the festivities roll on! 
You can actually click over to their blogs through this image by the way!


nifty thrifty things the blue velvet chair homework project possessed meridian road modern country style home sweet homemade Jill Ruth & Co. Rustique Art hello lovely inc. Decor to Adore Ladybird Ln


OK, so wreaths… Wreaths are always a HUGE part of the Holiday season!
ANY season really… Especially if you tend to mingle in blog land!
There are a ton of great wreath ideas out there!
But what I would like to share today has to do with the main part of your wreath and making it unique!


You can use just about anything to make a fun and unique wreath! I’ve always been a fan of taking an idea and making it your own, so here are a few unique wreath ideas to get you started!!!


Here at Truly Lovely, I like to use my husband’s old discarded team ropes!


My

--> -->


My


There have been several Christmas ornament and yarn ball wreaths floating around blog land, but here’s one that combines BOTH elements!

Source: via on


OR! How about a wreath made completely from CANDY!!!

Source: rubberstampingdiva.com via on


Got an old picture frame just hanging around??? 😉

Source: via on


Want a unique wreath while recycling at the same time??
Check out this wreath made from reused tin cans!!

Source: ripegreenideas.com via on


Or how about a wreath made from materials purchased at the hardware store!?!
Something like this metal wreath would be fun!

Source: soyouthinkyourecrafty.com via on


You can click on each of the above images to be taken to my Pinterest and then onto their subsequent links. 


I definitely think a FRAME wreath is in my Holiday future!! 
How about you? Any other unique ideas for a fun wreath??? 
Please, share the links in the comments, or do tell! 
I’d love to hear what you come up with!!!


HUGE thanks to Diane of Home Sweet Homeamade for putting this together and inviting me to participate!!!

P.S. The Shabby Apple Dress Giveaway is ! :)

P.P.S. If you’re here to link up Fancy This Fridays is open below!

Fancy This Features #48 and Happy Halloween!!!

Happy Halloween lovelies!!! 
One of my favorite holidays for sure!!!
And the last of our Halloween features from Fancy This Fridays for 2011! 😉

First, from Orange it Lovely, check out this COOL cannibal pumpkin
Have to get more creative like this with mine next year! 😉


Don’t these Jelly Pop Pumpkins from Sew Can Do look yummy!! I bet the homemade version is TONS better than store bought, of course!


How fun is this Spider Web Table Runner from Freakin’ Craft!!! 
You could use her idea for any holiday!! Click over to see what she used!!!


Got a Halloween party to go to TONIGHT? 
You could whip up Shugary Sweets’ fun Halloween Spider Web Pretzel treats in a jiffy! Love the little spiders on top!


And one more… 
If you’re the spooky Halloween decoration type, you’ll love this skeleton display from Alderberry Hill! 


Here’s a featured on Truly Lovely button for you Halloween lovelies!! 
Hope you’ll grab one to share on your own blog! 


There are also a few fun Halloween features in my reader picks post over at Sugar Bee Crafts!
Even one or two that linked up here as well! Fun fun!
Hope you’ll pop over and check those out!

To everyone, 
Happy Halloween from Truly Lovely!!! 

Lovely Christmas Cards from Shutterfly

OK… So I know we’re not even quite past Halloween yet… 
And I LOVE Halloween, I do. 
But we are less than TWO months away from Christmas!
Holy, reality check.
That means there’s lots to do, lots to buy, lots to bake… 
All before Christmas rolls around! 

Our 2010 Christmas Card
On that note… I am SUPER excited about Christmas cards this year!
We ordered our greeting cards from Shutterfly last year, and I LOVED them. 
I used some of our engagement pictures and sent them out to a few family and friends. But this year… It’ll be the first time we can send out cards from The M’s. My new last name!

So naturally, we’ll be ordering our cards from Shutterfly again and there are a few of their Christmas photo cards in particular that are calling my name!

Wouldn’t this one be fun to highlight the name change! 


Or this one would look really nice with a certain wedding picture I have in mind… 


This one would look lovely with a wedding picture and our M inside the wreath!


Oooh! Or this one!!! 


There are so many different holiday cards to choose from at Shutterfly! 
You’re sure to find one that fits your tastes and highlights your reason for the season! :)

And while you’re there check out their fun selection of personalized photo gifts!! 
I just might get some of these lovely initial notepads to send notes to friends and family for the rest of the year!


So what about you?? Are you sending Christmas cards this year?
Or maybe a Christmas newsletter??


P.S. Fancy This Fridays is . 
Or just scroll down to link up your lovelies!!

*I was not monetarily compensated for this post. I did receive a promotional code from Shutterfly for 25 free cards, but all opinions shared here are my own!

Halloween Spider Web Candles

Halloween is now less than a week away!
Here’s a quick, easy Halloween craft for those last minute decorations!! 

Spider Web Candles


I bought two white candles at Wal-Mart. 
Then used my Silhouette SD to cut out two spider webs in black vinyl. 
The spider web is another FREE shape included with the software. 


Carefully stick them onto the candles and smooth all edges. 


Done! Quick and easy! And so cute!


What are you scaring up these last few days before Halloween lovelies?? 

By the way… I am guest posting over here today! 
It’s not my usual crafty post either… This time I’m talking….
MARRIAGE!!! Hope you’ll stop by and say hello!

Linking this here and here and .
P.S. Thanks to Kara for letting me share this here first! :)

Girlie Skull and Crossbones Jack-O-Lantern

Halloween is nearly upon us!!! Only a week and a half away now! 
It’s one of my favorite holidays! The candy, the decorations, the costumes!
Carving pumpkins, though, has to be the ultimate Halloween activity. :)

A couple of years ago… 
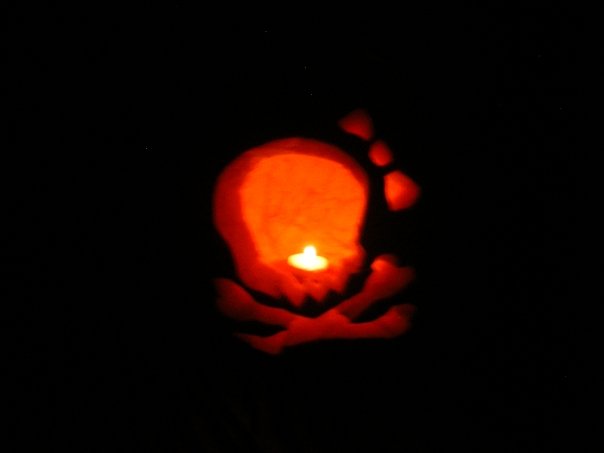
Before this Truly Lovely blog, my college roommate, Charli, and I carved up a lovely pumpkin. A Girlie Skull and Crossbones Jack-o-Lantern, or Jill-o-Lantern as it were, with a hair bow! :)


Isn’t she fabulous!
We found a picture we wanted to imitate online, blew it up on the computer and printed it out. 
Then we traced it with a pencil onto our pumpkin and cut it out. 


Definitely an easy and fun way to get a unique Halloween Jack-O-Lantern!


It’s still one of my favorites from Halloweens past! 
What about you?? Are you carving pumpkins this year?? 
Do you have a favorite method for getting a fun Jack-O-Lantern?

Linking this here and here and .